Monday, March 16, 2015

V200: Lights

Since I already decided that I would rip out the analog insides of this Maerklin 3021 and put a decoder in I did not want to keep the original light package either. I do want to do the model justice and keep the outside appearance as it was manufactured in 1958, thus I'll refrain from drilling out the 3rd headlight which is merely suggested by a bit of silver paint, as much as that offends my prototype instincts.

Light-board Mark I
I built a new light-board from some strip board and DCC-friendly 14V miniature light bulbs. I used some stacked styrene bits and double-sided tape to mount the board inside the locomotive shell, carefully paying attention to leave enough room for the motor assembly right next to it.

Light-board Mk I mounted in the shell
I hooked up my workbench 12V power supply and ... was underwhelmed.


Yes, the lights look ok. In fact they are looking better than with the original light package, but if I'm going through all this trouble might as well choose something with less maintenance burden. I remembered that I still have a pack of 3mm warm-white LEDs in my supply cabinet, and built a light-board with two LEDs arranged in series, protected by a 1.5kOhm resistor. After taking the photo I glued the stack of styrene and double-sided tape to the light-board assembly and mounted it the same way as the first one.

Light-board Mark II
The light looks similar and this was a somewhat pointless exercise after all, but now the old lady has LED lights. Woot.


Time to wire up the lights with the decoder in the chassis and see how well this all works on the layout.

Visitor

"Hey look, there's a Hooded Oriole in our Lemon tree!"


I didn't know the name when I took the photo, but rather thought "that lemon is moving awfully fast"...

Wednesday, March 11, 2015

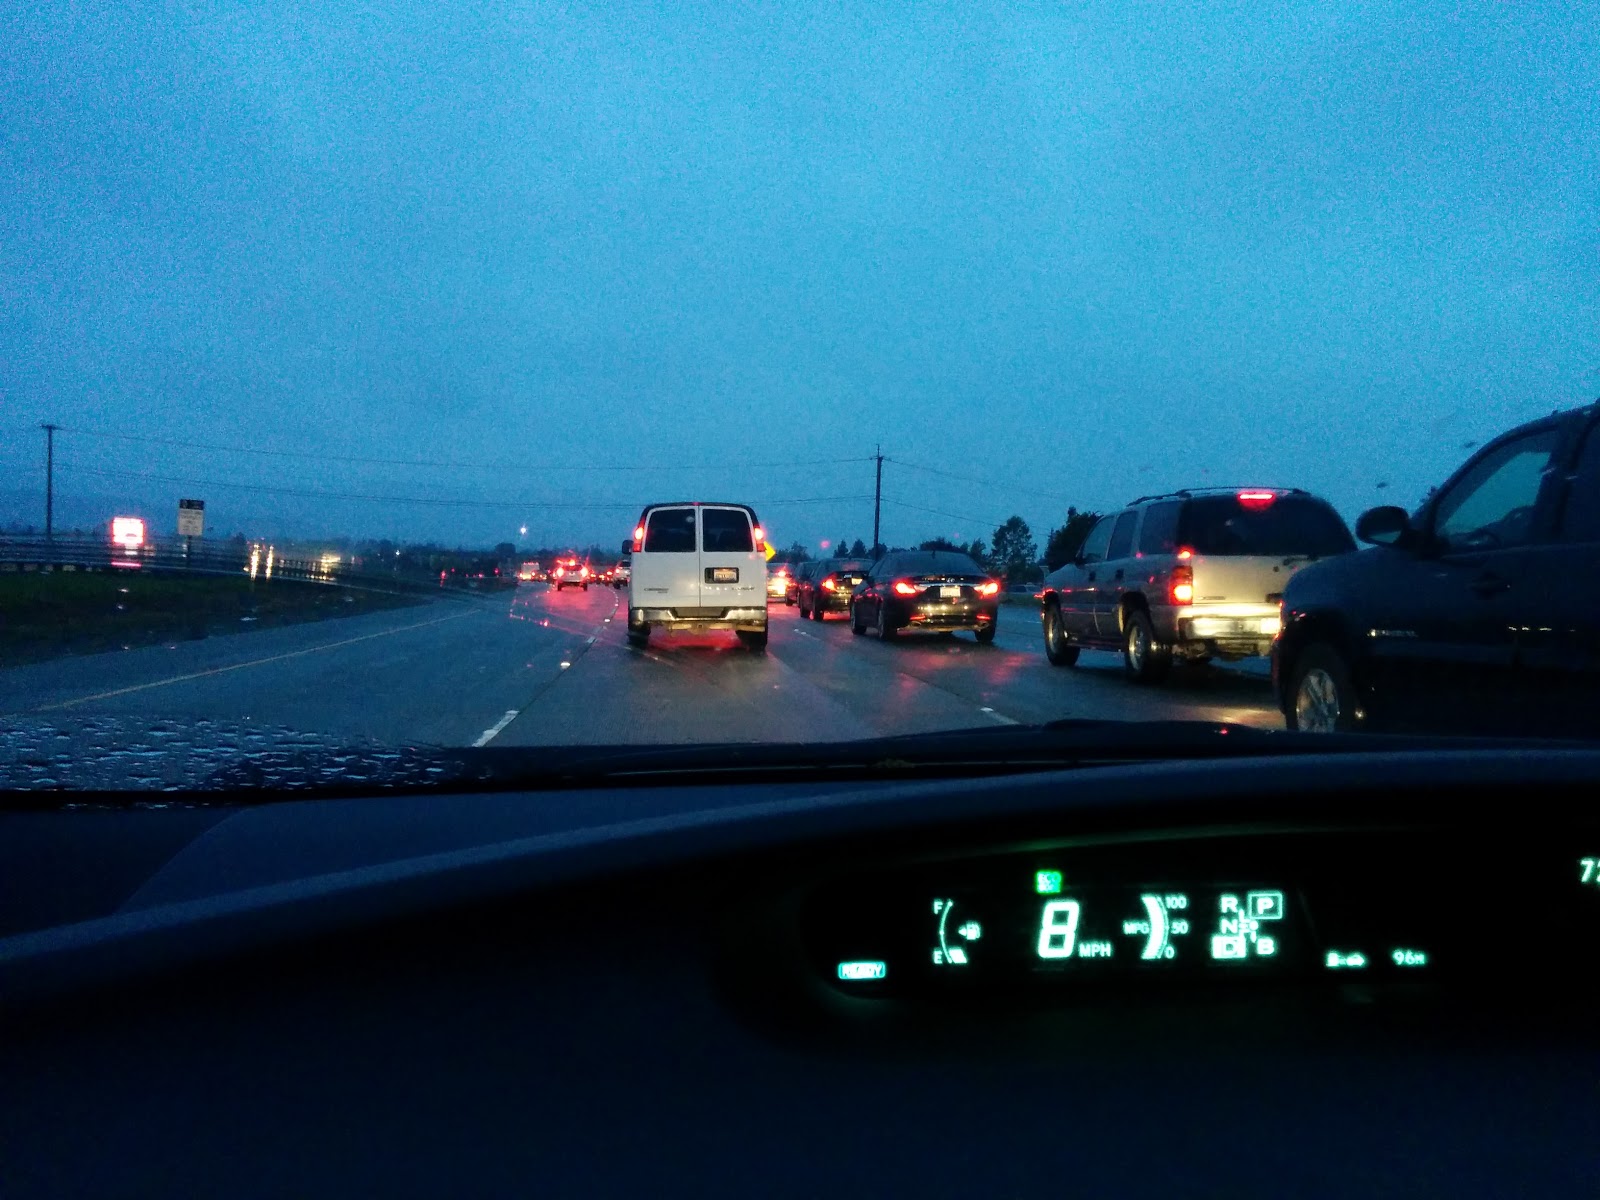
16 miles in 60 minutes


It was raining this morning. I had to drive to the office instead of taking the bus as usual.
It appears people are unable to refrain from having accidents when you drop a cup of water on the road.

Total drive time from south San Jose to Mountain View was over 90 minutes today.

Sunday, March 08, 2015

V200: D E U T S C H E   B U N D E S B A H N


The paint on the V200 Maerklin 3021 is showing signs of its age and eventful life.


This doesn't look particularly good as a close up, but the impression of the locomotive improved dramatically from merely fixing up the lettering on the side. At the moment I'm not planning to do a wholesale repaint of the body of the loco but rather leave most of the scruff marks. After all, it's almost 60 years old. It's allowed to have a few wrinkles.


[Part 1 of this conversion]

Playing with V200


This is Maerklin's 3021 model of V200 006. This model must have been produced around 1958, since Maerklin used the 200 006 number only from the introduction of the model in 1957 to 1959 (see this link for a description of the various model versions).
I've installed an Uhlenbrock 76200 multi-protocol decoder which also has cabling for driving the original Maerklin motors without turning them into a DC motor first as I usually do.


And yes, the old lady is now being tested on the Welztalbahn.

Tuesday, March 03, 2015

Koef II at work

I did some minor detailing, added couplers and put the Koef to work. A transfer run to Talheim was completed successfully. However, the return with only two cars barely made it up the hill. This model simply doesn't have enough traction to pull more than two cars on a 2% grade. That's ok. It's intended to perform switching duties in Emsingen only. As expected, the Koef II also does not forgive dirty rails, but performs significantly better than I expected. I might spring for a LokPilot Micro 4.0 with Powerpack if switching with this little loco is as much fun as I'm hoping for.

To finish off the conversion series of BRAWA's 0458 Koef II, here are some shots of the Koef working in Emsingen.

Koef II switching cars in Emsingen
I'm pleased to confirm that the Koef II and the work crane fit on the turntable together.
[Previous installments of the Koef II conversion: Part 1, Part 2, Part 3]

Sunday, March 01, 2015

BRAWA 0458: Digitized

[This is part 3 of my Koef II digital conversion. Part 2 is here.]
Test-program the decoder
I used an ESU Lokpilot 3.0 as the decoder for the Koef. When closing the roof I noticed that the decoder just barely doesn't fit. The LokPilot Micro version would actually fit under the roof as designed. I squeezed the decoder into the cab for now. Wires be damned.

To finish off the evening, here's a short video of the Koef in Talheim.


[Read the last installment of the series here]

BRAWA 0458: Roof Off!

[This is part 2 of my Koef II digital conversion. Part 1 is here.]


The roof is off!
Instead of a screwdriver, I used a wooden clothes pin to push hard against one edge of the Koef roof and it just popped off. No damage to the roof or the body of the locomotive.


The cab housed a shrink-wrapped assembly to make the loco work with Maerklin-style AC power, and includes two capacitors wired in series to provide some extra juice for dead spots.


View into the cab with the connector leads to motor and pickups.

Read on in part 3.

Maytag MDB6701AWS dishwasher standing water in the tub

A "fun" way to spend a Sunday afternoon is figuring out why our Maytag dish washer has standing water in the tub after a completed cycle and also doesn't quite clean as well as it used to. I cleaned the floater which felt gooey and didn't really float up and down as easily as you would expect. Didn't make a difference.

The troubleshooting instructions for "standing water in tub" suggest to check the drain for food remnants. I pulled out the dishwasher from under the counter and checked the drain hose. No apparent blockage, but I noticed that it took 10s of seconds after the pump came on until the water started to flow stronger than a trickle. I figured there must be something blocking water flow inside the dishwasher...

There was, and I learned a few things:
  • When your lovely wife says, "The dish washer needs a thorough cleaning", do the cleaning. It'll save you pain like an overflowing dish washer tub later.
  • It is not necessary to pull the dish washer out from under the counter top in order to clean the filter and sieve.
  • Contrary to earlier dishwashers we had, this Maytag model (MDB6701AWS) supposedly doesn't need manual cleaning of the sieves and filters. Of course, that's not actually true, it just takes longer until it is necessary.
  • The mechanism to shred, filter and sieve food inside this dish washer is quite involved, yet fascinating.

I didn't take photos when it was dirty, but I took a couple after I had everything back together. This is the inside of the dish washer. As you can see there are no obviously serviceable parts. The floater is the round thing on the right-hand side.


I first removed the 4 screws circled in red to take off the sprayer arm and loosen the filter cover. Then unscrewed the 6 screws under the arm on the inside ring. I circled 4 of those screws in green, there are two more under the sprayer arm. The middle part now comes off fairly easily revealing a black disc, which is actually part of the pump mechanism. There is a small screw on top of the disc. Unscrew that, and put the disc aside. Finally, there are two more screws holding the filter/sieve assembly in place. Take those out, too. With some gentle convincing the cover and the filter/sieve assembly can be taken out of the dish washer. Underneath you will find the blade that hacks food into tiny parts to be washed down the drain.

In our case, the inside of the filter/sieve assembly was completely gummed up with food remnants. This part can not be opened. However, a little bit patience and using a shower head provided sufficient pressure to loosen the gunk through the sieve and wash it out. While everything was out, I cleaned the other parts, as well as the drain inside the dish washer.

Finally, I put it all back together. Apparently I didn't break anything in the process. Our dish washer seems to be working fine again. We're running an empty cycle right now to wash out any remaining gunk. So far, so good.

Friday, February 27, 2015

Working in the mountains


Train #216 crosses Small Creek at Mount Nichols on its way from Nowheres Yard to Bakersfield during today's Silicon Valley Lines Operations session.

Yes, I like taking photos at Mount Nichols. Big Creek bridge is just to the left of this photo.

Precipitation


Snowfall is in the forecast for today. We're leaving and heading back to the Bay Area with some snow flakes in the air.

High-quality food for hungry travelers

Thursday, February 26, 2015

Winter Water

Eagle Lake


Eagle Creek

Wednesday, February 25, 2015

No snow, but ...

Lunch at Ten22 in Old Sacramento. That Calzone was quite good.
View from US50 south. Not much snow, sadly.
In exchange, we saw two bears rummaging through the garbage at the house next to our cabin


Monday, February 23, 2015

Flooring: Finale


Grainy photo, but it's the only one I have with the room not quite moved in yet. Either way, the occupant is visibly happy.

Here's a timelapse video of me installing the flooring.


Monday, February 16, 2015

Passengers


The people have to go somewhere. Since the BRAWA cars still need their interior lights installed, I changed my mind and put the first batch of people into the Schienenbus (Maerklin 39987).

That presented two problems:
  • First, I couldn't remove the Schienenbus shell. Hmmm, ... sensing a pattern here.
  • Second, I have no sitting train driver ("Lokfuehrer") figures that would be appropriate for a diesel powered rail car.
Trailer car with shell removed
After some research, it turns out removing the shell is quite easy:
The floor of the trailer is merely squeezed into the shell and can be taken out with careful wiggling back and forth.
The motor car is a slight bit more involved, since the shell is made from metal and doesn't flex as easily as the trailer car. There are depressions near the axles along the edge of the floor. Insert a screw driver in the depressions and carefully pry the floor from the shell.

In either case, seats and interior lighting are mounted on the floor and populating them with the usual foot and leg amputations on the passengers was accomplished reasonably quickly. I found that after a dozen figures or so I got the hang of it and became quite fast. That's also when I reached the end of the passenger supply.

Seated passengers held in place with Blue-Tac
For the Lokfuehrer I ended up repainting a passenger with a more official looking uniform jacket in the one case, and a grey sweater in the other case.

The control stand pops out from the shell and makes it easy to fit the Lokfuehrer in his chair.
Trailer car put back together
The other Lokfuehrer.
While at it, I followed a photo of a real 798 control stand to paint controls and give the impression there's more than just a blue injection-molded piece of plastic.


Wait ... Two Lokfuehrer? ... Yep. Since the Schienenbus is operating both forward and backwards during operating sessions, I want a driver at a front of the train, which requires that I install two drivers. Let's blissfully ignore the fact that one of them will look out of the rear window... 

Sunday, February 15, 2015

BRAWA 0485 Koef II 323 874-8


I have a weakness for the diminutive Koef II locomotives. Wikipedia has some nice background on them.

This specific BRAWA model of a modernized Koef II has been in its box for many years. I took it out tonight to measure the inside of the cab for dimensions of a decoder I could put in there. While I failed doing that because I couldn't get the roof off as the instructions say, I used the opportunity and took some photos.


The model has no head or tail lights. Warm-white LEDs in a tiny form-factor were not yet a thing back in the 80's when I got this model as a Christmas present. The cab is filled with a comparatively bulky relais required for changing direction on Maerklin tracks.


I do remember that it wasn't a great runner due to its stiff axle arrangement and short wheel base.


The loco is so short that the Maerklin-typical pick-up shoe barely fits under the locomotive.

Koef II arrives in Talheim with a transfer
Update March 1st, 2015:
I figured out how to get the roof off.

Fun with electronics


Pascal has been building various electronics circuits lately. This one was the most colorful so far. It combines various styles of blinking LED circuits.

The board with the LEDs under a water glass

Putting a water glass over the blinking LEDs creates some very cool effects.


Saturday, February 14, 2015

Flooring: Hallway Done


It's only February, but the holiday entertainment project is still going strong. At least we threw out our Christmas tree two weeks ago already... 

The dreaded bathroom transition
Fitting in the last board under the door jambs to the bath room was ... worthy of colorful language. So many angles to worry about and nothing wanted to fit together. The transition piece doesn't quite reach to the level of the bathroom tile floor by about 1/8th inch. Otherwise, I'm quite happy with how this part came out in the end.

Stair nose
The dreaded stair nose transition wasn't quite as awful as I feared. I cut the last row of boards at the top of the stairs only twice.

I should have spaced the screws evenly across the stair nose. Yeah, you can't tell that the gap between screws 1 and 2 matches the gap between screw 3 and 4. Your eye is offended by the fact that the center gap is smaller than the gaps to the left and right. This bugs me, but I'll redo it only if I can't get the (still missing) carpet transition properly attached.

One bed room left to do.

Thursday, February 12, 2015

The President is coming to town

The radio is full with reports that President Obama is coming to the Bay Area, and will be landing at SFO in a few minutes. Normally, he's landing at Moffett Field in Mountain View.

I wonder what kind of problems Air Force One landing at SFO would create ...


Looks like they are holding all incoming commercial flights for at least 30 minutes. Hmmmm, ...


Oh yeah! Look at all those planes circling above the Central Valley, ... and above Point Reyes, ... and above the Monterey Bay.

There's a heavy flight landing at Oakland right now (the popup doesn't show in the screen shoot: it's a FedEx MD11 from Memphis), and the lined up incoming flights to San Jose at the south end of Silicon Valley are easy to see, too.