Saturday, March 22, 2014

Colorado Railroad Museum: bits and pieces


Rio Grande F9s
The last service of these F9 units was pulling the Denver Ski Train for a couple years in the early 1980's after they retired from the last non-Amtrak long-distance passenger service in the US.


Speeders
An REA cart used for storage behind the roundhouse
Men at work signs behind the roundhouse

D&RGW narrow gauge stock car

End of the line.


Friday, March 21, 2014

DEN airport art


I'm not quite sure what this is supposed to be, but it reminded me of a certain Fry's store in San Jose.

Colorado Railroad Museum: 12 and 14


Shays are common on narrow gauge lines in the west. I just like the odd appearance and features of those locomotives with the offset boiler, side-pistons and gears.


Wednesday, March 19, 2014

Colorado Railroad Museum: RPO


CB&Q 254 is a combined baggage / railway post office car. There is no connection between the post-office half of the car, and the baggage section.


The California State Railroad Museum in Sacramento has a full-length, streamlined Great Northern RPO car on exhibit which has been restored very nicely. However, I really liked how the CRM put together the sorting scene in this car.

"No excuses will be accepted..."

Tuesday, March 18, 2014

Colorado Railroad Museum: Gooses


The Colorado Railroad Museum has 3 of the 7 "Galloping Gooses" that the Rio Grande Southern (RGS) railroad converted from buses and cars in the early 1900's to make their operations more efficient and cost-effective.


The gooses got their name from the "waddling" appearance when they rode over the  badly maintained tracks...

In the last few years before the line was abandoned the RGS ran tourist trips up into the mountains.

A snowy morning


It's been awhile that I've actually seen real snow fall. Even though this wasn't a big deal by Denver standards, I had a blast...

An hour later the ground looked like this:

Everything was gone by afternoon, and the next day we had beautiful spring weather again.

Monday, March 17, 2014

Colorado Railroad Museum: 318

Narrow-gauge locomotive #318 was built in 1896 by Baldwin and served on the Rio Grande narrow gauge lines.
I went to the Colorado Railroad Museum in Golden, CO this morning. They have an extensive collection of rolling stock and naturally quite a bit of it is narrow gauge. The photos below are details of locomotive #318.

Don't even think about it ...

Springs above one of the drivers
Pumps

One of my favorites

Sunday, March 16, 2014

Cab view trip on the Welztalbahn


Select the full-screen option to watch in HD.

Friday, March 14, 2014

Going home

On US50 going home.

Thursday, March 13, 2014

Breakfast

After a fulfilling breakfast at Sprouts Cafe in South Lake Tahoe ...
... I drove out to enjoy the views at Emerald Bay.

Wednesday, March 12, 2014

On the way to Tahoe

Half-way stop at The Firehouse Restaurant

Re-fueling almost complete
 

Yes, there is snow on the mountains, but it's not really that much.

cab car


The office railroad has obtained push-pull equipment.


Western Maryland power with Chicago Metra cars... The engine was there first.

Saturday, March 08, 2014

Trees and Bushes

I worked in the backyard most of the day today. Since there wasn't much wind late afternoon, I decided this is a good opportunity to try and make some bushes and low trees to practice for making actual trees.

I'm using Scenic Express' Super Trees as armature and basically follow Joe Fugate's scenery clinic for making deciduous trees.


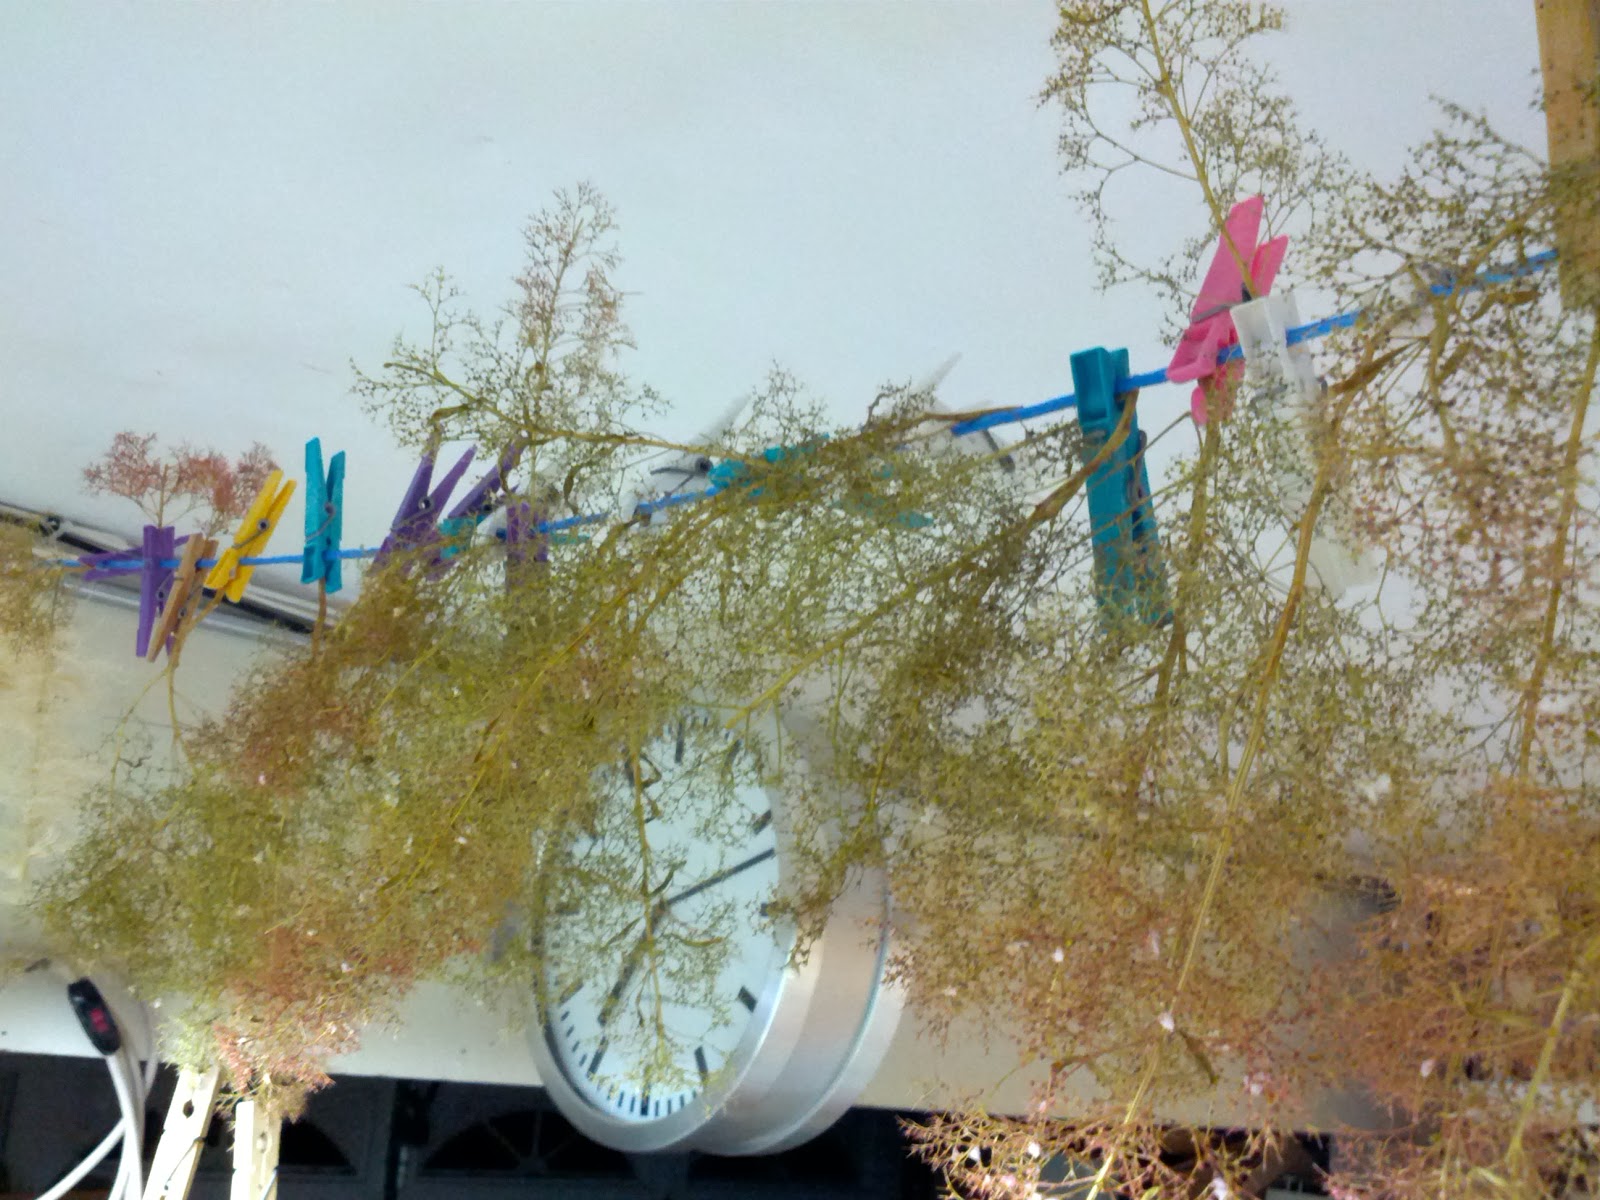
A couple weeks ago, I pulled some Super Trees out of the box and sorted them into "big trees" and "the rest". After bathing the Super Trees in thinned matte medium (didn't seem to make much of a difference, and I'll likely skip this step the next time), I hung the big trees under the ceiling to dry, and left the bushes and small trees in aluminum tubs. Once they were dry I planted the small trees and bushes into styrofoam sheets. I should have planted them into styrofoam right away, getting them out of the tub unharmed was a bit ... tricky.

Today I took the styrofoam sheets outside and made trees.


Spray the trunks in a light brown, followed by a light smattering of flat black to create some shadows. Then spray glue on 2-3 armatures at a time, and sprinkle medium-green coarse foam on the "tree". Repeat until the tree looks good. I tried to create fairly dense foliage since these trees will be close to the wall at the rear of the layout. Finally, I sprayed the trees with light shots of ColorMaster Basil green spray paint to give the tree foliage a pleasing color and add variation in the green. I finished off the trees with extra-strong hairspray to lock the foam in place.

Using this method it is shockingly easy to produce nice looking trees.


Look for yourself.


Sunday, March 02, 2014

Using Youtube Live Streaming to broadcast an Ops Session


Today's Ops session was available for viewing live on Youtube using Hangouts on Air. The embedded video above is the recording of the session. I haven't edited the recording all, so the first 90+ minutes are me and Balazs chatting, while the microphone was muted. I need to use a different (web) camera. Should do the recording in HD.

Since I haven't operated a full schedule on the layout for a couple months, and rather built scenery instead, there were various issues both mechanical and with the computer control, thus the action in the recording is limited ...

Nevertheless, it was an interesting experiment and I might do this again some other time.

Saturday, February 22, 2014

Welztalbahn Panorama

We took panoramic shots at Silicon Valley Lines today, and I used the opportunity of having a 8mm fish eye lens and a panoramic head in the house to do the same at the Welztalbahn.


This is the panoramic view from the Emsingen operator position. I made the panorama from 4 individual shots taken in exactly 90 degrees offsets, and processed them with Hugin on Linux.

Here is the full-size version of this picture.

Sunday, February 16, 2014

Saturday, February 15, 2014

Colors and Weeds

I started writing this blog over 8 years ago. This is post number 701. Congrats to me. Yay!

Here's how I made the scene below...


In my last post, I had photos of the unpainted rock, but didn't describe how I made them. I used a mixture of Fine Vermiculite and plaster (roughly in a ratio of 5 to 4) to cover the extruded foam pieces underneath. This stuff is similar to Woodland Scenic's "Mold-A-Scene plaster". The mixture has a working time of roughly 10 minutes so I make it in small batches. I use a spatula to smear it wherever it needs to go. First in fairly broad strokes to apply the whole batch, and then I go back and smooth out where necessary (e.g. along the hill), or make it more lumpy where I want rocks.
As the mixture hardened I carved out bits with a putty knife to create the weathered look of an older rock face. This creates a fairly soft looking rock, which is exactly what I needed here. The result can be seen on the right.

At this time of year in the garage it takes several days for the mix to dry.
If I wanted sharp rock edges, I either wait for the mixture to dry completely and then start carving, or make the rock from Hydrocal in molds.

Next, I painted the rock face next to the railroad crossing. ...

Well, actually you can tell from the photos that I got impatient and didn't want to wait for everything to dry before I work my way down along the wall, so I finished up most of the grass and left a gap near the rock face to finish later.

... I'm using cheap acrylics from Craftsmart for all my scenery painting needs. "Golden Brown" and a bit of "Espresso" is my earth color. For rocks like in this picture I use plenty of "White", a bit of "Black", and a tad of "Golden Brown" to break the stark gray and get some variation of shades.
I just take a bit of the colors on the brush and mix them as I paint. If the color doesn't look right, or doesn't quite match nearby areas, I might go back to the palette and take a bit more brown, or white to shift the effect in the right direction. Sometimes I take a very little bit of black, too. The point is to mix the wet colors in place and allow slight variations of color shades.

Acrylics dry quickly, so it's important to work fast. This method works quite well for me, since it forces me to keep moving forward and not fret over getting the perfect look. Amazingly enough it looks just fine with only a little bit of effort. This rock face took only a few minutes to paint, after which it looked like in the photo below. When the color has dried a bit I go back and dry brush a very light gray over the edges of the rock to create some highlights.


Now I needed to blend in the rock face with the surrounding scenery. The brown area on the right is pretty steep so I carefully brushed matte medium on the brown areas and sprinkled in fine turf to give the grass more body in the next step. Next, I carefully soaked the turf in 70% isopropyl alcohol as a wetting agent,  applied more matte medium, and used the Grassinator to apply a mixture of short and long grass fibers. In this case I used Noch medium green 6mm fibers, mixed with spring green and summer green 2mm fibers from Scenic Express, just like what I did for the grass nearby.

I applied full strength Elmer's White Glue everywhere I wanted bushes and weeds to grow. I'm using various shades of Woodland Scenics coarse foam, mostly light green, medium green, and olive, as well as lots of Scenic Express "Spring Green Super Turf". The larger Super Turf bits make nice small bushes and are excellent for overgrown weeds. I shaped the bushes to follow the edge of the hill, trying to imagine where the house owner would cut them back from above. Finally, I added another piece of fence to separate the garden from the path down to the tracks, and was pretty much done.

Here's another perspective.


"Path to the tracks?" you say? Yes, it's not there yet, but will discuss this in another post.

Monday, February 10, 2014

Working on scenery again

Plaster is still wet
Now that he gap at the railroad crossing is closed, work has started on scenery north of Emsingen on a 3 inch wide strip between the track and the wall towards Welzbruecke and Hochwald. This will tie the northern edge of Emsingen to the already scenicked area of Hochwald.

This is a fairly diverse section involving a backyard garden, the edge of a small apple orchard, unkept gras areas, a walking path, deciduous trees, bushes, a small creek with waterfall, and transition to the existing trees of Hochwald.


I tried to facilitate hiding the edge of the town module by not making it a straight line

Bushes will cover the gap along the rock cut. There is a bit of masking tape to keep the wet plaster mix away from the respective section on the town module

Saturday, February 08, 2014

Emsingen Impressions

Emsingen station in the foreground. The historic town of Emsingen can be seen in behind the station.

Dog and cat make for good amusement.

"Fresh bananas!" -- "I'd like to try this liquor, please."

"Hurry up!"

Sunday, February 02, 2014

Railroad Crossing Emsingen

Today I dropped the town of Emsingen back into the layout. I wrapped up the detailing I had planned so far, and also was itching to do something else than work on the town.

I decided to finish the scene to the north of town next. On the far side of the track this involves completing the orchard and the backyard garden behind the two village houses on the edge of town, and completing the scenery behind the Welzbridge all the way to Hochwald. On the near side I need to build the railroad crossing the scenery on top of Tiersteintunnel, as well as detailing the road out of town.

I started on the far side with filling in the gap between town and the existing scenery. I need to build this in a way that the town module continues to be removable, so I need to be very careful with glue along the edge...


I built the land form from pink foam and styrofoam pieces I had lying around from earlier projects. I tried to hide the rather steep drop from the town module to the track as much as I could. It's still a bit steep, but doesn't look quite as horrible as I feared.
In an ideal world this crossing will be protected with operational crossing arms. However, this might not work out since it will be difficult to mount a motor underneath, both because that area is hard to reach, and there are tracks and switch machines in the way. Due to the edge of the town module I have very little wiggle room.


I was dreading building the actual road crossing until I realized that it shouldn't be a total mess if I built the road from styrene. Getting exact shapes of the tracks passing through the road was surprisingly easy. Lay a piece of paper over the tracks and trace the contours of the rails with the side of a pencil. The paper templates turned out very accurate and fit perfectly on the first try.

In the coming days I will cut the styrene shapes for the crossing and find a solution for the inside of the tracks. Maerklin's center studs make this an interesting problem.

Saturday, February 01, 2014

Cirque Du Soleil: Amaluna


We saw Cirque Du Soleil: Amaluna today. 
Great show. Great artistics. Good music, too. Recommended. 

Thursday, January 30, 2014

Finally

Rain. Finally some rain. It won't be much or be enough, but it was so nice to  walk out into it this morning.