The BR211 from Roco is a very nice runner. It runs fairly quietly, with only a slight wirring sound. Nowhere as loud as the Maerklin BR86, but not as quiet as the Maerklin BR24, which is practically silent.
BR211 completed its run-in routine over the last two evenings. Now it's time for detailing and some minor reprogramming (I want to be able to turn off the red rear lights from the throttle, since they are only supposed to be on when the engine is running light). I'll use that opportunity to save the decoder values into JMRI, and adjust the locomotive address.

Thursday, May 26, 2011

Staging 2 tracks affect current draw sensor
Last night I was running a few locomotives and notices that there's lots of LocoNet traffic. LocoNet monitor reveals that the sensor measuring current draw in the staging departure block was continously flipping on and off.
After installing Staging 2 all three tracks were part of that block. I didn't really worry about train detection when I temporarily installed Staging 2. Bad idea...
Either way, apparently there's some resistance between the rails in Staging 2. I'll have to check for that when I install the track there permanently. Meanwhile, I insulated Staging 2 from the departure block, and now the sensor is behaving properly again.
After installing Staging 2 all three tracks were part of that block. I didn't really worry about train detection when I temporarily installed Staging 2. Bad idea...
Either way, apparently there's some resistance between the rails in Staging 2. I'll have to check for that when I install the track there permanently. Meanwhile, I insulated Staging 2 from the departure block, and now the sensor is behaving properly again.
Sunday, May 22, 2011
Emsingen Panel close to working
The LocoNet problems I had with the SRC16 are now resolved (Thank you, thank you, Bill Robinson!) Adding a DS64 on the LocoNet bus apparently provided enough signal stability that the SRC16 can work properly with the Intellibox.
I moved on to programming the local panel and it's respective routes before putting the decoder back into the layout. So ... much ... fun!
I'll post some pictures once everything is installed.
Update 05/24/2011:
The Emsingen panel and SRC16 are working correctly in place now. Routes work as advertised. For some routes the SRC16 needs to throw switches that are connected only to the track bus. The Intellibox translates the Switch commands sent to LocoNet from the SRC16 into DCC commands sent via the DCC accessory bus and executed by a Tam Valley Depot servo decoder.
Next up:
Temporarily put Staging 2 in place, track cleaning, some loco maintenance, and a shake out Ops session to determine work items for the next 2-3 weeks.
I moved on to programming the local panel and it's respective routes before putting the decoder back into the layout. So ... much ... fun!
I'll post some pictures once everything is installed.
Update 05/24/2011:
The Emsingen panel and SRC16 are working correctly in place now. Routes work as advertised. For some routes the SRC16 needs to throw switches that are connected only to the track bus. The Intellibox translates the Switch commands sent to LocoNet from the SRC16 into DCC commands sent via the DCC accessory bus and executed by a Tam Valley Depot servo decoder.
Next up:
Temporarily put Staging 2 in place, track cleaning, some loco maintenance, and a shake out Ops session to determine work items for the next 2-3 weeks.
Monday, May 16, 2011
Reshuffling, part 1
I'm probably trying to do too much, but whatever...
Some of the supplies and tools cabinets are in the way of Staging 2. And I wanted to rearrange that area for a while now, make it more narrow to actually allow for a second chair, so the cabinets have to move. And the computer (oh, finding a new place for that is a lot harder than I thought).
And I wanted to finally hook up the blue "night light", and build a box into the wall so that freight cars can actually enter the factory hall at Werner & Soehne.
And I wanted to gain more storage for various kits and building material that's currently stored under the layout. So I started putting some of the computer supplies from the big garage cabinet into a box, only to realize that *that* cabinet is apparently too humid. Various USB connectors had rust on them, and spray cans where rusty at the bottom. Hmmmm. I should have grabbed that shelf/cabinet combo my neighbors gave away for free last weekend, and chop it down so that it fits along the train room...
I got the shelf for Staging 2 installed, since that defines how much space I have for the shelves and boxes. I opened up the wall, after moving all the wood and styrofoam out of the way that's stored on the other side, and ran wiring for the blue light, and built the box in the wall for Werner & Soehne.
Oh, and yesterday I finished painting the upstairs hallway, the stairs and a couple somewhat inaccessible walls above the entrance area. Took me only 3 1/2 years after our move-in date to get to that.
That reminds me... A little over 3 years ago, I started construction of what is now the train room. Progress has been slow, but steady, even though at times there's been very little happening for months at a time.
 |
| Too much stuff. |
And I wanted to finally hook up the blue "night light", and build a box into the wall so that freight cars can actually enter the factory hall at Werner & Soehne.
 |
| New switch to get into Staging 2 |
I got the shelf for Staging 2 installed, since that defines how much space I have for the shelves and boxes. I opened up the wall, after moving all the wood and styrofoam out of the way that's stored on the other side, and ran wiring for the blue light, and built the box in the wall for Werner & Soehne.
 |
| Shelving Rearranged |
That reminds me... A little over 3 years ago, I started construction of what is now the train room. Progress has been slow, but steady, even though at times there's been very little happening for months at a time.
Friday, May 13, 2011
In other news
Some long outstanding orders are finally starting to come in.
- A Roco BR211 diesel engine that will go very nicely with passenger trains for local service, along with the Maerklin BR24, and the (still to be digitized) Schienenbus.
- All remaining hardware to digitize the Schienenbus.
- Another DS64 and a couple more Tortoises.
- The engine shed for Emsingen will complete the set of buildings for the small servicing facility I'm planning, and allow me to proceed with the overall arrangement of tracks and buildings there.
- Bullfrog Snot liquid traction tires to get better traction for BR24. I haven't used this before, but I hope it will address the slipping issues experienced by this otherwise very nice model.
- The first city houses for the town of Emsingen. This will be a combination of existing kits from the old layout, a few new kits, some low-relief models, and potentially a partial photo background for more depth.
Uhlenbrock Intellibox + Team Digital SRC16 powered from track = Smoke
I love the SRC16. It's a very powerful and flexible stationary DCC decoder with 16 independent inputs and the ability to drive up to 16 slow motion switch machines like the Circuitron Tortoise (when using the MotoD board, otherwise it's 8 Tortoises). I use a single SRC16 for the control panel in Emsingen, and all slow-motion switch machines at that station.
I mentioned before that I had trouble getting my Team Digital SRC16 to say a peep on LocoNet. After quite a bit of back and forth with Team Digital's support, and breaking a second SRC16 at least now I know what the problem is.
LocoNet Ground of the Uhlenbrock Intellibox is not referenced to track ground (contrary to e.g. a Digitrax system). So when you power the SRC16 from track power, and plug in LocoNet, you most certainly fry a little resistor near the LocoNet plugs. Afterwards the SRC16 still works just fine, but lost it's ability to talk to LocoNet, no matter what CVs are set.
The suggested work-around is simple:
Don't use track power, use a 12V DC wallwart. I'll try to bench-test this soon. I'm looking forward to being able to continue with work in Emsingen.
Team Digital was nice enough to repair the two fried units.
Update 05/25/2011:
The bench-test worked out great .
I mentioned before that I had trouble getting my Team Digital SRC16 to say a peep on LocoNet. After quite a bit of back and forth with Team Digital's support, and breaking a second SRC16 at least now I know what the problem is.
LocoNet Ground of the Uhlenbrock Intellibox is not referenced to track ground (contrary to e.g. a Digitrax system). So when you power the SRC16 from track power, and plug in LocoNet, you most certainly fry a little resistor near the LocoNet plugs. Afterwards the SRC16 still works just fine, but lost it's ability to talk to LocoNet, no matter what CVs are set.
The suggested work-around is simple:
Don't use track power, use a 12V DC wallwart. I'll try to bench-test this soon. I'm looking forward to being able to continue with work in Emsingen.
Team Digital was nice enough to repair the two fried units.
Update 05/25/2011:
The bench-test worked out great .
Wednesday, May 11, 2011
Skype
Only days after announcing a security vulnerability in the Mac Client, Skype gets purchased by Microsoft for $8.5B. Apparently Windows is so secure now, that the Microsoft security folks needed a new challenge.
Monday, May 09, 2011
More staging
More staging? Don't I have enough staging tracks already? Well, yeah, kinda.
I have 4 staging tracks at the moment, 170-200cm in length. That is a lot longer than my longest passing tracks which is 120cm in Emsingen, so when I operate I often end up doubling up two of the shorter trains in the longer staging tracks. ... And then the schedule asks for the rear train to show up first. There are ways around that (e.g. shuffling trains to another staging track, or releasing the first train to the ramp, and then use the down ramp track to bring the second train up... yes, there are a lot of switches in staging...) but those operations are not fun to do, and the risk of derailments is high. I call the existing staging yard Staging 1.
Additionally, as I digitize more locomotives, I need more space for active trains.
To provide more storage capacity and expand staging capacity, I decided to stick a few more staging tracks below Moebelfabrik Kopper along one wall of the room. The shelf for Staging 2 is not yet built, so I tested the track arrangement by simply laying out the tracks on top of the future of home of Moebelfabrik Kopper.

Here are the constraints for Staging 2:
I have 4 staging tracks at the moment, 170-200cm in length. That is a lot longer than my longest passing tracks which is 120cm in Emsingen, so when I operate I often end up doubling up two of the shorter trains in the longer staging tracks. ... And then the schedule asks for the rear train to show up first. There are ways around that (e.g. shuffling trains to another staging track, or releasing the first train to the ramp, and then use the down ramp track to bring the second train up... yes, there are a lot of switches in staging...) but those operations are not fun to do, and the risk of derailments is high. I call the existing staging yard Staging 1.
Additionally, as I digitize more locomotives, I need more space for active trains.
To provide more storage capacity and expand staging capacity, I decided to stick a few more staging tracks below Moebelfabrik Kopper along one wall of the room. The shelf for Staging 2 is not yet built, so I tested the track arrangement by simply laying out the tracks on top of the future of home of Moebelfabrik Kopper.

Here are the constraints for Staging 2:
- stub-ended staging (due to space and location)
- 3-4 tracks (I'm not going to buy any additional M-Track for Staging 2)
- accessible
- enter/exit Staging 2 from the departure track of Staging 1 (use the cross-over on the ramp to get from the down ramp track to the departure track and the switch to Staging 2
- no manual handling of locomotives between arrival and departure at Staging 2
I was able to cut an additional switch for accessing Staging 2 in the existing trackage behind the last switch of Staging 1 without modifying the existing geometry of the departure track. Originally I planned a trapezoid switch arrangement for Staging 2 giving me 120 cm usable length for each staging track. Due to how the departure track curves and underground supports, I gave up on that approach and ended up with above arrangement. I'm mostly using M-track switches from my Dad's layout. Each staging track will have a usable length of 130cm. The switch ladder made from double-slip switches allows locomotives to move around the train.
The rear track is 77cm between switches, the middle track 90cm, and the front track 117cm. This is sufficient for most passenger locals I'm plannung to run. The full 130cm are available for longer trains, but those need more involved maneuvers to swap the locomotive to the other end of the train. A stub track can be attached to the last switch in the lower right of the picture. That track will stick through the door and will need to be removable. It might be possible to build a removable return loop from that last switch out into the garage and conecting to the middle track through a hole in the wall.
There is a short stub track off the switches on the layout side to arrange for locomotive changes without running around the cars of an arrived train.
Sunday, May 08, 2011
Ridiculous
A recent article in the California HSR Blog talks about the security implications of potential terrorist attacks on high-speed rail infrastructure.
Of course, as one response TSA-style passenger screenings (also known as "security theater") are being floated by the folks that own that hammer.
Robert Cruickshank's discussion of the topic in the blog entry is worth reading, as he presents a very level-headed and fact-based response to such suggestions.
My take on this is, that rail systems by their nature are very large, and the tracks are easily accessible. For the determined, it's trivial and quite a bit more effective to attack trains without being inside, so to me the idea to increase train security by screening the passengers is simply ridiculous.
Maybe that's because, like Robert suggests, because I'm used to european trains as an effective, well integrated transportation mode. Contrary to Robert I don't think Europeans are "taking their chances" using public transit. Instead the mode of transportation is a choice that everyone makes when they leave the relative safety of their house. Every year a lot more people die from car accidents than terrorist attacks...
Of course, as one response TSA-style passenger screenings (also known as "security theater") are being floated by the folks that own that hammer.
Robert Cruickshank's discussion of the topic in the blog entry is worth reading, as he presents a very level-headed and fact-based response to such suggestions.
My take on this is, that rail systems by their nature are very large, and the tracks are easily accessible. For the determined, it's trivial and quite a bit more effective to attack trains without being inside, so to me the idea to increase train security by screening the passengers is simply ridiculous.
Maybe that's because, like Robert suggests, because I'm used to european trains as an effective, well integrated transportation mode. Contrary to Robert I don't think Europeans are "taking their chances" using public transit. Instead the mode of transportation is a choice that everyone makes when they leave the relative safety of their house. Every year a lot more people die from car accidents than terrorist attacks...
Friday, April 29, 2011
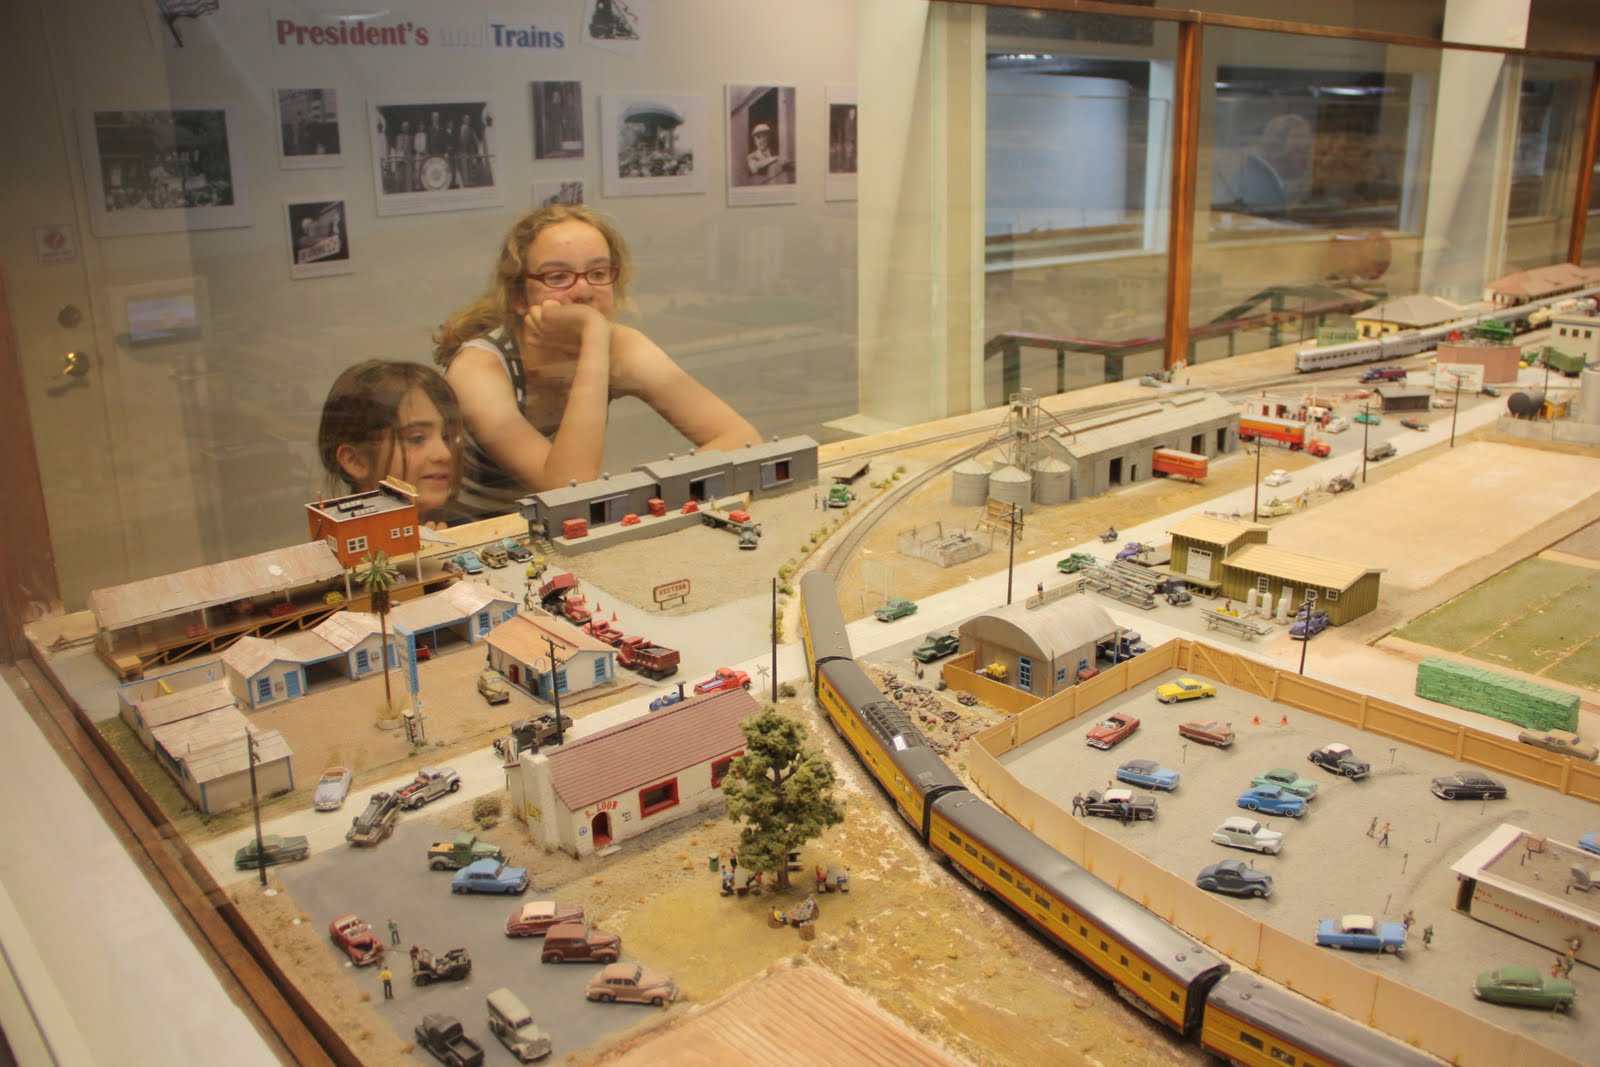
San Diego Model Railroad Museum - a mixed experience
We went to visit the San Diego Model Railroad Museum today. It was a very mixed experience. Beforehand I took a look at their Web site, and learned that they have over 2700 sqm of floor space making it one of the biggest model railroad museums in the world. Now that's cool.
Once we got there two things irritated me right away:
The O-Scale "Cabrillo Southwestern" didn't really excite me that much. The layout lighting was terrible, and it was hard to see details in the back of the rectangular layout room, since the visitor aisle runs only along one of the long edges of the rectangle. Looking at construction methods and track layout it appears this layout has been around for quite a while (though the Website claims it was designed in 1986 ... Well that's still 25 years :-) The layout did remind me about how big O-Scale really is. Thus, the hefty rolling stock had some serious "oompf" to it.
 A large part of the HO-Scale "San Diego & Arizona Eastern", especially near the museum entrance, is still visibly under construction. This layout attempts a quite correct depiction of actual rail lines around San Diego to the East and South into Mexico. This is one of the biggest layouts in the museum space-wise, and was quite interesting to view. The area depicting San Diego looks very interesting to operate on. The "desert side" with El Cajon has some impressive deep canyons and trestles , though the scenery is very sparse. This layout "burns" a lot of space on the mountains, canyons, and the descent into El Cajon. It does look more or less accurate and true to the prototype. Unfortunately for the museum visitor, the prototype is a lot of single-track main line. The layout is manually controlled, and doesn't appear to have any automation, so while we were visiting two friendly guys were running trains over the mountains. ... For some reason pretty much all major trains on the layout were at or en-route to El Cajon. So there was a major traffic jam getting trains out from El Cajon and back on the San Diego side of the layout. Somewhat interesting for the operators. Terrible for the visitor. This layout has a lot of potential, though...
 The N-Scale "Pacific Desert Lines" was cute to look at. The visitor aisle side of the layout is painted like a passenger railcar and the viewing windows are the windows of the car. Neat. The layout is large and very deep (6+ meters). Given it's N-scale, it's hard to see anything interesting that's more than 2-3 meters away from the visitor aisle. I saw a single train moving on this layout. Disappointing.
The kids had a blast in the "Toy Train gallery" which is a relatively small room with 3 gentlemen running Lionel trains on 3-rail track. The layout is stuffed with tracks all over and there's a lot going on, so a very welcome diversion from the mostly static displays we saw with the other layouts.
 Hands-down the most impressive layout at the museum is the "Tehachapi Pass" HO layout. The scenery in combination with the painted backdrop is superb, and the layout is actually arranged to be viewer friendly. There are no windows to peek through, no back at the wall features like on most of the other layouts. Just the SP/BNSF Tehachapi mainline climbing through the mountains up to the pass. Operationally, again this is not particularly interesting to watch, and not many trains where running, but the presentation and level of detail make up for it. I particularly liked the scene at Bealville, which has a very nice, old-timey atmosphere. Even though this layout is controlled digitally, trains are run over the line by an operator, one at a time, so there wasn't a lot going on here either.
Was it worth going? I don't know. Definitely more interesting than some other attractions at Balboa park, but my expectations were certainly higher than the delivery. I came for the layouts, so I didn't pay much attention to the wall display cases, with exception of the one that had items from John Allen's Gorre & Daphetid layout, including paper machee models of the layout.
Due to the impossible photography conditions, I didn't take many pictures. However, I got some video footage and will upload to Youtube if it's usable.
Once we got there two things irritated me right away:
- Most of the layouts are behind glass, which makes photography incredibly difficult, if not impossible.
- There's a lot of layout space still under construction.
- Very few trains were moving.
- Most of the layouts are not really set up to be viewed from the visitor aisle.
- Getting to see (some of) the layouts without having to peek through glass
- Have a chat with the people actually building this thing
The O-Scale "Cabrillo Southwestern" didn't really excite me that much. The layout lighting was terrible, and it was hard to see details in the back of the rectangular layout room, since the visitor aisle runs only along one of the long edges of the rectangle. Looking at construction methods and track layout it appears this layout has been around for quite a while (though the Website claims it was designed in 1986 ... Well that's still 25 years :-) The layout did remind me about how big O-Scale really is. Thus, the hefty rolling stock had some serious "oompf" to it.
 The N-Scale "Pacific Desert Lines" was cute to look at. The visitor aisle side of the layout is painted like a passenger railcar and the viewing windows are the windows of the car. Neat. The layout is large and very deep (6+ meters). Given it's N-scale, it's hard to see anything interesting that's more than 2-3 meters away from the visitor aisle. I saw a single train moving on this layout. Disappointing.
The kids had a blast in the "Toy Train gallery" which is a relatively small room with 3 gentlemen running Lionel trains on 3-rail track. The layout is stuffed with tracks all over and there's a lot going on, so a very welcome diversion from the mostly static displays we saw with the other layouts.

Was it worth going? I don't know. Definitely more interesting than some other attractions at Balboa park, but my expectations were certainly higher than the delivery. I came for the layouts, so I didn't pay much attention to the wall display cases, with exception of the one that had items from John Allen's Gorre & Daphetid layout, including paper machee models of the layout.
Due to the impossible photography conditions, I didn't take many pictures. However, I got some video footage and will upload to Youtube if it's usable.
Sunday, April 10, 2011
Progress?
Yep, there's been very little progress on the layout lately. Work kept me busy, and the weekends are chock-full with non-modelling activities.
I did manage to build a new panel for Emsingen that should be more straight-forward to use than the old one. Now, if only I could convince the SRC16 decoder to actually talk to LocoNet, so that the push-button actions actually show up as switch commands to the command station... Team Digital's support is very responsive, but we haven't gotten to the bottom of this yet.
Out of frustration dealing with electronics the last few evenings I worked on the layout, tonight I added a platform edge to Emsingen's track 2, as well as built the styrofoam core for tracks 1, and 1a. Styrofoam is a messy material to use for this, but it's what I had on hand for track 2, so I used it for track 1 as well.
The access hatch under the Emsingen station building is starting to become tight. This was always meant for emergencies only, but turned out to be convenient when I have visitors so I can get out of the way, as well as for working on the engine servicing facility.
I'm pretty sure I'll build the town of Emsingen off-layout, once I have a basic support frame in place, since that corner is harder to reach than I expected.
I did manage to build a new panel for Emsingen that should be more straight-forward to use than the old one. Now, if only I could convince the SRC16 decoder to actually talk to LocoNet, so that the push-button actions actually show up as switch commands to the command station... Team Digital's support is very responsive, but we haven't gotten to the bottom of this yet.
Out of frustration dealing with electronics the last few evenings I worked on the layout, tonight I added a platform edge to Emsingen's track 2, as well as built the styrofoam core for tracks 1, and 1a. Styrofoam is a messy material to use for this, but it's what I had on hand for track 2, so I used it for track 1 as well.
The access hatch under the Emsingen station building is starting to become tight. This was always meant for emergencies only, but turned out to be convenient when I have visitors so I can get out of the way, as well as for working on the engine servicing facility.
I'm pretty sure I'll build the town of Emsingen off-layout, once I have a basic support frame in place, since that corner is harder to reach than I expected.
Saturday, April 02, 2011
This is tiresome and makes me annoying
Taxes for 2010 are done, and e-filed. Just like last year the return keeps getting more complicated. One stumbling block took me a while a figure out, but in the end was really easy ...
Once you make your way through the various broker statements and 1099 forms, and reconcile what they talk about with what TurboTax offers.
Overall, I was quite a bit more annoyed about filing taxes this year than last year.
Once you make your way through the various broker statements and 1099 forms, and reconcile what they talk about with what TurboTax offers.
Overall, I was quite a bit more annoyed about filing taxes this year than last year.
Thursday, March 24, 2011
Thirty Inches of Snow
The buzz in the Boston office for the last couple days was that there will be snow. It's certainly cold enough, but every morning I woke up, there was no snow.
Until today:

A whopping thirty linear inches of snow, right next to the side walk.
Update (03/24/2011):
Tonight there was a very light snow shower. It was nice walking back to the hotel with some white fluffy stuff twirling around, though it was over after a few minutes, and no snow on the ground. Everyone here is longing for spring and was amused by my excitement about a few flakes of snow.
Until today:

A whopping thirty linear inches of snow, right next to the side walk.
Update (03/24/2011):
Tonight there was a very light snow shower. It was nice walking back to the hotel with some white fluffy stuff twirling around, though it was over after a few minutes, and no snow on the ground. Everyone here is longing for spring and was amused by my excitement about a few flakes of snow.
Monday, March 21, 2011
Rain and sun at the airport
My flight is delayed. There's some heavy rain around SFO. Though, it looks nice through the airport windows.

Boston will be a lot colder than San Francisco...
Update:
Boston _is_ colder.
Update:
Za Restaurant has an execellent Mac'N'Cheese pizza, that I improved further with bacon per recommendation from the waitress. Very good. Very rich. Nice crust.
Sunday, March 20, 2011
Second Operating Session on the Welztalbahn
Well, this was a disaster.
I wasn't prepared. Emsingen wasn't ready. JMRI Logix played tricks on me. And there were power problems.
When I installed the yard in Emsingen, I apparently forgot to connect one of the tracks to power. That was easily fixed, once noticed (thanks, Balasz), but it was a bit annoying nethertheless. What was worse, though, was that my spiffy new JMRI panel for Emsingen is over-engineered, has bugs in the routing logix, and only works on the control computer. The over-engineering makes the panel harder to use than necessary. The logix bug causes an endless series of switch commands to be sent to one switch, renders JMRI unresponsive, and apparently managed to burn out the affected output on one of my DS64 stationary decoders.
Finally, the whole reason I created that panel was so that I can drive it via the Web interface from an Android G1 smart phone. The catch? Sensor button pushes, which were meant as the primary means to drive the panel are not recognized via the Web interface.
We spent quite a bit of time debugging car routing in the Operations part of JMRI. Waaaay too much time for routing 30 cars around. "How did that car get here, and why is it not moving?", was a fairly common sigh.
There were also issues with power pickup in some underground sections, especially in the curves leading to and from the ramp. Staging needs some thorough clean-up and track polishing. At least once the PSX circuit breakers were too sensitive and cut power for what should have been a momentary blip.
I have a lot of work to do...
I wasn't prepared. Emsingen wasn't ready. JMRI Logix played tricks on me. And there were power problems.
When I installed the yard in Emsingen, I apparently forgot to connect one of the tracks to power. That was easily fixed, once noticed (thanks, Balasz), but it was a bit annoying nethertheless. What was worse, though, was that my spiffy new JMRI panel for Emsingen is over-engineered, has bugs in the routing logix, and only works on the control computer. The over-engineering makes the panel harder to use than necessary. The logix bug causes an endless series of switch commands to be sent to one switch, renders JMRI unresponsive, and apparently managed to burn out the affected output on one of my DS64 stationary decoders.
Finally, the whole reason I created that panel was so that I can drive it via the Web interface from an Android G1 smart phone. The catch? Sensor button pushes, which were meant as the primary means to drive the panel are not recognized via the Web interface.
We spent quite a bit of time debugging car routing in the Operations part of JMRI. Waaaay too much time for routing 30 cars around. "How did that car get here, and why is it not moving?", was a fairly common sigh.
There were also issues with power pickup in some underground sections, especially in the curves leading to and from the ramp. Staging needs some thorough clean-up and track polishing. At least once the PSX circuit breakers were too sensitive and cut power for what should have been a momentary blip.
I have a lot of work to do...
Thursday, March 17, 2011
Success!
It took me only 3 evenings in elapsed time, but the dryer belt is replaced thanks to Appliance Parts on Blossom Hill, judicious study of Internet how-to articles (which appear to be more or less just copies of each other), and good old observation.
Our dryer flat out stopped spinning the drum. After a few Google searches it was likely that the dryer belt was bad, and that was confirmed when I found the old belt under the dryer. I didn't realize at first, but dryers are really just boxes of sheet metal held together with little plastic clips and a few screws. When you know where to pull a dryer quickly comes apart. The mechanics are super simple, too: A motor, a pulley, a belt around the drum. Once you figure out in what sequence to install the parts, and where to thread the belt (belt around drum, put pulley in place, loop belt through pulley, then around motor axle), with help holding the drum in place, this was really just a 15 minute job start to finish.
I guess most of the $100 I saved by doing this myself pay for the knowledge of doing this efficiently.
Our dryer flat out stopped spinning the drum. After a few Google searches it was likely that the dryer belt was bad, and that was confirmed when I found the old belt under the dryer. I didn't realize at first, but dryers are really just boxes of sheet metal held together with little plastic clips and a few screws. When you know where to pull a dryer quickly comes apart. The mechanics are super simple, too: A motor, a pulley, a belt around the drum. Once you figure out in what sequence to install the parts, and where to thread the belt (belt around drum, put pulley in place, loop belt through pulley, then around motor axle), with help holding the drum in place, this was really just a 15 minute job start to finish.
I guess most of the $100 I saved by doing this myself pay for the knowledge of doing this efficiently.
Laughing Baby
What the hell is so funny about this video? I don't really know. I don't know the poster, nor the baby.
At the surface it's like any of the other million laughing baby videos on Youtube.
Yet, I still can't stop laughing any time I watch this video. The faces this baby makes, ... His reaction to the blowing-nose noises, ... It just cracks me up.
Sunday, March 13, 2011
That didn't work
I had this idea to use a spare Android G1 as a portable panel for Emsingen (at least until I'd built a physical panel near the station). I made a panel for Emsingen in JMRI and decked it all out with logix and routes. On the screen I could emulate the prototype practice of pressing a source and a target button and switches would be lined for the route between the two buttons.
Well, it didn't work out that way, mainly because the panel as presented by JMRI's mini-Webserver doesn't harmonize with Android's Web browser, so any clicks on Android result in a refresh of the panel image, but no actual button press being recorded on my JMRI IS buttons.
Next I experimented with the sand cover of the platform in Emsingen. Neither deco-sand, nor regular sand I had available worked out. The deco sand is way too shiny, and glittery. The platform looked like a Danish butter cookie. Regular sand is not sufficiently homogeneous and fine. I think I need some very fine powdery sand for this to come out right. Maybe Arizona Rock and Minerals Co. has a color and grain size that works in their product catalog ...
Well, it didn't work out that way, mainly because the panel as presented by JMRI's mini-Webserver doesn't harmonize with Android's Web browser, so any clicks on Android result in a refresh of the panel image, but no actual button press being recorded on my JMRI IS buttons.
Next I experimented with the sand cover of the platform in Emsingen. Neither deco-sand, nor regular sand I had available worked out. The deco sand is way too shiny, and glittery. The platform looked like a Danish butter cookie. Regular sand is not sufficiently homogeneous and fine. I think I need some very fine powdery sand for this to come out right. Maybe Arizona Rock and Minerals Co. has a color and grain size that works in their product catalog ...
Finally a useful explanation of what's happening at Fukushima
This blog entry explains very clearly and precisely how reactors like Fukushima-1 function and what can and can not happen during events that lead to possible meltdowns. I very much like the comparison in the comments of nuclear meltdowns to heart-attacks. They are all bad, but not every heart attack will kill you.
Friday, March 04, 2011
"Gar kein Problem"
My flight back to the US is this coming Monday. I have a Lufthansa ticket, and will arrive by train at Frankfurt airport at 12:38 (Lufthansa 353). My connecting flight is Lufthansa 9052 (i.e. United 901), leaving at 14:00. The departure time is really convenient since I don't need to hurry Monday morning, or get up at some awful early-morning hour.
I just called Lufthansa reservations to confirm whether 72 minutes is enough time to get off the train, check luggage, pass through security, and get to the departure gate. "Ja das geht, ist gar kein Problem", said the nice lady at the other end.
ok, then, if this is no problem, I won't worry about it.
I just called Lufthansa reservations to confirm whether 72 minutes is enough time to get off the train, check luggage, pass through security, and get to the departure gate. "Ja das geht, ist gar kein Problem", said the nice lady at the other end.
ok, then, if this is no problem, I won't worry about it.
Subscribe to:
Posts (Atom)