Showing posts with label rsd5. Show all posts

Saturday, March 13, 2021

RSD5: On the layout


My two RSD-5 lettered for Silicon Valley Lines numbers 1665 and 1667 moved to the layout tonight. After unpacking I couldn't resist taking them for a short trip from Hallelujah to Bayshore and back. Here's the pair rounding the curve at the Bayshore shops. As I was running the train I noticed that I forgot to clean the wheels after weathering, so power pickup was ... variable. 


On the way back to Hallelujah I caught the train at the bridge in Escape. The first batch of decaled and weathered two-bay hoppers looks very nice as the wheels are pounding the bridge decks.


Tuesday, January 12, 2021

RSD5: Weathering

The two Atlas RSD5 in Silicon Valley Lines livery are now ready and will move to the club for final testing when the county Stay-At-Home health orders have been lifted.

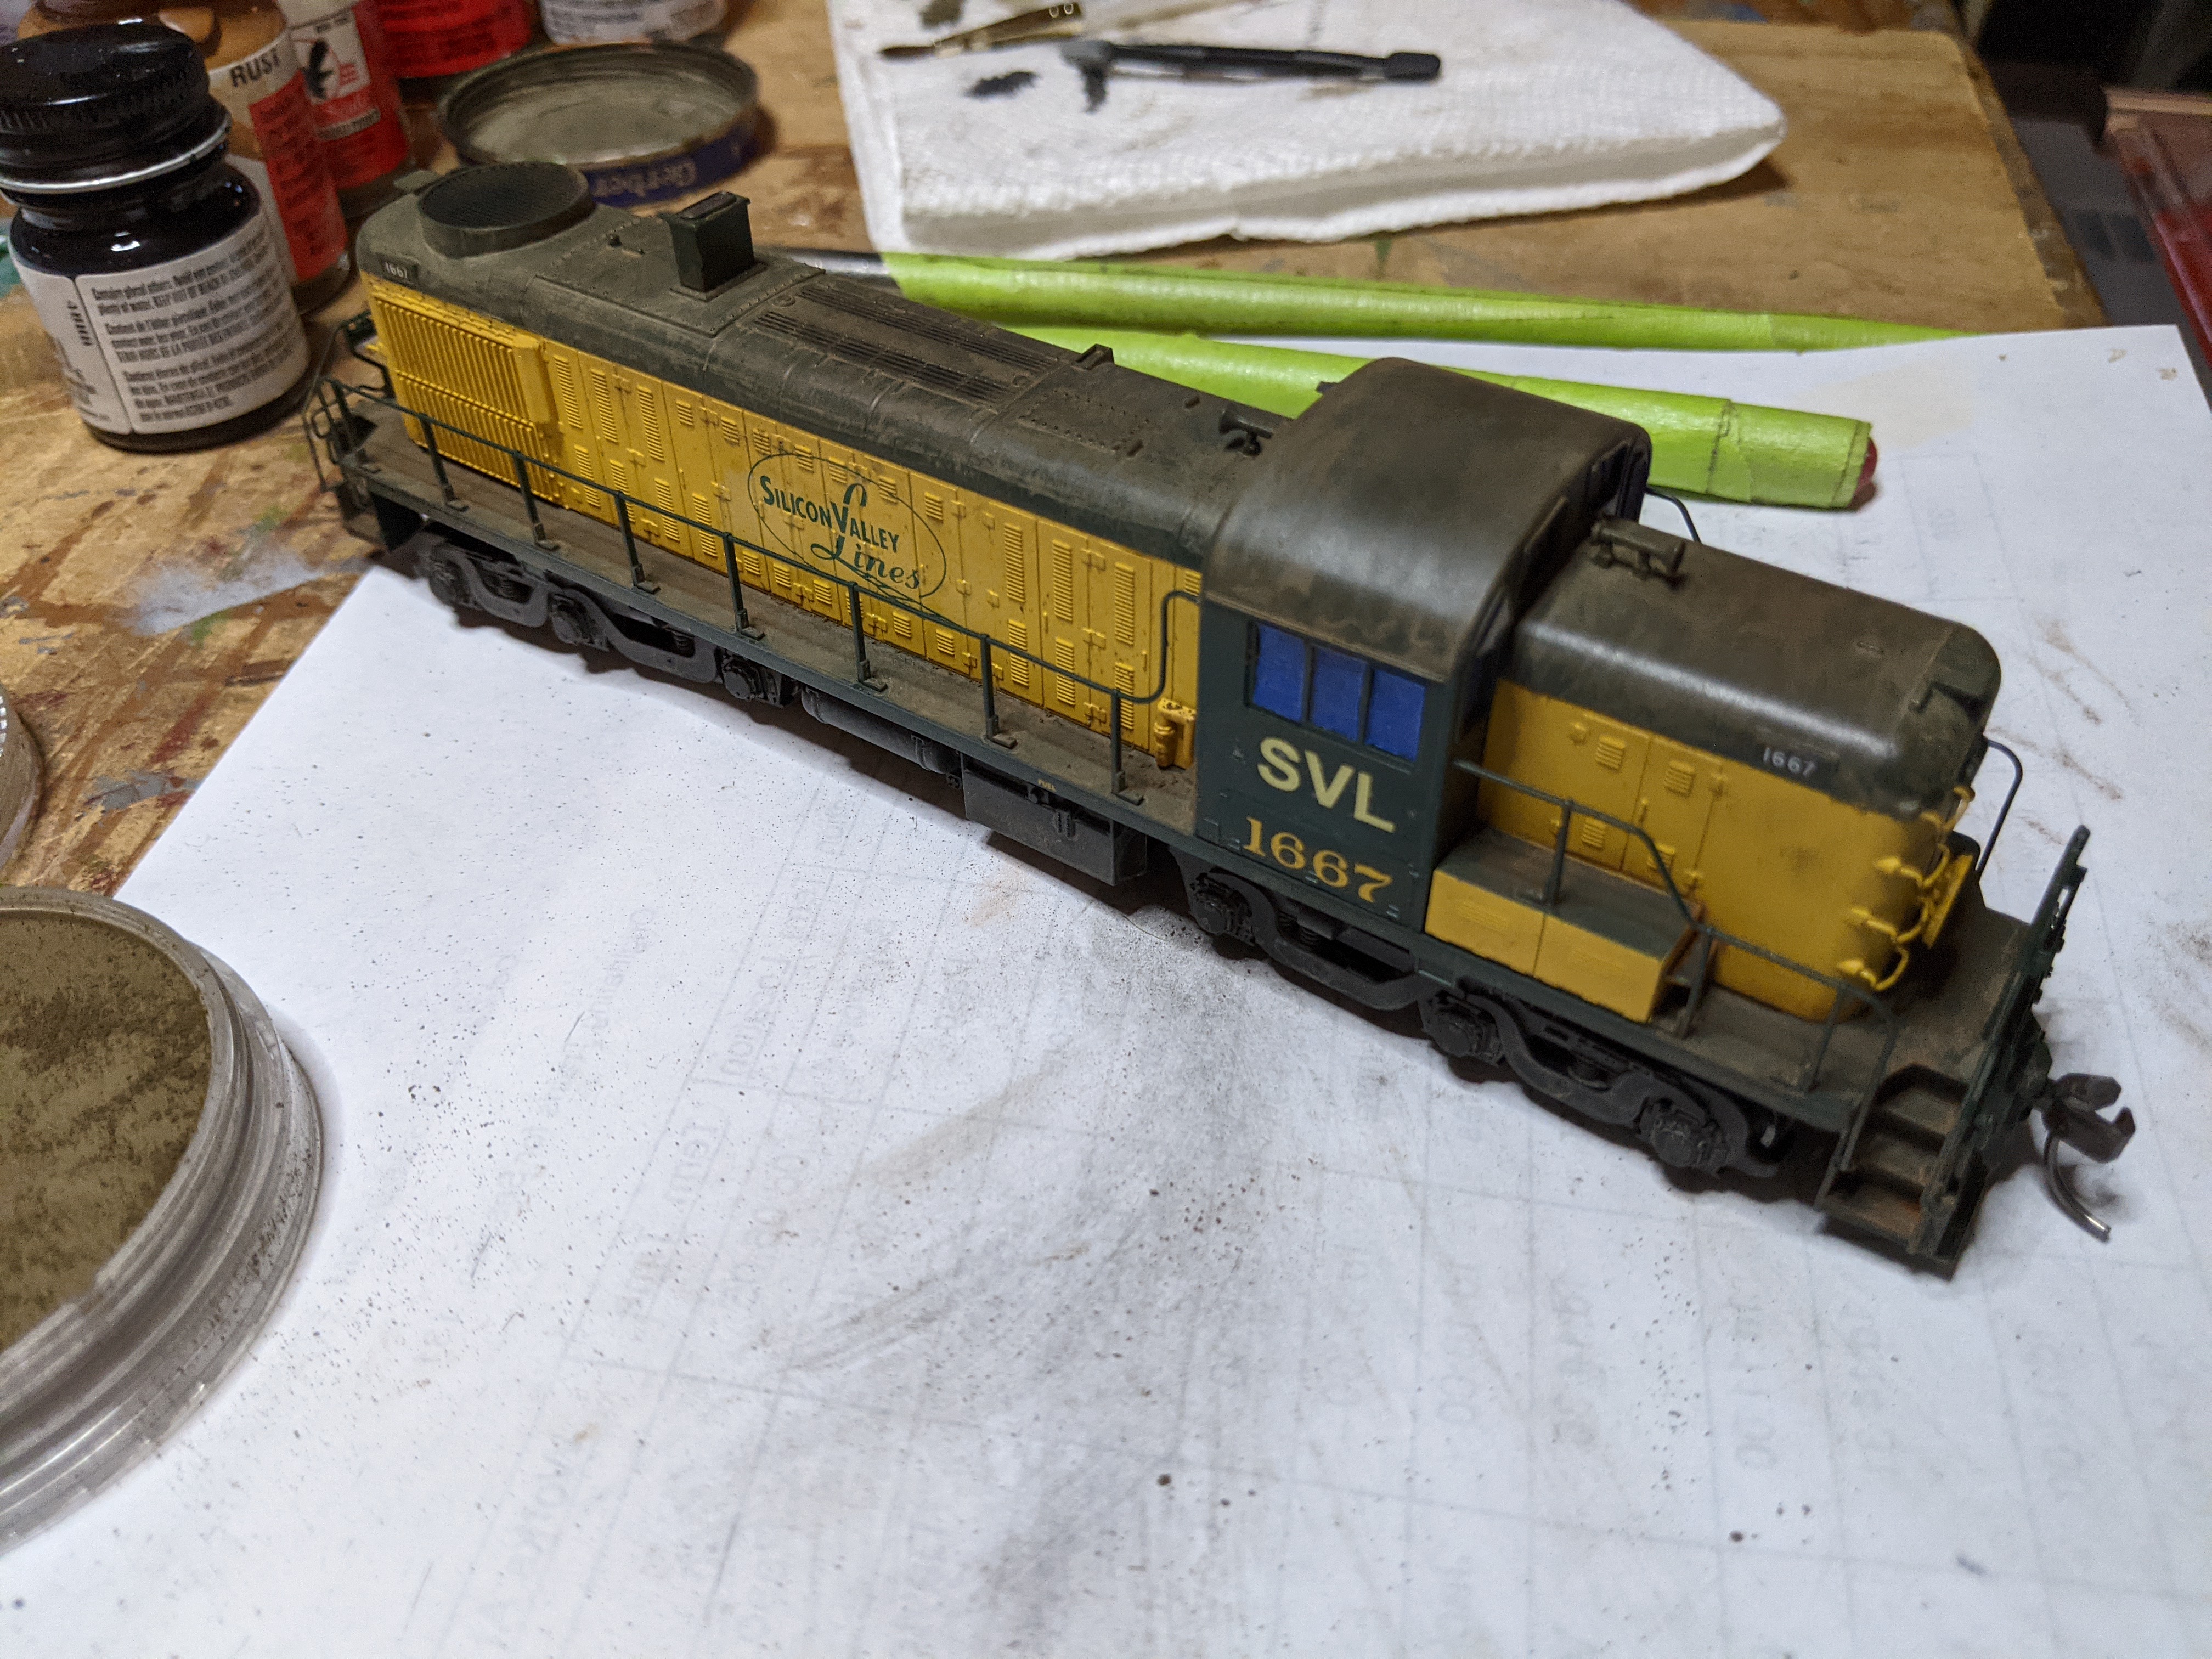
After applying the SVL decals last September the locomotives sat on my workbench and didn't get any attention until early December. I started with making the units a bit dirty and applied a wash of rail tie brown. It dried much lighter than I had expected. Urrgh.

I attempted to fix the ugliness with various applications of PanPastels. I really like the versatility of PanPastels. Once I was happy with the effect, I sprayed the locomotives with Dullcote and all the weathering turned into barely visible dark shades of green and yellow. Ah right I remembered: Dullcote needs to be at room temperature, applied from more than a foot away, and only in short bursts. The idea is to not get the PanPastels wet, and the Dullcote drops land on the pastels almost dry. For me the locomotive was dripping wet. The neighbors likely heard me swearing, but were nice enough not to say anything.

The second try of weathering was a bit more sloppy, and I messed that up with Dullcote as well. Third time was a charme, and I let the engines sit for a while while I tended to other projects.

Finally, as I was weathering a bunch of freight cars with the airbrush recently, the RSD5's received some more dirt around the trucks, too, as well as a several very thin coats of Vallejo Matte Varnish.

To finish off, I carefully applied Vallejo Dark Grey wash to the rear wall of the cooling grills, which adds to the illusion that you'd look into the dark air-cooling chamber at the locomotive front. Had I used light grey with the yellow sides, the effect would have been more subtle, but it's workable, so I left it as is.

In any case, I'm happy with the overall appearance. The weathering is subtle and not totally in your face. The Vallejo Matte Varnish works well, if only it would not be such a pain to clean the airbrush afterwards. The lead photo shows both completed engines staged on the Welztalbahn. I can't wait to run them at SVL.

Saturday, January 09, 2021

More Weathering Experiments


Today I decided to finish up weathering for the half dozen cars and locomotives sitting on my work bench since a few weeks ago. The weather was nice this afternoon, so I moved to the patio outside. The plan was to apply dirt and grime to undercarriage and trucks, as well as seal the Panpastel weathering effects with matte lacquer coat. I don't have much experience with the air brush yet, so this was also a good opportunity to try out a few ideas I had and see how to come out.


I used a base of Vallejo ModelAir Burnt Umber, and an overspray ComArt Soft Dirt for trucks and undercarriage. Using a thin spray of these lighter colors brings out more texture on the trucks of the American prototype car trucks, which is an effect I like. The Burnt Umber comes out a bit too redish on light surfaces as can be seen on the RBWX box car above. The Soft Dirt tones that down a bit.


I used somewhat heavier coverage of ComArt Soft Dirt on the RSD5 trucks and equipment, too.


As an experiment I sprayed an old Maerklin hopper with ComArt Soft Dirt, heavier around the wheels and frame and lighter towards the top. The top third got a light coat of ComArt Light Rust. This simple exercise took me less than 5 minutes and goes a looong way to making the car appear much less toy-like, despite the oversize ladders and crude features. Compare before and after below.


I weathered the roof and side panels of this Gbs256 box car with Panpastels, and sprayed the undercarriage and wheels with ComArt Soft Dirt. Again a very simple exercise with great effect dramatically increasing realism.


I sealed decals and Panpastel weathering on all models using thin coats from 5-10 drops of Vallejo Matt Varnish. I made sure to keep the air brush at least 6 inches away from the model to create even layers. Between cars and reloading Matt Varnish, I ran water through the air brush to minimize gunk build-up.

Finally, some trucks and frames got an application of Vallejo Dark Grey Wash.


Friday, September 04, 2020

RSD5: Decaling for SVL

On the locations where the new decals would go I applied MicroGloss and let it dry. Then carefully and slowly, one after the other, for each decal I applied MicroSet while the decal wets in some water, apply the decal, wick the water from under the decal, let it dry a little bit, and carefully apply drops of MicroSol so that the decal softens and adheres to the contours of the locomotive body for a painted-on look. The MicroSol is particularly important for the large logo on the doors of the long hood. It usually takes multiple MicroSol applications for the decal to soften enough.

I'm working on both locomotives at the same time, so that I can continue with one locomotive, while the other one dries.


Once the decals were done, I taped the windows to prep for Dullcoat and weathering.

Saturday, August 22, 2020

RSD-5: From CNW to SVL

[ RSD5 posts ]

The RSD-3/4/5 is one of my favorite American locomotives. Alco sound and the very distinctive cab shape come together for an unique locomotive. Atlas recently came out with RSD-5's painted and lettered for the Chicago & Northwestern Railroad with a built-in LokSound Select decoder. The CNW herald is only on the cab sides, and there is small CNW lettering on each end. A perfect starting point for relettering the locomotive for SVL.

Tonight I first played with the locomotive on the roller stand. Sounds good.


Next I took 1665 and its cousin 1667 over to the work bench and used a glass fiber pencil to carefully scrape off the CNW markings.


Finally, I mixed a green tone that's reasonably close to the CNW green from Modelmaster Coach Green, Engine Black, and Prussian Blue, and fixed up the shell areas where I scraped off not only the markings, but also the paint underneath. The brush marks are visible on the shell, but once the new decals are applied, and I weathered the locomotive, they'll disappear among the other gunk.