Saturday, April 28, 2012

A very windy place

The view from Uetliberg was great, though the wind was very strong.

On the way back down from Uto Kulm to the Uetliberg train station.

Friday, April 27, 2012

Sushi Kalifornia


Seen at Zurich HB. Why Kalifornia? 

Creating a Quick and Dirty Operating Scheme

"A"-Town on the right, "D"-Town between the two potted plants
This week I visited Balazs' layout and we made quite some progress on adding industry tracks, sidings, and conceptualizing how running an operating session on his new layout would work. This tabletop layout does support fully automated running, too, so the objective was to add enough operational opportunities to keep a few operators busy and entertained when running the layout in manual mode.

During automated operation, the layout is treated as a mostly double-tracked loop, with two single track choke points and one large interlocking that allows trains to run return loops, or take short-cuts.

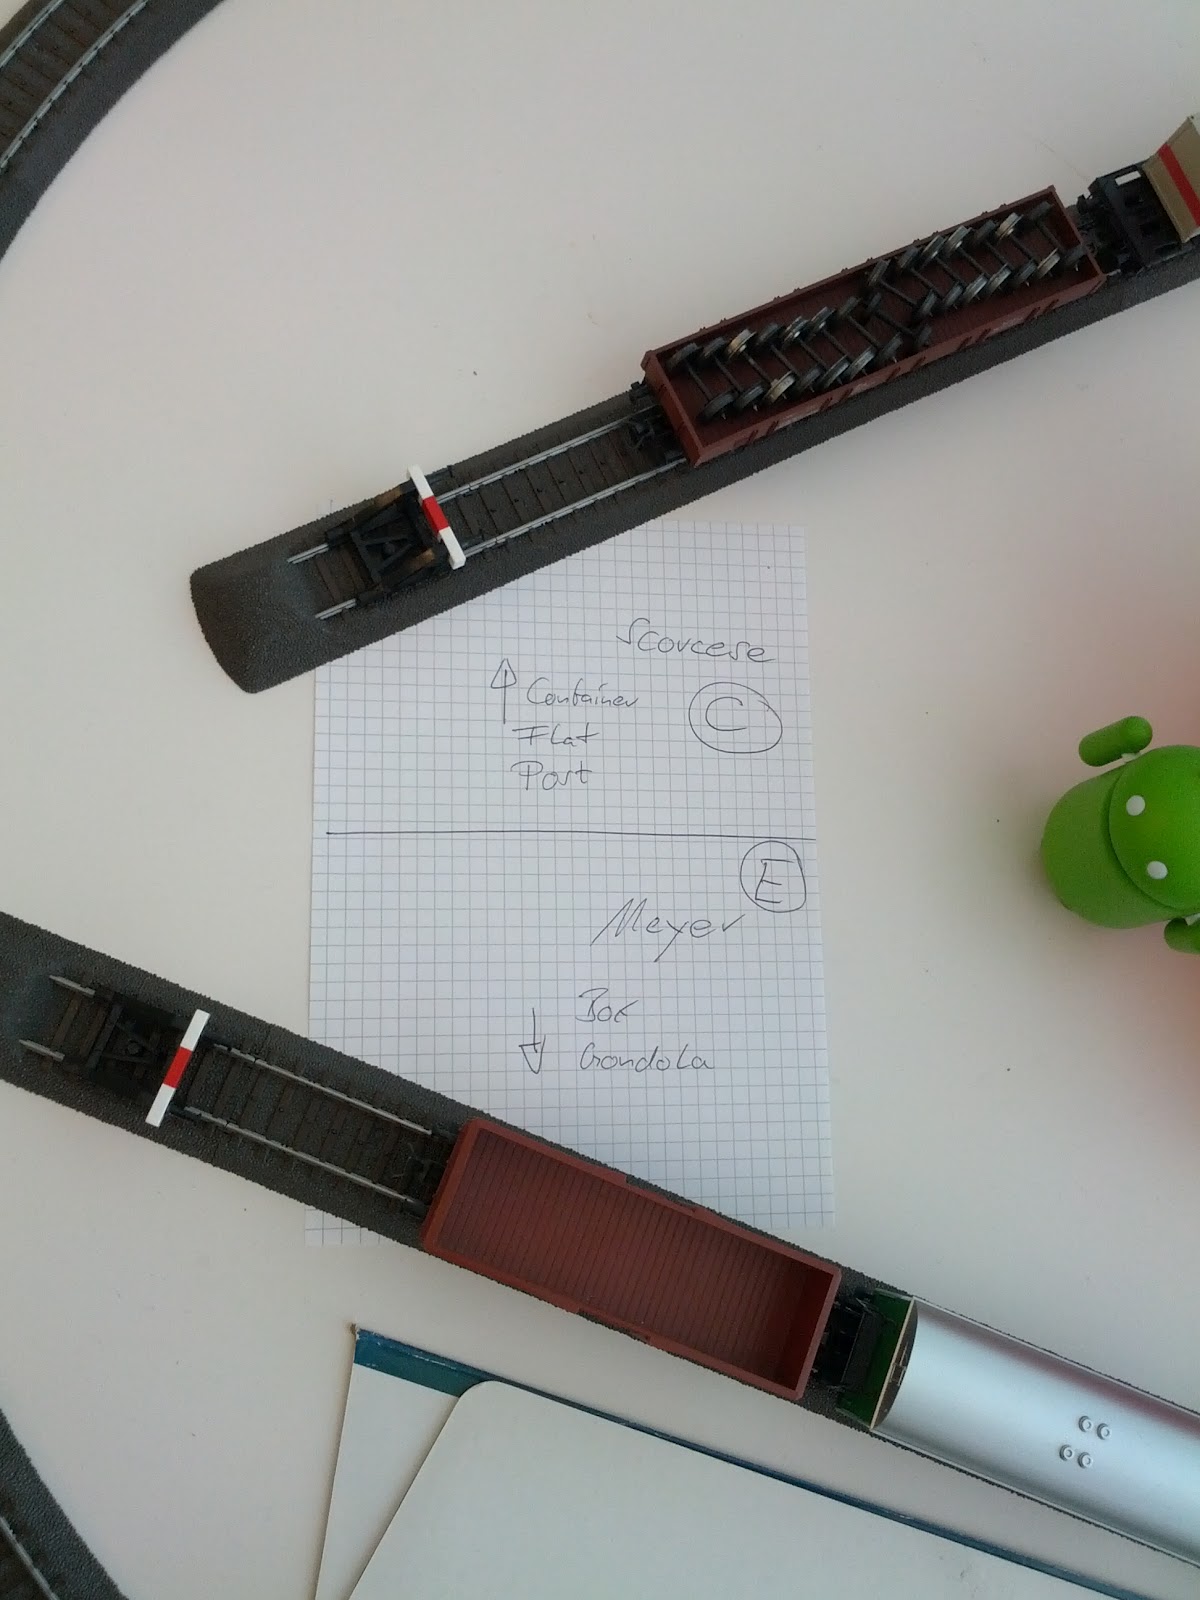
Industry tracks are labeled with sheets of paper in "D"-Town
For manual operation, I modified the concept and think of the layout as a single track mainline with sidings. The sidings give operators switching an industry track space to hold cars being switched, as well as a logical hiding place to not block main line traffic.
For each industry track I defined what kind of car type the track would accept. I chose a distribution of car types that roughly matches the fleet Balaszs has. Due to space constraints, most "industries" are single or double track spurs, mostly off sidings. There is one large industry with a more complex track arrangement.

To create a feeling of location, I gave each industry a name, as well as town names (well, the town names are not exactly imaginative: A, B, C, D, E, and F arranged roughly clockwise along the loop of track). Once that was worked out I placed sheets of paper near the tracks indicating location, industry, and what kind of cars the track would accept.

A small, stub-ended classification yard existed already. We added a dedicated track to be used as yard lead to disentangle the lead from the single A/D track.
Industry tracks of "C"-Town and "E"-Town

Now that we had industry locations and respective tracks, it was time to define trains. There are almost 30 car spots, maximum train length is about 8 cars, and multiple operators are expected to work the railroad. There will be local freights, through freights, as well as extensive passenger operation.

I broke up the local freight operations into 3 trains. One would run from the Yard to towns A and B, one would cover towns C, E, and F, and finally there would be a dedicated run to switch the large industry in D.

To extend the length of the runs, and make the job of a dispatcher a bit more interesting, the local freights need to go all the way around the layout between switching two towns. All trains are turns, so the engineers need to pay attention to trailing and facing point turnouts in the industries to switch, and in the worst case run around their train on a siding as needed. For each train I wrote station/loop order on a sheet of paper, so that the operators know what's expected of them.

Car routing works by type of car. If a track asks for a box car, any box car the train brought along from the yard will do. The engineer is expected to keep track which cars he picked up at an industry on the way and make sure to bring them back to the yard. However, even if a car or two slips through, it doesn't really matter that much.

This operating scheme was developed over the course of about an hour, and we ran a session with all 3 local trains, plus classification in the yard the same evening. There's certainly room for improvement and fine-tuning. However, for something that was made up on the fly, I was pleased to see that it worked well enough to give a feel for how switching on the layout could work, as well as quickly identify areas both on the layout and operationally that need further refinement before investing a large amount of preparation time.

Plus, we certainly had fun, both building out industries and track arrangements, as well as operating ... In the end, this is a hobby. Enjoying what you do is the only thing that matters.

Thursday, April 26, 2012

Morning Sun


Morning sun behind a house, which is slowly getting torn down, near Binz station.

Wednesday, April 25, 2012

The Real Mountain View

Beautiful day with clear view of the mountains

Tuesday, April 24, 2012

Kangaroo

Potatoes, Zucchini, Sausage, and ... kangaroo. Not something I expected to eat tonight.

Monday, April 23, 2012

Spring Time in Zurich

Trees just outside my apartment

Sunday, April 22, 2012

airport lunch


Mesquite Chicken Salad with goat cheese and organic tomatoes and greens.
Andale doesn't disappoint. Best food at SFO located in terminal G.

Friday, April 20, 2012

Going for 600 kWh

Now that the sun is finally shining regularly, our PV solar system is busy producing electricity.

In December we topped out at about 10 kWh each day pretty consistently (it was mostly sunny, but cool), for a total of 290 kWh.

In March the total was 430 kWh with a very uneven distribution over the month. Some days saw production up to 20 kWh, some days barely broke 5 kWh.

This month we're already at 390 kWh hitting almost 25 kWh most days, and a third of the month still in front of us. If the weather holds up we could be topping 600 kWh in April.

Last year we produced 600 kWh per month from May to September, and while high energy production in the summer offset the costs of winter usage generating a net negative dollar amount, we didn't get a refund at true up time because we were not a net producer in terms of kWh. Oh well ...

Our inverter reports usage data to Solarcity's SolarGuard monitoring service. The highest grossing month was July 2008 when we produced almost 700 kWh in one month. Our PV system is composed of 22 180W DC panels for a rated peak AC capacity of 3.2kW.

Previous posts covering system installation:
Installing the rails on the roof
Installing the panels
Generating electricity

Monday, April 16, 2012

Steinlehof foundation

Steinlehof is a typical Black Forest farm house. Since the ground has a bit of a slope here, I needed to build up the ground for the house. A nice overview shot of this area is in the posting about building Hochwald.
This patch is for rough leveling of the house. Next up is a bit fine-tuning, patching holes and sharp edges followed by painting and texturing the hill, as well as building part of the access road. I still need a design for a simple wooden bridge across the tracks in the background, and will probably end up scratch-building the bridge from styrene and stripwood.

Last weekend I spent some time to ballast more track. This time the approach to Hochwaldtunnel. Right now, the ballast looks too clean and uniform. I will add more trees and bushes later, along with more weeds to get the effect of overgrown vegetation around the tracks that I see on many photos of the Schwarzwaldbahn. 
Eventually, there will be a small Schrebergarten in the foregound , roughly in the area of where the cup and chisel are located. 

Wednesday, April 11, 2012

More car spots in Talheim

Talheim had a fairly modest amount of car spots, mostly around the Werner & Soehne machine factory, the loading track at Kopper Furniture, and a couple team track spots. Both Werner and Kopper had a simple track arrangement with one turnout. Well, that's changing ...

It all started with admitting that the freight shed I built over the Christmas break just doesn't work very well in Emsingen. It's too small for the traffic, and amount of goods it would be supposed to store. I started looking for another location I could put it at. I needed a spot with a track, road access, and a purpose.

Thus the freight shed became an agricultural supply. The only available spot on the layout was at the end of the Kopper Furniture shelf.

I had a location and a purpose for the building, now I needed the tracks to get there. The simple track arrangement on the shelf became a bit more involved.

Experimental track arrangement around Kopper Furniture
Kopper Furniture continues to be a large operation and will be represented as a modern half-relief building against the backdrop. There will be 3 numbered doors to spot cars at.

The track next to the shed extends all the way into the corner of the room (after I took the photo I also extended the shelf into the corner). The track next to it is a team track, and doubles as access to the sawmill track in the back.

Finally, the stub track branching off the curve towards the wall will get a small loco shed for the resident switching engine in Talheim (maybe a Koef?)

All of this adds a bunch more freight car spots, and it opens up the possibility to originate a switching job out of Talheim, even exchange cars in Emsingen and return. I really need to get more locomotives operational now.

Closing the gap

Odd-shaped hardboard piece to close "the gap"
When I originally built the Talheim station base board, I didn't intend to create the operator pit in the middle of the layout. The area was supposed to become a lake and the Welzbach ("Welz creek"), which gives the Welztal it's name, would provide power to a small watermill. Well, ... that didn't quite work out as planned and when I installed fascia inside the pit, there was a three inch gap between the end of the creek modeled into the station base board and the fascia.

First test-fitting of left-over Hydrocal rocks
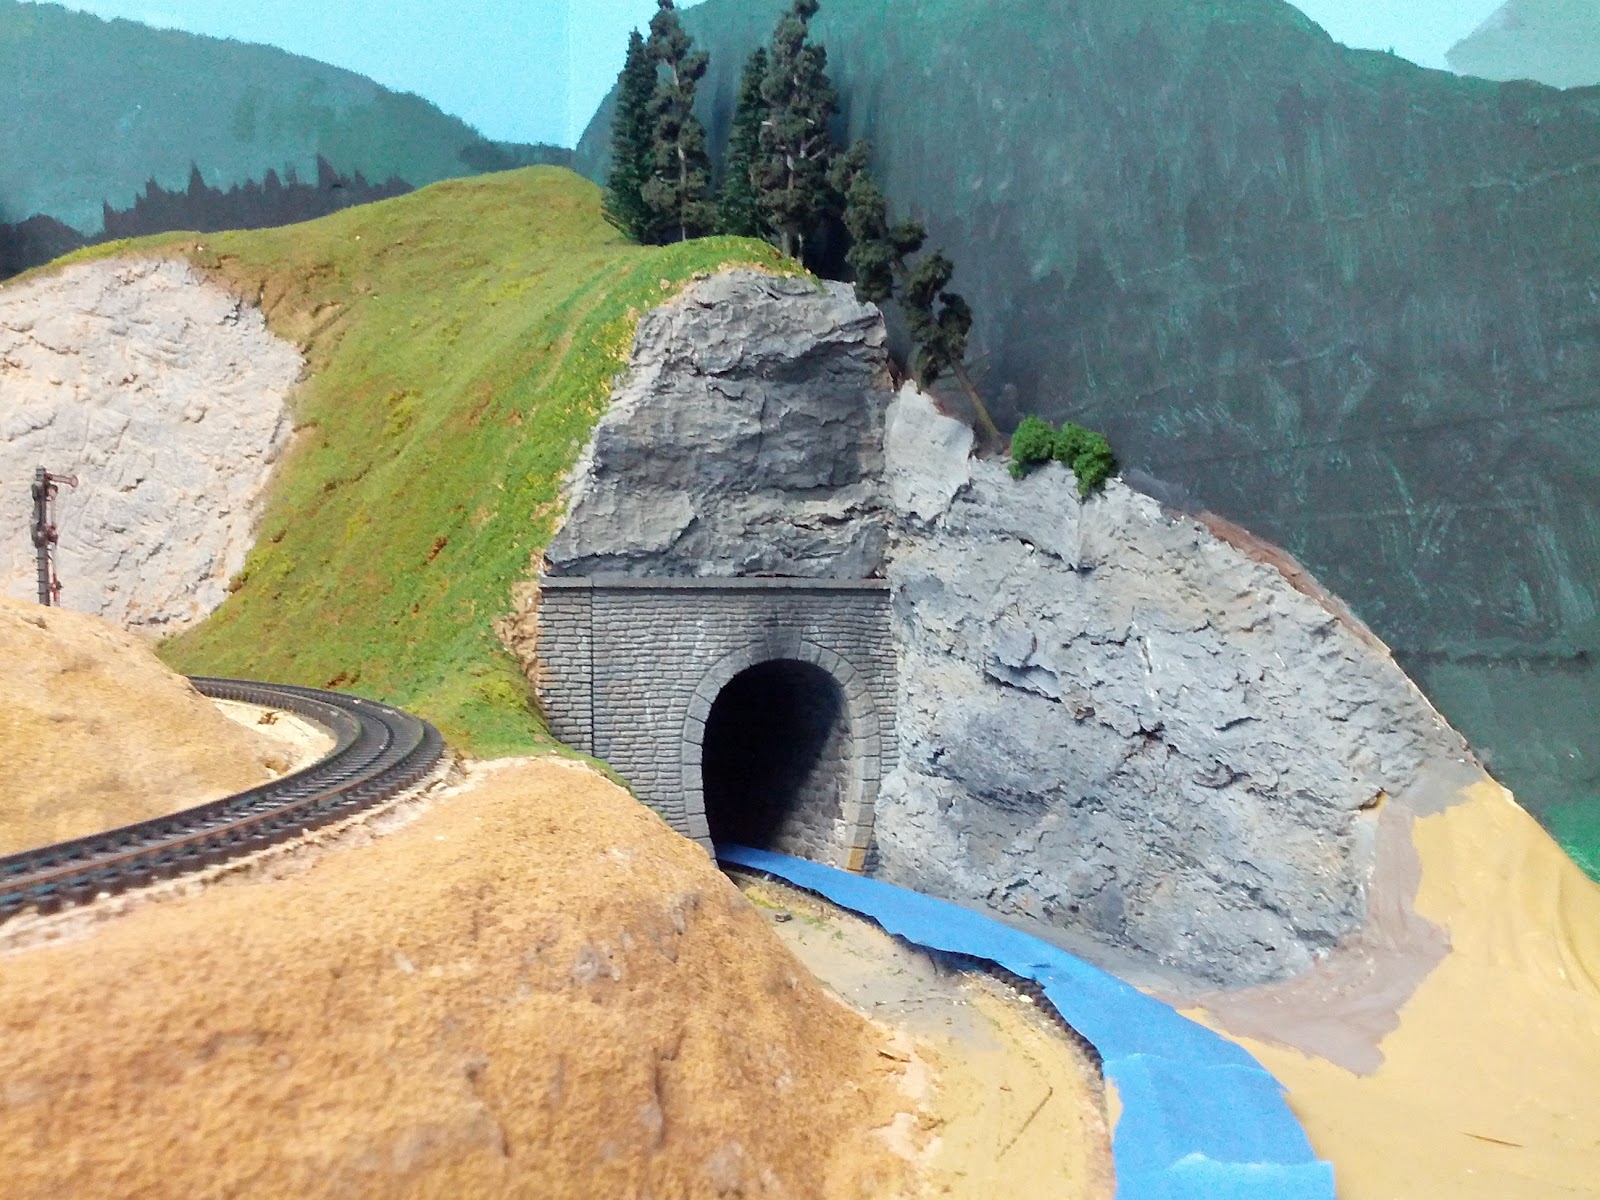
Several months ago I built up the hill next to Tiersteintunnel and covered it with masking tape. A few weeks ago, I cut a piece of hardboard to fit the gap, and glued it in place. Last week I started laying out some left-over Hydrocal rocks, and finally today I plastered everything in place (well, actually I used Scuptamold for the last step). Now it's on to add some paint to the rocks and creek bottom.

Hydrocal rocks fit in and set in place with Scuptamold. 
The photo above also shows a close-up of the ballast I added last week.

Finally, an overview shot of the tunnel entrance to staging. I closed the gap in the base board along the tracks, placed some support columns, and added the retaining wall next to the background. The retaining wall is salvaged from my Dad's dismanteled layout, and still needs to get painted. There's a connector for track power for the Emsingen yard tracks, which will be hidden under the boiler house of Werner & Soehne later. 

Tunnel entrance to staging. The two tunnel portals are not visible from this perspective.
Tools and paint occupy the site of the Werner & Soehne machine factory.


Wednesday, April 04, 2012

Monday, April 02, 2012

Ballast

Before ...

... and After.
Ballasting is not exactly one of my favorite tasks on the railroad. However, I find it gets your mind off things, and just like placing bushes and shrubs, has somewhat meditative properties.

Yep. That's one evening spent on about 3 feet of track.

Sunday, April 01, 2012

Some minor progress

This weekend I continued to work on the bridge:


I added some Scuptamold rocks around the abutments, painted the bridge, and blended colors into the surrounding scenery. I feel like I have a bit too much gray on the layout at the moment and will need to balance that with a lot more green...


Since I'm about to close up the area around the tunnel portals to staging, I had to ballast the second track while I still can get there somewhat easily. I obviously didn't do such a great job on the first track in the front two years ago, since the ballast is coming loose along the embankment. 

Thursday, March 29, 2012

"Bridge" installed


Tonight I glued the railing to the bridge. The railing is anchored in small holes I drilled into the stripwood that runs across the top. One hole went into my finger, but that's another story. Next I taped the bridge to the sub-roadbed and the track, applied a generous amount Scuptamold to build up the surrounding rock, and cement the bridge in place permanently. Next up: Painting the whole thing.

It's somewhat hard to see in the photo, but looks like the glue I used to stick the styrene sheet to the foam ate into the foam, and formed indents on the outside. Oh well, it's an old bridge...

Wednesday, March 28, 2012

Solar Tornado

And for a change from my usual subjects, this is quite impressive...


Tuesday, March 27, 2012

Hanging "bridge"

Covering up another planning mistake...

When I built Talheim station I built a road underpass into the station board off layout. That worked and looked great until I started building the curve leading up to Emsingen. It had its widest point exactly where it met the portal of the road underpass. Whoops!

As I built up the basic scenery I modeled a rock "cave" at that point, the road runs under the railroad, and for the longest time I had a cardboard cut-out indicating where the bridge would go.

As the scenery is moving closer to that section of track, it's time to fix that.

Building the bridge wall
First test fit
 I used a 20 year old Faller plastic "build your own tunnel portal" strip, and a Heki foam wall sheet, eyeballed the length of the strip and cut a mostly balanced opening into the foam sheet. Then fitted the strip into the arch. There's a piece of styrene backing the foam for added stability. I used push pins on my work bench to hold the pieces together while the glue dries

I should have cut the sides of the foam sheet an angle instead of vertically to ease the transition into the surrounding terrain. The rather harsh edge I have now will need to be fixed and hidden away with Scuptamold, bushes, and ground cover at a later time.

Monday, March 26, 2012

The Grassinator

I had this on my to-do list for a long time now...

The Grassinator
Static grass is pretty darn cool, but I lacked the tool to apply static grass on the layout. I picked up a Noch static grass shaker bottle, and it kind of works. However, the grass would not really stand on ends, but rather be a jumbled mess.

Last summer I bought an electric fly swatter. These are nifty little devices that typically look like a small tennis racket. They generate a high voltage load which zaps insects when you hit them with the metal screen in the paddle. Using that, today I finally built ... The Grassinator.

Construction is extremely simple: Disassemble the fly swatter, remove paddle, cut cables to the paddle, hot glue a metal sieve in place of paddle, connect one cable to sieve, connect other cable to an alligator clamp. Done.

To apply static grass, drive a nail into the scenery, generously apply scenery glue or matte medium, add some static grass into sieve, clip alligator clamp to nail, turn on Grassinator, gently shake the Grassinator while holding it closely above the ground, and the static grass fibers will fall through the sieve. Static electricity between the wet glue and the sieve will make them stand on their ends (well, mostly, this Grasinator is not super strong).

Here's what the result looks like, with the glue still wet. I'm using a base of fine ground foam before applying the static grass to give a bit more body. 
Approach to Hochwaldtunnel with static grass hills


Sunday, March 25, 2012

No modelling this weekend ...

... but the tax return is done. Yay.

I'm starting to see a pattern on my "taxes are done" posts. It seems, I'm mostly doing my taxes a few weeks before the deadline. Unless I'm really motivated.

Wednesday, March 21, 2012

There's always a First Time ...

This week it was:


Since we got to Heavenly too late for the morning lessons, I toyed around on a hill for a couple hours before lunch under supervision of Dave, and then spent the afternoon with the Heavenly ski instructor.

Since there were only four people in the group to start with, and two of them gave up halfway through the lesson, and the third one had to leave early, and the instructor met an instructor friend, who joined us for the last hour or so, I got private coaching from two instructors for the second half of the lesson. That was very nice, and more than made up for the slow pace of the first 90 minutes.

For those of you familiar with Heavenly:
I spent most of my time in the beginner's area near the tubing hill, and at the end took the Big Easy Chair Lift to Easy Street a few times until the lift closed.


Icicles


Icicles effectively illuminated outside the main cabin in South Lake Tahoe. 

Sunday, March 18, 2012

Green

Redoing the retaining wall
Yard track #6 ran very close to the edge of the retaining wall. I figured it'll be ok. However, when I put a locomotive on the track, I couldn't stand how silly it looked that the cylinders hang over the abyss. A bit more room to the side of the track was necessary.

Which meant, I had to redo the retaining wall I installed about year ago. Of course, I didn't want to rip everything out, and redo both inclines of the wall. Only the left half was partially cut away, and covered up with new wall.

I used the same methods as before, glue the wall, fill the gaps with Scuptamold, then paint everything, and we have a fairly nice looking curved wall with a slight bend in the middle.
The extended retaining wall finished, as well as basic greenery
While at it, I might as well make nails with heads, and add some long overdue greenery to this section. Did I mention yet, that the unfinished parts of the layout make a great work-surface. I'll have to come up with something else when more scenery is in.

By the way in this photo the dent in the wall is quite nicely visible. While building I figured I'll cover it up later with ... something.


Aerial view of turnout to track 6, and retaining wall.
To the left of the covered track, the "river" Welz.


The aerial view shows how the additional space between track and wall helps balancing the look. Much better now.

Finally, I started to add bushes and weeds to give the hillside more structure, as well as cover up that pesky dent in the wall.


Covering up the dent and bottom of the wall with bushes and weeds


Sunday, March 11, 2012

Hochwald = high forest


Creative Chaos
Following the plan, this weekend it was time to make Hochwald an actual forest.

I don't really have the space on my hills to model an actual forest (puffballs are popular for doing deciduous forests, yet the Black Forest has mostly conifer trees). The Woodland Scenics "conifer trees" pack is not really producing convincing conifers tress either ...

Nevertheless, creative chaos reigns on the Welztalbahn.


Hochwald
After some initial experimentation, I painted the forest floor a dark, almost black, brown, glued down fine foam for grass, and started planting trees. Over the next couple hours Hochwald looked more like the suggested forest edge I had in mind. Though, it wasn't quite right.

Comparing to photos I took in the Black Forest, I realized what I was missing: The tree line at the edge of the forest is much more dense and darker, than what I produced today. Nevertheless, given that I never made something like this before, I'm quite happy with how this all came out.

I think the depression in the tree line where the access road to Steinle Hof exits the forest and crosses a bridge looks much better than I thought I could manage. Now it's a question of finding and fitting the right kind of bridge to cross the track.

Hochwaldtunnel
Since I was already working in the general area I painted the rocks around Hochwaldtunnel. The tree bark pieces are still a little bit visible in this photo, though it's not nearly as noticable on the actual layout from most viewing angles. Blending in the gaps filled with Scuptamold worked better than I expected.

Finally, a photo covering most of today's work.


Saturday, March 10, 2012

UP SD70M and box cars at Blossom Hill


While dropping off Tatjana this morning, UP 4383 was tied down with a string of quite beat up box cars on the siding at the Blossom Hill Caltrain station.

On the way back home I stopped briefly, and took a couple photos of this very common UP locomotive. Not exactly ideal light, though I like the shadows on the cab.

The motor was running but no-one around in the cab or nearby, as far as I could tell.

Thursday, March 08, 2012

Lunch


Pineapple & Apple Salad with Spring Mix greens

Suprema Carne De Mexicana (made with grass fed beef)

Glaceados Con Guajilo sauce (zucchini, cauliflower, carrots in a spicy sauce) and Beans

...

A delicious combination.

Wednesday, March 07, 2012

All stones are gray ...

... but some are more gray than others.

I spent some more time with the tunnel portals to staging, cut the walls, and did a lot of painting. On most of the photos below the color is still wet.

Stone wall just outside the bridge/tunnel. I also painted the rocks above the wall. That brown slope in the background will get grass and bushes.

This wall will go under the bridge to the left of the wall above. 
  
And finally the actual tunnel portals. The wall in the previous photo will close the gap on the  right.


Monday, March 05, 2012

Emsingen Yard

Yep, the yard wasn't really on the to-do list, yet it got quite a bit of attention lately. Whatever.
Today, it got a bit more grass to get a slightly unkept appearance.


US bank-to-bank transfers

When we came to the US, Direct Deposit (i.e. depositing your pay check directly into your checking account) was a big deal, and there were plenty of promotions to get free checking account when using it. We were scratching our head what all the excitement is about.

15 years later, I still find myself unable to easily send money from my checking account to someone else's checking account. To do a wire transfer which is the only available option to do this electronically, I not only have to come in to the bank branch, but also are required to pay $40 for the privilege. ... And I think they still print checks for this process.

This bank no longer accepts wire transfers through online banking due to "regulatory constraints" (Another bank I do business with doesn't have this limitation, and they will get more of my business in the future).

Sooo, ... instead of a simple electronic transaction (that in addition could be traced easily in financial networks) I have to drive to the bank, talk to a person, get a printed official check, pay $5 fees, drive back to the office, print out an overnight shipping label (and pay shipping fees), find an appropriate envelope, put the check in the envelope, seal it, put the label on the envelope, ride a bike to the shipping drop box a couple blocks away, where the express shipping company will stop by tonight to bring the envelope to the airport, to put it on a plane to LAX overnight, and deliver it, so that the escrow company has the check tomorrow.

What's not wrong with this picture?

Saturday, March 03, 2012

Tunnel portal to staging

An extra-wide double-track portal
The entrance to staging is double-track, in a curve, and there is a curved turnout leading to Prechtal. It's also below Emsingen yard, so not that accessible. And, just like everywhere else, there's not a whole lot of space.  The original plan was to use two tunnel portals, and stagger them.

When I tried to set this using the plastic portals I have, it didn't quite work out. Clearance between the tracks is too tight, and the single track portals are not wide enough to be set over the curved turnout. I modified one of the portals, but it didn't look particularly good with half of the portal stone missing. So I went to plan B: modify a double-track portal, and make it extra-wide so that it fits over both tracks and there's enough clearance at the turnout, too. I inserted two crown stones from another portal and glued everything together.

Extra-wide double-track portal installed.
The picture on the left shows the result. A big gaping hole. Might as well not have a tunnel portal here. Meh, I don't like the look of this at all.

Additionally, I tell my operators switching in Talheim they can operate between the tunnel portals. However, now there is not enough space for a locomotive to fit between the turnout in the foreground and the tunnel portal. And I can't put the "Halt fuer Rangierfahrten" sign just outside the portal. There must be a better way to do this.

Staggered single-track portals mock-up.
I went back to the single-track plastic portals, but replaced the one over the curved turnout with a cardboard template again. Then I started experimenting with positioning so that my longest passenger car would still comfortably fit through the opening and the portals would use the area where the tracks are diverging a bit as originally planned.
Eventually I had worked out the right position and dimensions for the right-hand portal, and cut down the extra-wide double-track portal to an extra-wide single-track portal.
Original double-track tunnel portal, and extra-wide single-track version
Putting it all together...


Much better. The two portals are offset by only 1.5 inches, and are now set much further down under the yard than originally thought. The gap between the wall on the right, and the right-hand portal is about 4 inches. There is not enough space between the tracks to allow for proper stone wall next to the portal without affecting clearance on the neighboring track. Something to keep in mind for the next layout.