I'm not good at doing drywall work. Nor do I want to texture dry wall. Nor do I think I'll do a good job with building a box to hide the hole in the ceiling where the neon lights are currently located. Nor do I want to run a bunch of electrical conduit, and set it up in a way that'll pass city inspection.
That's what you pay contractors for. We're on the schedule and they'll start next week with a new sub panel. Over the next couple weeks they'll do the drywall and ceiling, install can lights, run a bunch more circuits into the kitchen to meet current code, and do some light re-piping.
I'll rip out the old cabinets, paint the walls, install flooring, install the new cabinets, and install temporary plywood counter tops as stand-in until the new butcher block counter top is delivered and installed.
If it all works out the worst is over before Easter.
Now I just need to find someone to trade oncall with me, since I'm supposed to carry the pager the same week most of the work happens.

Tuesday, March 09, 2010

Sunday, February 28, 2010
Taxes Done
Another year, another tax return done. TurboTax Online was as helpful as usual, but my tax situation keeps getting more complicated, as I barely made it through some of the random, occasionally seemingly crazy questions TurboTax had for me.
Overall, the experience was about as pleasant as it can be given we are talking about doing your taxes here...
Overall, the experience was about as pleasant as it can be given we are talking about doing your taxes here...
Friday, February 26, 2010
It's raining hard

Saturday, February 20, 2010
Power outage in San Francisco
There's a power outage in San Francisco. Why would I care?
My DSL circuit is provisioned on an AT&T line, but my Internet service is provided by sonic.net. Sonic's aggregation for the Bay Area is in San Francisco, and the colocation facility had a power outage, which took out the upstream equipment of my connectivity. It's amazing how often data center generator facilities and UPS systems have problems coming online when the mains power goes down, given that's one of the main points for being in a co-location facility in the first place (cooling being the other, and yes, that also goes down more often than one would think).
But again, why would I care about this today? Isn't it great if I forced to do something else than staring at a computer screen?
Well, yes, but I'm oncall this weekend, and Internet connectivity is crucial to do my job. Fortunately, the problem was fixed relatively quickly and I didn't get paged in the meantime.
Sonic has more information on their systems blog. BTW, not many ISPs these days are this open about the small and big problems and outages that do occur regularly in large complex systems.
My DSL circuit is provisioned on an AT&T line, but my Internet service is provided by sonic.net. Sonic's aggregation for the Bay Area is in San Francisco, and the colocation facility had a power outage, which took out the upstream equipment of my connectivity. It's amazing how often data center generator facilities and UPS systems have problems coming online when the mains power goes down, given that's one of the main points for being in a co-location facility in the first place (cooling being the other, and yes, that also goes down more often than one would think).
But again, why would I care about this today? Isn't it great if I forced to do something else than staring at a computer screen?
Well, yes, but I'm oncall this weekend, and Internet connectivity is crucial to do my job. Fortunately, the problem was fixed relatively quickly and I didn't get paged in the meantime.
Sonic has more information on their systems blog. BTW, not many ISPs these days are this open about the small and big problems and outages that do occur regularly in large complex systems.
Thursday, February 11, 2010
Hiking in West Maui
After late breakfast we started the day with a short visit to Iao Valley which was quite disappointing to me, as I remembered it a lot less touristy. However, once we were there it all came back to me, and yes it had looked like this when I was there the last time 10 years or so ago. Tour buses, and lots of ... errm ... seniors. We bailed quickly and drove further north to the Waihee Ridge trail head.
This is a real hike up to the mountain, pretty steep in the beginning, but otherwise not too bad. It's roughly 2.5 miles to the summit. After about 1.5 miles we started to get into the clouds, and I had quite a bit of trouble with condensation on my glasses for the last half mile or so to the summit . My glasses completely fogged up, and I could see better where I was going without glasses..
This was a fun hike, though the definition of fun depended on who you asked.
This is a real hike up to the mountain, pretty steep in the beginning, but otherwise not too bad. It's roughly 2.5 miles to the summit. After about 1.5 miles we started to get into the clouds, and I had quite a bit of trouble with condensation on my glasses for the last half mile or so to the summit . My glasses completely fogged up, and I could see better where I was going without glasses..
This was a fun hike, though the definition of fun depended on who you asked.
Wednesday, February 10, 2010
Snorkeling at Kapalua Beach
After breakfast we went snorkeling at Kapalua Beach. The weather was slightly overcast, so light conditions and visibility weren't as good as at Black Rock yesterday, but when the sun was out the colors were spectacular. No sun unfortunately also meant that the water was much cooler, too, (or at least it felt that way). After about 30 minutes in the water I went back to the beach to warm up. Trying to snorkel while your teeth are doing a frost dance in your mouth isn't fun.
After everybody was back out of the water we drove further north to Honolua Bay and watched the surfers. The swell was quite good, surfers were doing their tricks, and the water looked gorgeous from the highway. I might suggest we come back here for snorkeling tomorrow depending on weather and wind.
In the channel between Maui and Molokai there were lots of humpback whales. Some got pretty close to the coast line, so you could see them breathe a couple hundred meters off shore. So overall we got to see quite some action.
After everybody was back out of the water we drove further north to Honolua Bay and watched the surfers. The swell was quite good, surfers were doing their tricks, and the water looked gorgeous from the highway. I might suggest we come back here for snorkeling tomorrow depending on weather and wind.
In the channel between Maui and Molokai there were lots of humpback whales. Some got pretty close to the coast line, so you could see them breathe a couple hundred meters off shore. So overall we got to see quite some action.
Whale Watching and Snorkeling
This morning we went whale watching. It was a nice little trip and we saw a LOT of humpback whales.
They sang. They flapped with their fluke on the water. They breached. During the first half of the trip we got very lucky and the whales came pretty close to the boat. At one time there were about a dozen whales in proximity of the boat. "Blow at 12 o'clock, another at 2, of and there are two more at 8 and 10 o'lock." ... "Woah, did you see that whale breaching at 9 o'clock? Nice!" ... (naturalist on the PA system). I took a bunch of photos and videos, but the photo quality is very so-so, and I don't have the proper means here to make something halfway interesting from the videos. I might post something when I'm back on the mainland.
After a very good cheeseburger Island Style at Cheeseburgers in Paradise, we went Snorkeling at Black Rock in Kaanapali, a few miles north of Lahaina. That was fun. I haven't done this for a few years, so it needed some effort to convince myself it's ok to continue to breathe with the face in the water.
Visibility was not so great, but I saw plenty of tropical fish, and even a big sea turtle. Using a mask with prescription glasses helped a lot.
They sang. They flapped with their fluke on the water. They breached. During the first half of the trip we got very lucky and the whales came pretty close to the boat. At one time there were about a dozen whales in proximity of the boat. "Blow at 12 o'clock, another at 2, of and there are two more at 8 and 10 o'lock." ... "Woah, did you see that whale breaching at 9 o'clock? Nice!" ... (naturalist on the PA system). I took a bunch of photos and videos, but the photo quality is very so-so, and I don't have the proper means here to make something halfway interesting from the videos. I might post something when I'm back on the mainland.
After a very good cheeseburger Island Style at Cheeseburgers in Paradise, we went Snorkeling at Black Rock in Kaanapali, a few miles north of Lahaina. That was fun. I haven't done this for a few years, so it needed some effort to convince myself it's ok to continue to breathe with the face in the water.
Visibility was not so great, but I saw plenty of tropical fish, and even a big sea turtle. Using a mask with prescription glasses helped a lot.
Tuesday, February 09, 2010
Lahaina, Maui
The flight via LAX to Maui was very long. The service and the entertainment program on United worse than expected. Well, I expected the worse and was pleasantly surprised when one of the stewardesses actually smiled. Since the flight wasn't full I managed to switch to an exit row seat after take-off. I brought food and a good book, time passed, and eventally touched down at the really short runway at Kahului.
I got picked up from the airport and we drove to our hotel in Lahaina. Nice hotel. Nice rooms. Small apartments, really.

Later in the afternoon we went on a walk along Front Street, saw a giant cruise ship, and a nice sunset.

I got picked up from the airport and we drove to our hotel in Lahaina. Nice hotel. Nice rooms. Small apartments, really.

Later in the afternoon we went on a walk along Front Street, saw a giant cruise ship, and a nice sunset.

Monday, February 01, 2010
Why you should not leave your truck on railroad tracks
A semi-truck got stuck on a grade crossing in Acworth, GA this morning. Unfortunately, a CSX train was approaching the crossing, and a guy recorded the accident on his cell phone. What I find interesting is how fast the train is still going at the beginning of the video, even though it appears the brakes are already fully engaged, and how long it takes a heavy freight train like this to stop. It finally came to a stop about 300 ft or so behind the crossing.
There's a follow-up video on the same site that shows the front of the train after it pulled back a bit. Looks like mostly minor damage to the locomotive. There were no injuries. The truck driver got out in time, and the sheer mass of the train makes the impact not nearly as bad for the engineer as one might think.
This Youtube video has the dashboard view from the police car seen racing down the street in the first video.
There's a follow-up video on the same site that shows the front of the train after it pulled back a bit. Looks like mostly minor damage to the locomotive. There were no injuries. The truck driver got out in time, and the sheer mass of the train makes the impact not nearly as bad for the engineer as one might think.
This Youtube video has the dashboard view from the police car seen racing down the street in the first video.
High-speed rail in the US?
A reality? Maybe? Finally?
3 hours from San Francisco to Los Angeles. 130+mph service between Boston and Washington. Less than 2 hours from Seattle to Portland.

After the administrations's announcement last week to spend a ton of money on high-speed rail improvements, suddenly this is no longer a dead topic. Of course, vested interests will fight this tooth and nails, and I have low hope that any of this will actually become truly usable in our lifetimes.
Too bad.
3 hours from San Francisco to Los Angeles. 130+mph service between Boston and Washington. Less than 2 hours from Seattle to Portland.

After the administrations's announcement last week to spend a ton of money on high-speed rail improvements, suddenly this is no longer a dead topic. Of course, vested interests will fight this tooth and nails, and I have low hope that any of this will actually become truly usable in our lifetimes.
Too bad.
Thursday, January 21, 2010
Lake Washington and Seattle

I really like this view across Lake Washington towards downtown Seattle. On clear skies you can see as far as to the Olympic Mountains on the other side of Pudget Sound. Evening time provides some awesome light this time of year.
Wednesday, January 20, 2010
BNSF Eastside line

This segment of the BNSF line through Kirkland east of Lake Washington was last used by the "dinner train" running several times a week, as well as BNSF freight locals. Due to freeway expansion near Bellevue the line was cut in the middle, and has now fallen into disrepair. I like the rusty look of the rails telling of better times.
Tuesday, January 19, 2010


Monday, January 18, 2010
I made it!
The rear row is almost done. The big pullout cabinet (also known as "Apothekerschrank") is in. All the knobs and handles are installed. I even managed to deal with a drain emergency. Our sewer pipe was clogged and required a rooter company to come out and clean. And I made it in time to SJC for my flight to Seattle.
Still missing is mostly window dressing: toe kicks, moulding, some caulking. Some areas of exposed drywall need to be textured. We'll hire that out as part of the lighting project. And there's definitely need for paint on the uncovered walls. But the cabinets are now usable. And I started with this project only one week ago!
I made myself a nifty drilling template for the holes in the doors from an old shelf. Any kind of plywood works for this really. Then put the template on the inside of the door, another on the outside to act as a block to prevent splintering when the drill exits the door and secured this contraption with bar clamps, while carefully aligning the edges of the template with the door. This ensures that the knob holes are in the same place and height for all doors. Worked great for the 10 doors I drilled holes in today. IKEA also sells a plastic drilling template called FIXA for less than $3. I'm likely going to use this for the many drawer and pullout fronts to be installed in the other half of the kitchen.
The 15" pullout cabinet requires the use of a template called "S1184/0404" to mount the cabinet front to the pullout drawers. Unfortunately, that templates was nowhere to be found in any of the boxes. I found a copy of it over at IKEA fans, and resized it in GIMP, so the dimensions in the template actually match reality when printed. I was quite nervous that this won't work, and I therefore would drill holes into a $120+ cabinet front in the wrong place, so I re-checked every hole location before drilling.
One the screw holes was right over one of the cutouts where the hinges normally go. However, I found that the plastic filler piece for those cutouts has a depression at just the right place to hold the screw securely in place. Once I mounted the hardware, I put the pullout drawers with the front attached on the support rails, and low-and-behold, it slid in just fine, clicked in place and was ready for action.
I also installed a 1/2 inch birch plywood board as temporary countertop near the fridge until we install the final countertop.
Oh, and yes, now that I got the hang of how putting together an IKEA kitchen works, I will do the other half of the kitchen in the coming weeks as well. But first we need to arrange a few things, and I need some rest.
Sorry, still no photos online. Maybe tomorrow.
Still missing is mostly window dressing: toe kicks, moulding, some caulking. Some areas of exposed drywall need to be textured. We'll hire that out as part of the lighting project. And there's definitely need for paint on the uncovered walls. But the cabinets are now usable. And I started with this project only one week ago!
I made myself a nifty drilling template for the holes in the doors from an old shelf. Any kind of plywood works for this really. Then put the template on the inside of the door, another on the outside to act as a block to prevent splintering when the drill exits the door and secured this contraption with bar clamps, while carefully aligning the edges of the template with the door. This ensures that the knob holes are in the same place and height for all doors. Worked great for the 10 doors I drilled holes in today. IKEA also sells a plastic drilling template called FIXA for less than $3. I'm likely going to use this for the many drawer and pullout fronts to be installed in the other half of the kitchen.
The 15" pullout cabinet requires the use of a template called "S1184/0404" to mount the cabinet front to the pullout drawers. Unfortunately, that templates was nowhere to be found in any of the boxes. I found a copy of it over at IKEA fans, and resized it in GIMP, so the dimensions in the template actually match reality when printed. I was quite nervous that this won't work, and I therefore would drill holes into a $120+ cabinet front in the wrong place, so I re-checked every hole location before drilling.
One the screw holes was right over one of the cutouts where the hinges normally go. However, I found that the plastic filler piece for those cutouts has a depression at just the right place to hold the screw securely in place. Once I mounted the hardware, I put the pullout drawers with the front attached on the support rails, and low-and-behold, it slid in just fine, clicked in place and was ready for action.
I also installed a 1/2 inch birch plywood board as temporary countertop near the fridge until we install the final countertop.
Oh, and yes, now that I got the hang of how putting together an IKEA kitchen works, I will do the other half of the kitchen in the coming weeks as well. But first we need to arrange a few things, and I need some rest.
Sorry, still no photos online. Maybe tomorrow.
Sunday, January 17, 2010
Kitchen Progress
Another long day. I stopped by OSH this morning to pick up a few parts, and a sweet 12V driver tool made by Milwaukee. It's battery lasted me all day screwing in drawer rails, door hinges, and other odd jobs. While I have a 3.6V driver tool (thanks, Dad!) which is great for the railroad layout, the 12V tool has quite a bit more "ooompf".
Anyways, it took me a while to figure out how these IKEA drawers for the big pantry cabinet go together, but once I got the hang of it, it became really easy. The doors have some snazzy hinges that snap into place on the door, and are very easy to hang to the cabinet frame. I installed all doors with exception of the pull-out drawer cabinet, which will be done tomorrow morning. The fridge is also in it's final place now, and of course Charlie is exploring the new climber's garden.
The annoyance of the day was putting together the modified layout for the microwave/oven cabinet. For one, it took me forever to get the electrical for the microwave routed properly, the cord is just a tad too short to reach the outlet. Then I needed two attempts to build supports for the mounting frame. Once that was out of the way, I could finally measure how much space was left for the oven. Much less than I hoped for. Which left only room for one 9 inch high drawer. Unfortunately, the Stat drawer fronts come in 4 inches and 12 inches only. I mounted the rails into the cabinet but didn't put together the drawer while I wait for an ingenious idea how to fix this in a way that actually looks half-way decent. Hmmm, I could use two 4-inch drawer fronts and mount them on top of each other. Anyways, this will have to wait until Im back from Seattle.
Getting the oven mounted was another heavy lifting action which we worked through with no major damage.
Several people asked for photos. No worries, there will be photos posted here. Stay tuned.
Lessons learned:
Careful when snapping together the drawer pieces. It really hurts bad when some skin gets pinched in the process.
Go to bed at a decent time and have enough sleep.
Anyways, it took me a while to figure out how these IKEA drawers for the big pantry cabinet go together, but once I got the hang of it, it became really easy. The doors have some snazzy hinges that snap into place on the door, and are very easy to hang to the cabinet frame. I installed all doors with exception of the pull-out drawer cabinet, which will be done tomorrow morning. The fridge is also in it's final place now, and of course Charlie is exploring the new climber's garden.
The annoyance of the day was putting together the modified layout for the microwave/oven cabinet. For one, it took me forever to get the electrical for the microwave routed properly, the cord is just a tad too short to reach the outlet. Then I needed two attempts to build supports for the mounting frame. Once that was out of the way, I could finally measure how much space was left for the oven. Much less than I hoped for. Which left only room for one 9 inch high drawer. Unfortunately, the Stat drawer fronts come in 4 inches and 12 inches only. I mounted the rails into the cabinet but didn't put together the drawer while I wait for an ingenious idea how to fix this in a way that actually looks half-way decent. Hmmm, I could use two 4-inch drawer fronts and mount them on top of each other. Anyways, this will have to wait until Im back from Seattle.
Getting the oven mounted was another heavy lifting action which we worked through with no major damage.
Several people asked for photos. No worries, there will be photos posted here. Stay tuned.
Lessons learned:
Cabinet frames installed
Phew, this was a long day. All cabinet frames are now installed in their final positions.
Hanging an 27kg over-the-fridge cabinet proved challenging. We managed with some ingenious arm raising mechanism. Think dining room chair, plus step stool, plus wife on top to get her high enough so that she can reach the screws in the back of a 2 feet deep cabinet pretty much just under ceiling.
Lessons learned:
When cutting the rail to hang the wall cabinets measure twice, cut once. It really sucks when you're cutting one inch too short because you forgot to take the cover panel between two cabinets into account.
Walls are never straight.
A sufficiently strong drill can twist off a screw you're trying to force into a wall stud.
Thankfully wall studs are wide enough to allow for a second screw.
Make sure your screws are not longer than the hole you drilled for them, unless they are the self-drilling kind.
Old laminate flooring on top of two layers of old vinyl is about 1/2 inch thick. No matter how much you wish it, a 95.5 inch side cover panel won't magically fit into 95inch air space in front of the cabinets (due to floor and ceiling lights), even if there is 96inches of vertical space around the cabinets. Cutting off 1/4 inch height is not sufficient.
Swearing doesn't make it shorter.
Previous owners are idiots for not ripping out the old flooring when remodeling. Come on folks, it's not THAT hard.
Overall, I think this will come out nicely.
Tomorrow (well, later today really), I'll start hanging doors, installing shelves and drawers, as well as getting the microwave and oven installed in their new cabinet. That will be interesting, as I'm planning to modify the layout of that cabinet to allow for both microwave and oven stacked on top of each other (29 + 18 inches vertical space), while the cabinet is intended to be used with a 28 inch high oven only (the rest is doors and drawers).
I need to cut a 24x36 inch piece of plywood to use as temporary flooring in the nook for the fridge so it's level with the existing flooring until I replace the old laminate floor in a few weeks.
Hanging an 27kg over-the-fridge cabinet proved challenging. We managed with some ingenious arm raising mechanism. Think dining room chair, plus step stool, plus wife on top to get her high enough so that she can reach the screws in the back of a 2 feet deep cabinet pretty much just under ceiling.
Lessons learned:
Overall, I think this will come out nicely.
Tomorrow (well, later today really), I'll start hanging doors, installing shelves and drawers, as well as getting the microwave and oven installed in their new cabinet. That will be interesting, as I'm planning to modify the layout of that cabinet to allow for both microwave and oven stacked on top of each other (29 + 18 inches vertical space), while the cabinet is intended to be used with a 28 inch high oven only (the rest is doors and drawers).
I need to cut a 24x36 inch piece of plywood to use as temporary flooring in the nook for the fridge so it's level with the existing flooring until I replace the old laminate floor in a few weeks.
Saturday, January 16, 2010
Cabinet frames built
Today I built all 5 remaining cabinet frames that go on the rear wall of the kitchen. We're going to move them in place to make sure the whole row is going to fit in the space available. I will also use this opportunity to cut openings in the rear for power connections at the right places. Then it's crunch time again to set up each cabinet frame on its legs and the rear wall board.
I just realized that I can install the drywall anchors through the hole in the cabinet, so we need to put them into place only once.
Lessons learned:
READ THE INSTRUCTIONS ... CAREFULLY, AND IN DETAIL. Then think about what you read and modify where it makes sense.
If something doesn't seem to make sense, think about it some more, and read the instructions again. It's likely you didn't understand it in the first place.
I just realized that I can install the drywall anchors through the hole in the cabinet, so we need to put them into place only once.
Lessons learned:
Friday, January 15, 2010
First cabinet frame is in
Well, I was at IKEA this afternoon to pick up a few missing pieces, and Tatjana's school concert was tonight, so I started working on the layout ... errrm, I mean the kitchen, only after after 8pm.
I started with the big high corner cabinet, not only because it's a fairly standard cabinet, but also because I need to establish the height for the hanging cabinets before hanging them, and it all should line up nicely, right? Anyways, I went slowly and carefully and had the frame assembled a while later. If you've ever done furniture assembly this is not really hard. The hard part came when I realized we need to lift this monster into place because the legs are too whimpy to be used to tip the cabinet on. Nor can you move this thing much on the legs.
After some grunting and swearing the cabinet was in the corner. Turn the page of the setup instructions and I almost fell over backwards. You need to mark the holes for the screws holding the cabinet at the wall. If there are no studs at the position, to install wall anchors, YOU NEED TO LIFT THE DAMN THING AWAY AGAIN. All FIFTY-SIX kilograms at once. Urgh....
So we did, and it wasn't fun. I installed wall anchors, and we put the monster back into place.
Lessons learned:
Glue/tape the legs to the floor of the cabinet, otherwise they fall out if you lift it up.
The rear support wall support board from IKEA is quite whimpy. I used a 3" wide wood plank instead and screwed it to the studs
It's a good idea to use 4 legs for the cabinet. This allows for more weight to be loaded into the cabinet. But don't forget to install these little plastic lids that come with the legs, so that the cabinet sides are directly supported by the legs.
I started with the big high corner cabinet, not only because it's a fairly standard cabinet, but also because I need to establish the height for the hanging cabinets before hanging them, and it all should line up nicely, right? Anyways, I went slowly and carefully and had the frame assembled a while later. If you've ever done furniture assembly this is not really hard. The hard part came when I realized we need to lift this monster into place because the legs are too whimpy to be used to tip the cabinet on. Nor can you move this thing much on the legs.
After some grunting and swearing the cabinet was in the corner. Turn the page of the setup instructions and I almost fell over backwards. You need to mark the holes for the screws holding the cabinet at the wall. If there are no studs at the position, to install wall anchors, YOU NEED TO LIFT THE DAMN THING AWAY AGAIN. All FIFTY-SIX kilograms at once. Urgh....
So we did, and it wasn't fun. I installed wall anchors, and we put the monster back into place.
Lessons learned:
Wednesday, January 13, 2010
The cabinets are on the patio
The backrow of kitchen cabinets is now on the patio. In pieces. Today I disconnected the microwave and oven, moved them aside and demo'ed the remaining two floor to ceiling cabinets.
When I took down the last cabinet, I finally learned why they didn't use the space all the way to the wall: There's a heating duct from the living room extending about an inch into the kitchen. There goes one inch of the 1.5 inch "wiggle room" I left when planning the layout of the new cabinets.
Lessons learned so far:
Demolishing kitchen cabinets youerself is feasible and not really hard.
BE CAREFUL with nails! They are all over the place. Hammer them down, so they don't stick out from the wood.
Wear ear and eye protection.
There will be surprises.
it's easy to crack drywall when you get too excited ripping out shelf supports.
It sucks if cracked drywall is in an area that will be visible later. I'm adding repairing drywall to my repertoire.
Make sure there is enough space for your shiny new cabinets. In the worst case I will have to ... errm ... modify ... the end cabinet to allow space for the heating duct.
When I took down the last cabinet, I finally learned why they didn't use the space all the way to the wall: There's a heating duct from the living room extending about an inch into the kitchen. There goes one inch of the 1.5 inch "wiggle room" I left when planning the layout of the new cabinets.
Lessons learned so far:
Tuesday, January 12, 2010
Google to review China involvement
After a serious attack on Google's corporate infrastructure Google decided to "review our involvement in China" and may "shut down google.cn, as well as close China offices".
The blog post from David Drummond has more details on what exactly happened, as well as the implications.
For corporate America this is an amazing, and very impressive reaction, to an apparently very serious significant incident. Way to go to show some spine, Google.
The blog post from David Drummond has more details on what exactly happened, as well as the implications.
For corporate America this is an amazing, and very impressive reaction, to an apparently very serious significant incident. Way to go to show some spine, Google.
2 cabinets down
Slaming a hammer into a kitchen cabinet is actually FUN.
I took down the pantry and the cabinet over the fridge today. I worked mostly with a crowbar and a hammer, and my trusty jigsaw with a big blade, for cabinet fronts, as well as cuts through shelves and sides. I don't really want to know what nasty stuff they mixed into plywood 40 years ago, but I tried to avoid breathing that dust anyway.
In the socket under the pantry we found the dried up skeleton of a mouse. That guy probably has been down there for quite a while. Looks like he tried to chew up some of the drywall with no success.
Took me just over an hour to take the two cabinets down. The kids were watching and had a blast. Tomorrow I'll do the other two cabinets, and cut away a bit of the laminate flooring, so it's not in the way. Depending on how long this takes, I'll also prep the walls and do some caulking along the floor. If this all works out, I might start setting up the new cabinets on Thursday.
I took down the pantry and the cabinet over the fridge today. I worked mostly with a crowbar and a hammer, and my trusty jigsaw with a big blade, for cabinet fronts, as well as cuts through shelves and sides. I don't really want to know what nasty stuff they mixed into plywood 40 years ago, but I tried to avoid breathing that dust anyway.
In the socket under the pantry we found the dried up skeleton of a mouse. That guy probably has been down there for quite a while. Looks like he tried to chew up some of the drywall with no success.
Took me just over an hour to take the two cabinets down. The kids were watching and had a blast. Tomorrow I'll do the other two cabinets, and cut away a bit of the laminate flooring, so it's not in the way. Depending on how long this takes, I'll also prep the walls and do some caulking along the floor. If this all works out, I might start setting up the new cabinets on Thursday.
Monday, January 11, 2010
98 boxes
Today our new kitchen cabinets were delivered. We're really doing this.
IKEA in East Palo Alto might want to improve the delivery process a little bit. When we ordered the cabinets 2 weeks ago, we chose a delivery window of 8-12 in the morning. Last Wednesday I received a call from Excel, the delivery company that everything is at the warehouse, and they will deliver it on Monday (today). "We will call you on Saturday, to let you know the exact delivery window". ok. cool, that's service I thought.
By Saturday afternoon I did not get a call. I call IKEA, get connected a few times, and eventually a really friendly lady explains, "oh, yes Sir, you will receive a call tonight between 7:30 and 9:30 after they put together the route". ok, fine.
No call.
I called them again on Sunday, "oh, you haven't received a call, because they plan the route today, so we will call you tonight between 7:30 and 9:30". ok. fine.
At 8:30 they call me. "Hello Sir, we will deliver your kitchen between 8am and 12pm tomorrow morning." - uh, could you give me an idea when they'll show up, are we earlier or later in the schedule? - "I don't know SIr, that's really up to the driver, but we can call you half an hour before they get there. Would you like us to do that?" - sure.
Of course, this morning they called while I was at work in the shower.
An IKEA kitches comes in A LOT of boxes. 98 to be exact. Patricia spent a good part of the afternoon checking that all the pieces in the delivery manifest actually showed up.
I spent a couple hours in the garage in the evening sorting the boxes into neat stacks. Each stack represents the major parts of one cabinet. I hope this will make building the cabinets less painful. We'll see how that works out...
IKEA in East Palo Alto might want to improve the delivery process a little bit. When we ordered the cabinets 2 weeks ago, we chose a delivery window of 8-12 in the morning. Last Wednesday I received a call from Excel, the delivery company that everything is at the warehouse, and they will deliver it on Monday (today). "We will call you on Saturday, to let you know the exact delivery window". ok. cool, that's service I thought.
By Saturday afternoon I did not get a call. I call IKEA, get connected a few times, and eventually a really friendly lady explains, "oh, yes Sir, you will receive a call tonight between 7:30 and 9:30 after they put together the route". ok, fine.
No call.
I called them again on Sunday, "oh, you haven't received a call, because they plan the route today, so we will call you tonight between 7:30 and 9:30". ok. fine.
At 8:30 they call me. "Hello Sir, we will deliver your kitchen between 8am and 12pm tomorrow morning." - uh, could you give me an idea when they'll show up, are we earlier or later in the schedule? - "I don't know SIr, that's really up to the driver, but we can call you half an hour before they get there. Would you like us to do that?" - sure.
Of course, this morning they called while I was at work in the shower.
An IKEA kitches comes in A LOT of boxes. 98 to be exact. Patricia spent a good part of the afternoon checking that all the pieces in the delivery manifest actually showed up.
I spent a couple hours in the garage in the evening sorting the boxes into neat stacks. Each stack represents the major parts of one cabinet. I hope this will make building the cabinets less painful. We'll see how that works out...
Sunday, January 10, 2010
over the air line-up
This is the line-up and signal quality I can receive at my house with a Terk HDTVo antenna on the roof.
2_1 KTVU-HD - 95% no issues
2_2 KTVU-SD - 95% no issues
4_1 KRON_SD - 96% no issues
4_2 KRON_HD - 96% no issues
5_1 KPIX-DT - 90% mythtv menu doesn't show
7_1 KGO-HD - 94% no issues
7_2 LIVWELL - 95% no issues
7_3 KGOACCU - 95% no issues
9_1 KQED-HD - 89% very strong MPEG2 artifacts as soon as more than 10% of image changes
9_2 KTEH-DT - 89% no issues
9_3 WORLD - 86% from KQED, strong MPEG2 artifacts
11_1 KNTV_HD - 93% no issues, some MPEG2 artifacts, mythtv menu doesn't show
11_2 NBC Weather - 93% no issues
11_3 US - 93 % Universal Sports
14_1 KDTV-DT - 100% mythtv menu doesn't show
14_2 KFSF-DT - 100% no issues
20_1 KFOY-HD - 95% no issues
20_4 Azteca - 95% no issues
26_1 KTSF-D1 - 97% no issues
26_2 KTSF-D2 - 97% no issues
26_3 KTSF-D3 - 97% no issues
26_4 KTSF-D4 - 97% test picture ?
28_1 KFTL-CA - 82%
28_10 KEAR - 82% Radio
32_1 KMTP-DT - 87% no issues
32_2 WorldChannel- 87% no issues
32_4 WTV - 87% crappy quality, but no issues
32_5 NTD - 87% no issues
36_1 KICU-DT - 100% no issues
36_2 KICU-SD - 100% no issues
38_1 KCNS - 80% no issues
38_2 KCNS-2 - 90% crappy quality
38_3 KCNS-3 - 89% no issues
44_1 KBCW-DT - 94% mythtv menu doesn't show
48_1 MSO? - mythtv menu doesn't show, Telemundo
54_1 KTEH - 100% no issues
54_2 KQED - 100% no issues
54_3 LIFE - 100% no issues
54_4 KIDS - 100% no issues
54_5 V-me - 100% no issues
60_1 KCSM - 96% no issues
60_2 KCSMMhz - 96% no issues
60_3 Jazz-TV - 96% no issues
65_1 ION - 96% no issues
65_2 qubo - 96% no issues
65_3 IONLIfe - 96% minor MPEG2 artifacts, sound skipping
65_4 Worship - 96% no issues
Channels that don't show the MythTV menu are likely FullHD, and MythTV has a little bit trouble with the video driver to show the menu properly.
2_1 KTVU-HD - 95% no issues
2_2 KTVU-SD - 95% no issues
4_1 KRON_SD - 96% no issues
4_2 KRON_HD - 96% no issues
5_1 KPIX-DT - 90% mythtv menu doesn't show
7_1 KGO-HD - 94% no issues
7_2 LIVWELL - 95% no issues
7_3 KGOACCU - 95% no issues
9_1 KQED-HD - 89% very strong MPEG2 artifacts as soon as more than 10% of image changes
9_2 KTEH-DT - 89% no issues
9_3 WORLD - 86% from KQED, strong MPEG2 artifacts
11_1 KNTV_HD - 93% no issues, some MPEG2 artifacts, mythtv menu doesn't show
11_2 NBC Weather - 93% no issues
11_3 US - 93 % Universal Sports
14_1 KDTV-DT - 100% mythtv menu doesn't show
14_2 KFSF-DT - 100% no issues
20_1 KFOY-HD - 95% no issues
20_4 Azteca - 95% no issues
26_1 KTSF-D1 - 97% no issues
26_2 KTSF-D2 - 97% no issues
26_3 KTSF-D3 - 97% no issues
26_4 KTSF-D4 - 97% test picture ?
28_1 KFTL-CA - 82%
28_10 KEAR - 82% Radio
32_1 KMTP-DT - 87% no issues
32_2 WorldChannel- 87% no issues
32_4 WTV - 87% crappy quality, but no issues
32_5 NTD - 87% no issues
36_1 KICU-DT - 100% no issues
36_2 KICU-SD - 100% no issues
38_1 KCNS - 80% no issues
38_2 KCNS-2 - 90% crappy quality
38_3 KCNS-3 - 89% no issues
44_1 KBCW-DT - 94% mythtv menu doesn't show
48_1 MSO? - mythtv menu doesn't show, Telemundo
54_1 KTEH - 100% no issues
54_2 KQED - 100% no issues
54_3 LIFE - 100% no issues
54_4 KIDS - 100% no issues
54_5 V-me - 100% no issues
60_1 KCSM - 96% no issues
60_2 KCSMMhz - 96% no issues
60_3 Jazz-TV - 96% no issues
65_1 ION - 96% no issues
65_2 qubo - 96% no issues
65_3 IONLIfe - 96% minor MPEG2 artifacts, sound skipping
65_4 Worship - 96% no issues
Channels that don't show the MythTV menu are likely FullHD, and MythTV has a little bit trouble with the video driver to show the menu properly.
Saturday, January 09, 2010
I must be crazy ...
We are renovating our kitchen. We picked IKEA's Akurum/Stat kitchen, and will keep pretty much the same layout we currently have, with some minor tweaks. And we're going to do the whole thing ourselves. Well, at least that's the plan.
The cabinets are supposed to arrive on Monday. I believe it when I see it. Today I finished making space in the garage. You can park a car in there again. yay. On Monday, this space will be filled with boxes, and boxes, and boxes. Then over the course of the week, I will demolish the row of cabinets on the backwall of the kitchen. This is where the fridge, the oven and the microwave are located. So until I'm done there won't be fresh bread or cake in the house. But we can continue to use the cooktop, so we'll have some warm food.
I'm planning 2 days for setting up the 5 large cabinets, so I should be done with this before I fly out to Seattle the week after.
Depending on how this works out, we'll tackle the other side of the kitchen, with sink and countertop. This will involve some nasty work to get rid of backsplash tiles, fixing drywall afterwards, and also replacing the current florescent lighting with recessed lighting. For the electrical and the dry wall work we'll get contractors, they'll do a better job than I could, and for anything dealing with house electrical it's a good idea to get someone who knows what they are doing.
Once this is all done, I'll redo the floor.
The first phase should take about a week of elapsed time. The second phase, due to contractors and more complicated arrangement, I'm estimating about 2 weeks. And the floor will be a good weekend's work. So overall, I'm targeting to be done with this in early March (taking work assignments where I need to be out of town into account). Let's see how that all works out.
The cabinets are supposed to arrive on Monday. I believe it when I see it. Today I finished making space in the garage. You can park a car in there again. yay. On Monday, this space will be filled with boxes, and boxes, and boxes. Then over the course of the week, I will demolish the row of cabinets on the backwall of the kitchen. This is where the fridge, the oven and the microwave are located. So until I'm done there won't be fresh bread or cake in the house. But we can continue to use the cooktop, so we'll have some warm food.
I'm planning 2 days for setting up the 5 large cabinets, so I should be done with this before I fly out to Seattle the week after.
Depending on how this works out, we'll tackle the other side of the kitchen, with sink and countertop. This will involve some nasty work to get rid of backsplash tiles, fixing drywall afterwards, and also replacing the current florescent lighting with recessed lighting. For the electrical and the dry wall work we'll get contractors, they'll do a better job than I could, and for anything dealing with house electrical it's a good idea to get someone who knows what they are doing.
Once this is all done, I'll redo the floor.
The first phase should take about a week of elapsed time. The second phase, due to contractors and more complicated arrangement, I'm estimating about 2 weeks. And the floor will be a good weekend's work. So overall, I'm targeting to be done with this in early March (taking work assignments where I need to be out of town into account). Let's see how that all works out.
Monday, January 04, 2010
Servo Motors as Switch Machines

This ended up working better than I hoped.
Below Talheim station are several hidden staging tracks, and there is not a lot of headroom. I spent some time coming up with a way to get Tortoise slow motion underfloor switch machines mounted in the little space I have, but those things are not made for situations where space is tight.
I considered using some kind of pushrod to move the switch points, but that requires some careful calibration and extended remote machinery, which is also tricky. That green thing in the photo on the right is one Tortoise, next to five servos...
 Finally, I read Craig Bisgeier's Housatonic Railroad Construction Journal and about his very positive experience with Servo controllers from Tam Valley Depot. These controllers use regular RC model servos, are relatively cheap, and particularly the QuadP, dead-simple to program. Like the Digitrax DS64 and the Team Digital SRC16 they can be controlled with momentary push-button switches from a control table and can be combined with LEDs to provide visual feedback of switch positions. Unfortunately, the QuadP doesn't have Loconet, so it's unable to report switch positions back to a computer. That's a bummer. But looking around there doesn't appear the be an manufacturer that makes a stationary decoder that combines the ability to control RC servos with Loconet feedback and control. A bit odd.
There are several others that are coming close to the TVD QuadP in options, like the Team Digital SMC4, the ESU Switchpilot Servo (though, after my less than stellar experience with the regular Switchpilots, I'm not going to buy any more Switchpilots), or the Uhlenbrock 67800, but they are either hard to get in the US, or cost quite a bit more. So far (1 week), I'm happy with the QuadP. It doesn't come with a case, so one needs to be a little bit careful with where you place it, but I can live with that.
Antenna Update
Over the weekend I finally moved the TV antenna to the other side of the house. Alex came over and helped me mount it, which was a great. It's sooo much easier to mount the antenna mast to the side of the house if someone is holding it.
As night fell, I hooked it up, when into MythTV and scanned for channels. ... Hmmm. Action36, a couple chinese channels, and KNTV, the local NBC affiliate. That's it? You're kidding me. hdhomerun_config_gui reported signal strengths around 40% and 40-80% symbol quality.
After I stopped being annoyed I realized that I hadn't conected the little amplifier box that came with the antenna. What a difference that made! MythTV found over 20 channels, many in HD, including all major broadcast networks. Signal strength comes in mostly around 70-100% and symbol quality is 80+%.
On some channels the picture is somewhat choppy, cutting out, or showing MPEG2 artifacts. I suspect that's what happens when some bits get dropped on the way from the transmitter to the antenna, and/or my MythTV system has problems playing full HD TV. I'll try some more fine-tuning of antenna orientation to see if this improves signal quality.
I also learned that solar PV systems can cause a lot of reflection of the TV signal, so it's probably A Good Thing that our solar system is behind the antenna.
As night fell, I hooked it up, when into MythTV and scanned for channels. ... Hmmm. Action36, a couple chinese channels, and KNTV, the local NBC affiliate. That's it? You're kidding me. hdhomerun_config_gui reported signal strengths around 40% and 40-80% symbol quality.
After I stopped being annoyed I realized that I hadn't conected the little amplifier box that came with the antenna. What a difference that made! MythTV found over 20 channels, many in HD, including all major broadcast networks. Signal strength comes in mostly around 70-100% and symbol quality is 80+%.
On some channels the picture is somewhat choppy, cutting out, or showing MPEG2 artifacts. I suspect that's what happens when some bits get dropped on the way from the transmitter to the antenna, and/or my MythTV system has problems playing full HD TV. I'll try some more fine-tuning of antenna orientation to see if this improves signal quality.
I also learned that solar PV systems can cause a lot of reflection of the TV signal, so it's probably A Good Thing that our solar system is behind the antenna.
Thursday, December 24, 2009
Frohe Weihnachten 2009
Merry Christmas to everyone.

This year our Christmas bakery was again very productive.
Auch in diesem Jahr war unsere Weihnachtsbaeckerei sehr erfolgreich.

This year our Christmas bakery was again very productive.
Auch in diesem Jahr war unsere Weihnachtsbaeckerei sehr erfolgreich.
Sunday, December 20, 2009
On the importance of line of sight
Lesson learned:
Line of sight matters when choosing a spot for your TV antenna. A lot. TV signals don't penetrate buildings very well, so if you are living in an area with weak or difficult reception, it's incredibly important that the antenna has as much direct line of sight to the broadcast tower as possible.
A wile ago I climbed on the roof with a roof mount antenna in hand, sat down in the middle of the roof and measured reception quality using the hdhomerun_config_gui software. Reception quality was not great, but sufficient for HDTV at head height when sitting on the roof top. Since the mast that came with the antenna is only about 20 inches high, I replaced it with some bent leftover 1" EMT pipe to get the antenna to ~40 inches above the roof.
Then I mounted the antenna on one of the side eaves of the roof.
Turns out I put it on the wrong side of the house. From roughly the middle to the right-hand side of the roof, the line of sight to San Francisco's Sutro tower passes through a gap in the row of houses on the other side of the street. However, from the left hand side of my roof, there is a two story house in the way. Since Sutro tower is 50 miles away, it's not high enough to peek over the top of that house, and the signal is not strong enough to pass through my neighbor's house and make it to my antenna.
I could either mount the antenna higher above the roof, which will require a longer pipe and possibly some bracing and cross-wiring both to keep the antenna stable and to avoid overloading the antenna mount. Or I move the antenna to the right-hand side of the house ... which is what I'll try next.
As is I can receive several local independent channels, as well as PBS, but none of the other big broadcast networks.
Line of sight matters when choosing a spot for your TV antenna. A lot. TV signals don't penetrate buildings very well, so if you are living in an area with weak or difficult reception, it's incredibly important that the antenna has as much direct line of sight to the broadcast tower as possible.
A wile ago I climbed on the roof with a roof mount antenna in hand, sat down in the middle of the roof and measured reception quality using the hdhomerun_config_gui software. Reception quality was not great, but sufficient for HDTV at head height when sitting on the roof top. Since the mast that came with the antenna is only about 20 inches high, I replaced it with some bent leftover 1" EMT pipe to get the antenna to ~40 inches above the roof.
Then I mounted the antenna on one of the side eaves of the roof.
Turns out I put it on the wrong side of the house. From roughly the middle to the right-hand side of the roof, the line of sight to San Francisco's Sutro tower passes through a gap in the row of houses on the other side of the street. However, from the left hand side of my roof, there is a two story house in the way. Since Sutro tower is 50 miles away, it's not high enough to peek over the top of that house, and the signal is not strong enough to pass through my neighbor's house and make it to my antenna.
I could either mount the antenna higher above the roof, which will require a longer pipe and possibly some bracing and cross-wiring both to keep the antenna stable and to avoid overloading the antenna mount. Or I move the antenna to the right-hand side of the house ... which is what I'll try next.
As is I can receive several local independent channels, as well as PBS, but none of the other big broadcast networks.
Monday, December 14, 2009
Article about Disney's steam engines

Trains magazine has a nice online article about the steam engines that power the Disneyworld Railroad here. Interesting read.
Monday, November 23, 2009
Layout updates
I'm getting closer to closing the loop for the second phase of the layout. The middle level tunnel storage track is in, and the S-curve from Abzweig Talheim to the switch at the base of the future incline to Emsingen station is built.
I'm now working on connecting Talheim South to the long ramp along the wall, and then the temporary cross-over to the switch mentioned above. I'll probably need another one or two evenings to piece that together. Then another evening of odds and ends and I should be able to run trains from staging ("Schattenstadt") to Talheim station, via the new loop and Abzweig Talheim back into staging.
Meanwhile track 1 is glued down in Talheim. I'll probably do some very basic scenery around Talheim station, ballast the station tracks and built a simple platform, once the industry tracks to the creek bridge and beyond the street tunnel are installed. I'll skip the signals for now, as I'm very worried I might accidentally break them during the ongoing construction.
Once the loop is closed I'll focus on connecting underfloor, slow-motion switch machines, building a small control table, and going back to try and get computer control working, at least as far as track occupancy detection and basic layout control is concerned. This should keep me busy for a few weeks. All rolling stock needs to be cleaned, and fixed up.
I test-ran all locomotives with an analaog power pack a couple weeks ago. While all need cleaning, several are pretty much ready to be converted to digital operation. A few have mechanical issues that need a closer look (Schweizer Krokodil and BR53), and 2 are completely gummed up. One doesn't move at all, no lights, no nothing (my favorite pair of BR236 aka "Doppeltes Lottchen"), and the other shows light, but doesn't move.
I selected the BR50 with cabin tender as my next "victim". It's a good runner, a nice model, and in excellent condition. It also as a quite finicky lead-truck which will help find problematic sections of track.
In the new year we have a big kitchen renovation coming up, so I don't think I'll have much time for major work. However, once that's done, I'll built out the ramps up to Emsingen station, put in a connecting track, and then move on to building Emsingen station, as well as start the mountain and landscaping at the south end of the layout.
I'm planning to build most of Emsingen station outside the layout room and drop it into place, once all track alignments, wiring and switch machines are installed. It's much easier to work on such a big piece when you can access it freely from all sides. It will likely take up some space in the garage for a couple months...
I'm now working on connecting Talheim South to the long ramp along the wall, and then the temporary cross-over to the switch mentioned above. I'll probably need another one or two evenings to piece that together. Then another evening of odds and ends and I should be able to run trains from staging ("Schattenstadt") to Talheim station, via the new loop and Abzweig Talheim back into staging.
Meanwhile track 1 is glued down in Talheim. I'll probably do some very basic scenery around Talheim station, ballast the station tracks and built a simple platform, once the industry tracks to the creek bridge and beyond the street tunnel are installed. I'll skip the signals for now, as I'm very worried I might accidentally break them during the ongoing construction.
Once the loop is closed I'll focus on connecting underfloor, slow-motion switch machines, building a small control table, and going back to try and get computer control working, at least as far as track occupancy detection and basic layout control is concerned. This should keep me busy for a few weeks. All rolling stock needs to be cleaned, and fixed up.
I test-ran all locomotives with an analaog power pack a couple weeks ago. While all need cleaning, several are pretty much ready to be converted to digital operation. A few have mechanical issues that need a closer look (Schweizer Krokodil and BR53), and 2 are completely gummed up. One doesn't move at all, no lights, no nothing (my favorite pair of BR236 aka "Doppeltes Lottchen"), and the other shows light, but doesn't move.
I selected the BR50 with cabin tender as my next "victim". It's a good runner, a nice model, and in excellent condition. It also as a quite finicky lead-truck which will help find problematic sections of track.
In the new year we have a big kitchen renovation coming up, so I don't think I'll have much time for major work. However, once that's done, I'll built out the ramps up to Emsingen station, put in a connecting track, and then move on to building Emsingen station, as well as start the mountain and landscaping at the south end of the layout.
I'm planning to build most of Emsingen station outside the layout room and drop it into place, once all track alignments, wiring and switch machines are installed. It's much easier to work on such a big piece when you can access it freely from all sides. It will likely take up some space in the garage for a couple months...
Sunday, November 15, 2009
Continous loud tone on a Sunday morning
"wow, my ears are ringing badly today", I thought while making coffee for breakfast this morning. And it wouldn't get better, so I started to look around whether that very high-pitched continuous sound came from outside. Nope. I looked in the garage. Yep, definitely louder, so it's not my ears. It's not the furnace. It's not in the train room, but it gets louder when I go to my work bench and side door. It's not my neighbor either.
Finally, I tracked it down to the UPS of the communications cabinet, an APC BackUPS ES 450. The power LED was blinking between green and red, and unit was clearly emitting the sound. I pressed the power button to shut it down and the noise stopped. Phew. Turned it back on, and the beep came back immediately. Screw it. I turned it off again, plugged the various transformers into the non-UPS sockets. Everything came back up just fine.
After breakfast and being properly caffinated, I looked at the support pages at apcc.com and sure enough they have a FAQ entry describing my exact problems. Battery self-check failed.
Hmmm, so this unit performs an automatic self-test every 14 days, and it *may* fail the test, even though there is nothing wrong with it. The solution is to turn everything off, reset the unit and turn it back on. How lame.
"Legendary reliability" be damned, I know what I'm not going to buy again.
Finally, I tracked it down to the UPS of the communications cabinet, an APC BackUPS ES 450. The power LED was blinking between green and red, and unit was clearly emitting the sound. I pressed the power button to shut it down and the noise stopped. Phew. Turned it back on, and the beep came back immediately. Screw it. I turned it off again, plugged the various transformers into the non-UPS sockets. Everything came back up just fine.
After breakfast and being properly caffinated, I looked at the support pages at apcc.com and sure enough they have a FAQ entry describing my exact problems. Battery self-check failed.
The Back-UPS ES performs an internal self-test every 14 days, the internal self-test checks the integrity of the battery. If the battery fails the self-test, the Power on LED will flash and the unit will emit a constant tone.
[...]
A self test should be performed with the UPS fully charged (charging without interruption or transfer to battery for 5 hours) and normal load attached. To do this, power down all equipment attached to the battery outlets. Then reboot the Back-UPS ES by turning it off then count to 5 and power it back on. If the constant tone clears, then it was a false onbattery condition and the unit has been reset. It now is ready to be used again.
Hmmm, so this unit performs an automatic self-test every 14 days, and it *may* fail the test, even though there is nothing wrong with it. The solution is to turn everything off, reset the unit and turn it back on. How lame.
"Legendary reliability" be damned, I know what I'm not going to buy again.
Friday, November 13, 2009
Pearls Before Swine

Pearls Before Swine - Oct 21 2009
I love this.
I had the newspaper cut-out of this strip in my backpack for the last 3 weeks. It's all crumpled up now. Thankfully, things like this stick around in cyberspace for a long time.
Sunday, November 08, 2009
Law Abiding Citizen
Wow.
This movie keeps you on the edge of your seat for its suspense. It also sets you aback for its in stretches very gruesome, bloody violence. You think about the American justice system with its common use of deals between prosecutors and cooperating witnesses even if they committed murder. The need to prove things in court and to convince a jury, versus career attorneys attempting to get and maintain a high conviction rate. And a man who takes justice into his own hands ingeniously fighting the system along the way. It's shocking and fascinating at the same time.
This is one of those movies that make me appreciate what I have, but nothing I would let my children watch.
Another shocker were the several 2,5,6 year-old children in this R-rated film. It escapes me what those parents are thinking, taking their kids into a movie that is so clearly not age-appropriate.
Century Capitol 16 must not be doing well. It was Saturday evening 8pm, when people are flooding the theaters. The parking lot was half-empty. There were barely any lines at the cashier, or concession stand. Very few people in the lobby. The girl checking tickets could leave her post and walk around for lack of visitors. We could walk into the movie 5 minutes before scheduled starting time and still got an excellent seat. What a difference compared to 10-12 years ago when we moved to the area.
Capitol 16 is clearly one of the older theaters nearby and seems to feel the competition from the AMC theatres at Oakridge and Eastridge which are much more modern, and co-located with a large mall.
Since we were a bit early at the theater we watched Michael Jackson's 'This is it' for a little while. It was nice and ok for the 15 minutes, but I don't know whether I would make it awake through the full 2 hours of the movie. And yes, that auditorium had also at most 10% of the seats taken.
This movie keeps you on the edge of your seat for its suspense. It also sets you aback for its in stretches very gruesome, bloody violence. You think about the American justice system with its common use of deals between prosecutors and cooperating witnesses even if they committed murder. The need to prove things in court and to convince a jury, versus career attorneys attempting to get and maintain a high conviction rate. And a man who takes justice into his own hands ingeniously fighting the system along the way. It's shocking and fascinating at the same time.
This is one of those movies that make me appreciate what I have, but nothing I would let my children watch.
Another shocker were the several 2,5,6 year-old children in this R-rated film. It escapes me what those parents are thinking, taking their kids into a movie that is so clearly not age-appropriate.
Century Capitol 16 must not be doing well. It was Saturday evening 8pm, when people are flooding the theaters. The parking lot was half-empty. There were barely any lines at the cashier, or concession stand. Very few people in the lobby. The girl checking tickets could leave her post and walk around for lack of visitors. We could walk into the movie 5 minutes before scheduled starting time and still got an excellent seat. What a difference compared to 10-12 years ago when we moved to the area.
Capitol 16 is clearly one of the older theaters nearby and seems to feel the competition from the AMC theatres at Oakridge and Eastridge which are much more modern, and co-located with a large mall.
Since we were a bit early at the theater we watched Michael Jackson's 'This is it' for a little while. It was nice and ok for the 15 minutes, but I don't know whether I would make it awake through the full 2 hours of the movie. And yes, that auditorium had also at most 10% of the seats taken.
Monday, November 02, 2009
What's new around the layout
I've done a couple things around the layout in the last month.
Removed the catenary.
 Yup, The catenary that took me a couple weeks to build up is all gone from the layout again. I initially installed it because I wanted the pantographs of my electrics to be guided nicely through the long tunnels on the way to and within staging. There are several tight spots where I felt I need to push the pantographs down to make it through the opening. Turns out that a fully extended pantograph is about as high as the catenary masts. I also realized (and anyone who did this kind of thing before would tell me), that it's a *really* bad idea to have catenary wires in the already tight staging space under Talheim station. They just get horribly in the way whenever one tries to access a derailed train down there.
Instead I will let the engines run with the pantographs fully extended inside the tunnels and provide "catch" devices to gracefully lower the pantographs to normal catenary height at tunnel portals and in the one or two tight spots where I really don't have enough clearance (notably below the street tunnel at Talheim station.
Installed guard rails
 With open frame construction and various ramps connecting the various levels, there is always potential that a derailed engine or cars runs off the track and falls all the way down to the floor. Model meets laminate flooring... Usually not a pretty sight once the model lands. I installed protection/guide railings around staging, the ramps, and some curves to protect derailed trains.
Track in Talheim
I glued down more track in Talheim, and am getting ready to install the occupancy detectors. Contrary to staging, which uses current draw sensors, on the rest of the layout I'm using simpler detectors that can detect when wheelsets are in an insulated section of a rail. This will require cutting gaps in the rails and soldering quite a few detection leads. Fun. I'm using the trackage in Talheim to test out the approach, before I do this elsewhere.
Debugging ESU Switchpilot
 It looks like my Switchpilots are the first revision and are a bit unstable. They occasionally forget their address, don't turn off voltage to the switch, and/or don't follow their programming. I'm unimpressed. I contacted ESU Support, but haven't heard back yet.
Finally, I fixed a few minor things and relocated a cross-over switch on the ramp from staging that caused several derailments.
Removed the catenary.
 Yup, The catenary that took me a couple weeks to build up is all gone from the layout again. I initially installed it because I wanted the pantographs of my electrics to be guided nicely through the long tunnels on the way to and within staging. There are several tight spots where I felt I need to push the pantographs down to make it through the opening. Turns out that a fully extended pantograph is about as high as the catenary masts. I also realized (and anyone who did this kind of thing before would tell me), that it's a *really* bad idea to have catenary wires in the already tight staging space under Talheim station. They just get horribly in the way whenever one tries to access a derailed train down there.
Instead I will let the engines run with the pantographs fully extended inside the tunnels and provide "catch" devices to gracefully lower the pantographs to normal catenary height at tunnel portals and in the one or two tight spots where I really don't have enough clearance (notably below the street tunnel at Talheim station.
Installed guard rails
 With open frame construction and various ramps connecting the various levels, there is always potential that a derailed engine or cars runs off the track and falls all the way down to the floor. Model meets laminate flooring... Usually not a pretty sight once the model lands. I installed protection/guide railings around staging, the ramps, and some curves to protect derailed trains.
Track in Talheim
I glued down more track in Talheim, and am getting ready to install the occupancy detectors. Contrary to staging, which uses current draw sensors, on the rest of the layout I'm using simpler detectors that can detect when wheelsets are in an insulated section of a rail. This will require cutting gaps in the rails and soldering quite a few detection leads. Fun. I'm using the trackage in Talheim to test out the approach, before I do this elsewhere.
Debugging ESU Switchpilot
 It looks like my Switchpilots are the first revision and are a bit unstable. They occasionally forget their address, don't turn off voltage to the switch, and/or don't follow their programming. I'm unimpressed. I contacted ESU Support, but haven't heard back yet.
Finally, I fixed a few minor things and relocated a cross-over switch on the ramp from staging that caused several derailments.
Tuesday, October 20, 2009
Goodbye KDE
After getting fed up with KDE, we switched to Gnome. While some things took some getting used to (again, mostly around dealing with digital photos), overall the experience is a lot more pleasant.
The UI doesn't get nearly as much into the way as KDE does. Gnome has less bells and whistles, but things mostly just work, and on top of that, it's much, much faster than KDE4.
F-Spot is ok, but also suffers from the "hey, you didn't do anything, so I won't write that photo to disk when you tell me to save it after I rotated it for you automatically". One day I'll write (or find) a simple shell script that'll go through a folder and correctly rotate the photos on disk based on EXIF information.
The UI doesn't get nearly as much into the way as KDE does. Gnome has less bells and whistles, but things mostly just work, and on top of that, it's much, much faster than KDE4.
F-Spot is ok, but also suffers from the "hey, you didn't do anything, so I won't write that photo to disk when you tell me to save it after I rotated it for you automatically". One day I'll write (or find) a simple shell script that'll go through a folder and correctly rotate the photos on disk based on EXIF information.
Monday, October 19, 2009

Sunday, October 18, 2009
Over the air HDTV - figuring out the basics
I'm sick and tired paying $50 a month to a company I despise. Comcast got enough money from me over the years and our TV viewing habits have changed enough that I don't value the cable-only channels nearly as much as I used to.
So over-the-air HDTV it is. My hdhomerun box supports both cable and over the air HDTV (even at the same time...) I went to the local Fry's and found a shelf full of indoors antennas. Wow, quite a selection. I pick one that sounded decent, went home, set it up in the garage and ... only got channel 36 "Action 36". Urgh.
That's when I learned about AntennaWeb. Plugged in my address and ... oha, all the major stations in the Bay Area transmit from San Francisco (50 miles away). Except Action 36, which has an antenna in downtown San Jose (18 miles) and is rated as the only station I should be able to receive with a simple indoor antenna.
Accoding to AntennaWeb, I need an antenna with the "blue" and "violet" color codes due to my location and distance from the broadcast towers, which require an amplified, large directional outdoor antenna. In other words, a commonly known "TV antenna".
Fry's doesn't have any (!) outdoor antennas, nor does the local Walmart. Both carry lots and lots of indoor antennas ("perfect for HDTV"), which are barely suitable to receive TV signals from up to 20 miles away. The vast majority of the South Bay doesn't fit that description. No wonder half of the boxes were returned...
Radio Shack had outdoor antennas, but not amplified, they weren't even rated for "blue", and still cost over $70, plus $35 for an amplifier.
In the end I ordered a Terk HDTVo antenna from Amazon, which showed up this week.
Today I went on the roof to test reception with that antenna. I used the hdhomerun_config_gui application running on my TV computer in the living room with the X Window output redirected to my Mac laptop, which I carried on the roof with me. Must have been quite a funny sight. Me on the roof, with an antenna in one hand, typing away at laptop in my lap with the other...
I'm able to receive all major broadcast networks, FOX, CBS, ABC, NBC, PBS, plus a bunch of local independent stations. KTVU, the local FOX affiliate, comes in weakest of the bunch, so I'm using as my guide when directing the antenna.
I planned to mount the antenna to the eaves board of my roof, so that it overlooks the neighboring house. Turns out that the signal of KTVU severely degrades about 1 feed above the roof line, and is reasonably strong at about 3 feet above the roof line. So I need (at least) a small mast. I don't feel like penetrating my roof with mounting a TV antenna. Instead I will likely mount the mast on a side-wall on the left side of the house above the master beed room, where the roof is not quite as high above the ground.
Of course I need to ground the antenna mast, as well as the antenna cable. I'm going to use the electrical conduit of the solar PV system for ground, and reuse the grounding block installed by my dear friends at Comcast for grounding the antenna cable.
Now, where do I find a suitable 5-6 ft long antenna mast and appropriate mounting hardware nearby?
So over-the-air HDTV it is. My hdhomerun box supports both cable and over the air HDTV (even at the same time...) I went to the local Fry's and found a shelf full of indoors antennas. Wow, quite a selection. I pick one that sounded decent, went home, set it up in the garage and ... only got channel 36 "Action 36". Urgh.
That's when I learned about AntennaWeb. Plugged in my address and ... oha, all the major stations in the Bay Area transmit from San Francisco (50 miles away). Except Action 36, which has an antenna in downtown San Jose (18 miles) and is rated as the only station I should be able to receive with a simple indoor antenna.
Accoding to AntennaWeb, I need an antenna with the "blue" and "violet" color codes due to my location and distance from the broadcast towers, which require an amplified, large directional outdoor antenna. In other words, a commonly known "TV antenna".
Fry's doesn't have any (!) outdoor antennas, nor does the local Walmart. Both carry lots and lots of indoor antennas ("perfect for HDTV"), which are barely suitable to receive TV signals from up to 20 miles away. The vast majority of the South Bay doesn't fit that description. No wonder half of the boxes were returned...
Radio Shack had outdoor antennas, but not amplified, they weren't even rated for "blue", and still cost over $70, plus $35 for an amplifier.
In the end I ordered a Terk HDTVo antenna from Amazon, which showed up this week.
Today I went on the roof to test reception with that antenna. I used the hdhomerun_config_gui application running on my TV computer in the living room with the X Window output redirected to my Mac laptop, which I carried on the roof with me. Must have been quite a funny sight. Me on the roof, with an antenna in one hand, typing away at laptop in my lap with the other...
I'm able to receive all major broadcast networks, FOX, CBS, ABC, NBC, PBS, plus a bunch of local independent stations. KTVU, the local FOX affiliate, comes in weakest of the bunch, so I'm using as my guide when directing the antenna.
I planned to mount the antenna to the eaves board of my roof, so that it overlooks the neighboring house. Turns out that the signal of KTVU severely degrades about 1 feed above the roof line, and is reasonably strong at about 3 feet above the roof line. So I need (at least) a small mast. I don't feel like penetrating my roof with mounting a TV antenna. Instead I will likely mount the mast on a side-wall on the left side of the house above the master beed room, where the roof is not quite as high above the ground.
Of course I need to ground the antenna mast, as well as the antenna cable. I'm going to use the electrical conduit of the solar PV system for ground, and reuse the grounding block installed by my dear friends at Comcast for grounding the antenna cable.
Now, where do I find a suitable 5-6 ft long antenna mast and appropriate mounting hardware nearby?
Friday, October 16, 2009
The creek is done
I spent months on getting the creek under the bridges in Talheim right. It's finally done, and I'm very happy with the result. Click the picture. Seriously.


Tuesday, October 13, 2009
Lots of water
We had lots of rainfall today.

This is Permanente Creek at Charleston Road in the late afternoon of October 13th.

And this is what it looks on normal days...

This is Permanente Creek at Charleston Road in the late afternoon of October 13th.

And this is what it looks on normal days...
Friday, October 09, 2009
Peace Nobel Price for Barack Obama ... Really?
I couldn't believe the news this morning. Really? No, seriously? Obama has been in office for a mere 9 months and is already receiving the Peace Nobel Price? What will he get after 4 years?
I am very, very happy for our President to be the recipient. It's a great honor. A huge surprise. Apparently, even the White House initially had only a single word comment: "Wow". How many sitting presidents have received the Nobel Price while in office? It's a very small club.
However, I believe Obama should choose not to accept the price.
It comes too early. Much too early. While he is doing many good things in international relations, he doesn't have measurable results to show. ... He's on a great trajectory. The scores look good. His work and projects are showing great promise. He should re-apply for promotion next year when the tricky projects are rolled out and he has shown this great performance over a longer period of time. ... whoops, it's performance review season at work, and my committee notes provide just the right vocabulary ;-)
Update:
It's been reported that Obama accepted the price. The Washington Post has a nice summary mirroring my sentiments.
I am very, very happy for our President to be the recipient. It's a great honor. A huge surprise. Apparently, even the White House initially had only a single word comment: "Wow". How many sitting presidents have received the Nobel Price while in office? It's a very small club.
However, I believe Obama should choose not to accept the price.
It comes too early. Much too early. While he is doing many good things in international relations, he doesn't have measurable results to show. ... He's on a great trajectory. The scores look good. His work and projects are showing great promise. He should re-apply for promotion next year when the tricky projects are rolled out and he has shown this great performance over a longer period of time. ... whoops, it's performance review season at work, and my committee notes provide just the right vocabulary ;-)
Update:
It's been reported that Obama accepted the price. The Washington Post has a nice summary mirroring my sentiments.
Thursday, October 08, 2009


Thursday, October 01, 2009
Layout updates
Over the last couple months I spent a lot of time experimenting with track alignment and options for Emsingen. My updated requirements list is roughly as follows
passenger station for a small city (it's ok to have a semi-rural/small town look & feel)
ability for train meets (i.e. at least one siding long enough to hold a decent sized freight train)
single through track (I'm building a single track main line after all)
proper signals for two direction operation on at least two tracks
enough sidings to allow for terminus operation (i.e. some passenger trains end in this station, the locomotive runs around the cars and the train later leaves in the direction it came from)
Now the list of nice to haves:
"lok station" (i.e. small coaling/operations/service facilities for steam + diesel locomotives to service locomotives of trains ending in Emsingen)
engine shed (for one or more locomotives)
2+ industrial spurs or loading options
some multi-use yard tracks to break down/shuffle car cuts left for Emsingen and Talheim by a freight train passing through
When I started tearing up the original plans, I relatively quickly came to add a couple more nice to haves:
lokstation/engine shed needs to be on the near end of the station from the controls (what's the point of e.g. a turntable, if it's hidden behind the engine shed/roundhouse and servicing facilities)
a (small? how small?) turntable would be really cool.
sorting of cars needs to happen on near side of the station, too. You need to see what's moving where
yard tracks need to be straight
ooops. Here's my first try:

The location of the station building is pretty much set on the city side of the tracks. I converted the former freight area to become the lok station, including a 3 stall round house, and turntable. The round house, as a side-effect, conveniently hides the tunnel entrance of the ramp to the middle level, so I'm hoping that the effect will be "train enters the stage" instead of "train exits yet another tunnel". The space for the service area is tight but workable, given it's a small terminus with only a few road locos to service, as well as 1 or 2 locomotives stationed here.
On the other side of the main track is an open air loading ramp, or maybe I put some oil tanks in that corner on the inside of the right turn towards the bridge.
The yard tracks are a bit odd, and too short for any real work. There is a limit on how deep the station area can become without encroaching on space needed for the middle level. However, they correspond well to the available length of the yard lead. One problem I have with all approaches is that I'm having trouble properly operating the arrival/departure track without using the main line track. I kind of want to maintain the ability for fairly busy operation on the main line (either automated, or by a second operator), as much as that is possible on a single track ...

A simplified approach for the yard tracks. Basically, I left enough track to shuffle cars for switching and local deliveries.
I also re-aligned the tracks in the lok station a bit. I'm not happy with how the switches to the lok station clog up track 1 in front of the station building. I want servicing to be located between the tracks and the turn table. The setup is a bit loose here, since I don't have a turntable (yet), and most roundhouses require a certain distance between turntable and doors, which is larger than what I accounted for here. I might have to circle the round house to the right and potentially move the turntable more to the left further into the curve, which would affect the arrangement of the servicing and access tracks. Clearly more accurate planning is needed for this area.

A sneaky approach to get more usable length for the yard tracks by using slim switches with a small angle, and allowing the tracks to encroach on middle level territory. The lead track is to short to hold a full cut of cars from the longest yard track, plus locomotive.

Here I attempted to address the problem of "how do I get a complete train from the yard onto the main line with no switching maneuvers". As a side effect the industry track on the right gained some space. Unfortunately this also meant more encroaching on middle level territory.

Same idea, with longer yard tracks and simplified trackage, no dedicated yard lead.

A variation on the theme that leaves much more space around the industry track, but again requires somewhat odd movements for yard operations.

Going back to basics. Instead of trying to squeeze a lot of yard operations into an impossible space, I just go with two storage tracks, making them as long as I possibly can. The alignment of the mainline track slightly changed by removing the curved switch, which leaves space to arrange the two storage tracks more neatly.
What I like about this setup is that it allows me to do some switching operations, without eating into space I had originally allocated for scenery, industry, and roads.
Less is More.
This plan is also updated with the actual track layout I'm using on the middle level around Talheim station and on to the tunnel.
Now the list of nice to haves:
When I started tearing up the original plans, I relatively quickly came to add a couple more nice to haves:
ooops. Here's my first try:

The location of the station building is pretty much set on the city side of the tracks. I converted the former freight area to become the lok station, including a 3 stall round house, and turntable. The round house, as a side-effect, conveniently hides the tunnel entrance of the ramp to the middle level, so I'm hoping that the effect will be "train enters the stage" instead of "train exits yet another tunnel". The space for the service area is tight but workable, given it's a small terminus with only a few road locos to service, as well as 1 or 2 locomotives stationed here.
On the other side of the main track is an open air loading ramp, or maybe I put some oil tanks in that corner on the inside of the right turn towards the bridge.
The yard tracks are a bit odd, and too short for any real work. There is a limit on how deep the station area can become without encroaching on space needed for the middle level. However, they correspond well to the available length of the yard lead. One problem I have with all approaches is that I'm having trouble properly operating the arrival/departure track without using the main line track. I kind of want to maintain the ability for fairly busy operation on the main line (either automated, or by a second operator), as much as that is possible on a single track ...

A simplified approach for the yard tracks. Basically, I left enough track to shuffle cars for switching and local deliveries.
I also re-aligned the tracks in the lok station a bit. I'm not happy with how the switches to the lok station clog up track 1 in front of the station building. I want servicing to be located between the tracks and the turn table. The setup is a bit loose here, since I don't have a turntable (yet), and most roundhouses require a certain distance between turntable and doors, which is larger than what I accounted for here. I might have to circle the round house to the right and potentially move the turntable more to the left further into the curve, which would affect the arrangement of the servicing and access tracks. Clearly more accurate planning is needed for this area.

A sneaky approach to get more usable length for the yard tracks by using slim switches with a small angle, and allowing the tracks to encroach on middle level territory. The lead track is to short to hold a full cut of cars from the longest yard track, plus locomotive.

Here I attempted to address the problem of "how do I get a complete train from the yard onto the main line with no switching maneuvers". As a side effect the industry track on the right gained some space. Unfortunately this also meant more encroaching on middle level territory.

Same idea, with longer yard tracks and simplified trackage, no dedicated yard lead.

A variation on the theme that leaves much more space around the industry track, but again requires somewhat odd movements for yard operations.

Going back to basics. Instead of trying to squeeze a lot of yard operations into an impossible space, I just go with two storage tracks, making them as long as I possibly can. The alignment of the mainline track slightly changed by removing the curved switch, which leaves space to arrange the two storage tracks more neatly.
What I like about this setup is that it allows me to do some switching operations, without eating into space I had originally allocated for scenery, industry, and roads.
Less is More.
This plan is also updated with the actual track layout I'm using on the middle level around Talheim station and on to the tunnel.
Monday, September 14, 2009
200!
Here's to another 100 posts!

and yes, Hello Kitty Beck's beer is about as weird as the idea of writing a blog sounded to me almost 4 years ago...

and yes, Hello Kitty Beck's beer is about as weird as the idea of writing a blog sounded to me almost 4 years ago...
Why does KDE 4 suck so badly?
Yesterday I installed Ubuntu 9.04 on Patricia's computer at home. The installation process was very easy, as usual for Ubuntu. I proceeded to install kubuntu with KDE4, since we prefer using KDE over Gnome.
One login later my socks were blown off. Wow! So much eye candy. Animated windows. Transparency effects. A pretty task bar. ... but, where's my desktop? What did they do to the K menu? How do I modify menu entries? Where's konqueror? Where does my digital camera show up? What is this plasma thingy? How do I turn of this active widget thingy that's slowing my computer to a crawl? Why does it take so long to launch an application?
First I turned off all the desktop effects, which are pretty, but make KDE *really* slow to handle.
Next, I tried to slim the default fat window title bars (whose fatness remind me of Windows XP). This is apparently only possible by selecting a different theme than Plastik.
Now, dealing with this horrible contraption they call the K menu. It's a big, fixed size box that shows all the menus one would expect in a Startmenu, sorted into various tabs (Favorites, Applications, Computer, Leave, ..)
If the menu is longer than what fits into the box (i.e. > 7 entries), a scroll bar appears and one needs to scroll. In the age of 32" wide-screen computer monitors, this forces me to search for the application I want to start via a little peep hole in the lower left corner of my screen. Going back up the menu tree requires clicking on the a slim bar to the left of the menu list that only has a back marker once you hover with your mouse over it.
What's worse, I haven't found a option to rename, delete, or move menu entries around. This is particularly annoying in the Leave tab on this computer, since there are 8 options and two separator lines, which moves the Shutdown menu entry just below the bottom of this box, so one is forced to click in 5 places to shut down the computer:
K -> Leave -> scroll down -> Shutdown -> Shutdown now
On to the widgets screen. KDE3.x had, like most modern operating systems, the concept of a desktop. Most people clutter up their desktop with various icons, just like they clutter up their desk with paper and stuff. KDE4 took a cue from Macintosh and added widgets that by default show in the background of the screen, instead of the familiar desktop. While on the Mac the widgets are overlaid on top of the regular screen, in KDE4 they are behind all other windows (like the old Microsoft Active Desktop). The point of this escapes me. I also turned this off.
Digital camera integration with gphoto, konqueror, gwenview, and the kamera io slave worked pretty nicely in KDE3. Not so in KDE4. Looks like for now I'll open konqueror and go to camera:/ manually. gwenview became totally useless. It rotates photos for me when viewing them, but there is no way to save just the rotated photo.
konqueror has a plug-in supposedly using imagemagick to rotate photos (great!), but I can't figure out how to make it actually do that, all it shows now under actions is options to convert images to other formats.
I'm aware that most of this is fixable. My point, however, is why this needs to be so unintuitive. E.g. I actually like the rotate photo buttons in Windows Explorer. They are simple and get the job done. Loading The Gimp for every rotated photo is just crazy.
Enough whining. On to figuring out how to make this work the way I want...
One login later my socks were blown off. Wow! So much eye candy. Animated windows. Transparency effects. A pretty task bar. ... but, where's my desktop? What did they do to the K menu? How do I modify menu entries? Where's konqueror? Where does my digital camera show up? What is this plasma thingy? How do I turn of this active widget thingy that's slowing my computer to a crawl? Why does it take so long to launch an application?
First I turned off all the desktop effects, which are pretty, but make KDE *really* slow to handle.
Next, I tried to slim the default fat window title bars (whose fatness remind me of Windows XP). This is apparently only possible by selecting a different theme than Plastik.
Now, dealing with this horrible contraption they call the K menu. It's a big, fixed size box that shows all the menus one would expect in a Startmenu, sorted into various tabs (Favorites, Applications, Computer, Leave, ..)
If the menu is longer than what fits into the box (i.e. > 7 entries), a scroll bar appears and one needs to scroll. In the age of 32" wide-screen computer monitors, this forces me to search for the application I want to start via a little peep hole in the lower left corner of my screen. Going back up the menu tree requires clicking on the a slim bar to the left of the menu list that only has a back marker once you hover with your mouse over it.
What's worse, I haven't found a option to rename, delete, or move menu entries around. This is particularly annoying in the Leave tab on this computer, since there are 8 options and two separator lines, which moves the Shutdown menu entry just below the bottom of this box, so one is forced to click in 5 places to shut down the computer:
K -> Leave -> scroll down -> Shutdown -> Shutdown now
On to the widgets screen. KDE3.x had, like most modern operating systems, the concept of a desktop. Most people clutter up their desktop with various icons, just like they clutter up their desk with paper and stuff. KDE4 took a cue from Macintosh and added widgets that by default show in the background of the screen, instead of the familiar desktop. While on the Mac the widgets are overlaid on top of the regular screen, in KDE4 they are behind all other windows (like the old Microsoft Active Desktop). The point of this escapes me. I also turned this off.
Digital camera integration with gphoto, konqueror, gwenview, and the kamera io slave worked pretty nicely in KDE3. Not so in KDE4. Looks like for now I'll open konqueror and go to camera:/ manually. gwenview became totally useless. It rotates photos for me when viewing them, but there is no way to save just the rotated photo.
konqueror has a plug-in supposedly using imagemagick to rotate photos (great!), but I can't figure out how to make it actually do that, all it shows now under actions is options to convert images to other formats.
I'm aware that most of this is fixable. My point, however, is why this needs to be so unintuitive. E.g. I actually like the rotate photo buttons in Windows Explorer. They are simple and get the job done. Loading The Gimp for every rotated photo is just crazy.
Enough whining. On to figuring out how to make this work the way I want...
Sunday, August 16, 2009
Visiting the Selfkantbahn - Sunday
It was a long evening yesterday, and I had trouble getting out of bed at first. Reminder to self: If you are not used to drinking beer, do it in moderation...
However, today's the day!
Shortly before 9am we were back in Schierwaldenrath where Christoph and Jan had already prepared the locomotive for the day. There was not much left for us to do so we went inside the car hall for coffee and breakfast. Yup, the two of them did the job of oiling, lubing, and a light polish in less than a quarter of the time it took us yesterday...
 The morning was cool, with patchy fog and overcast skies, and by 10am I found myself in the warm cab of the locomotive switching an extra freight car to the tail end of the train. By now I was much more comfortable with the controls and had a blast. I must have been grinning over both ears most of the time. I picked up the freight car, spotted it to the end of the train, and then pulled the train forward into the service area so that the folks in the dining car could comfortably load food and drinks for the day.
It's not trivial to stop the train in a way so that the dining car ends up near the entrance door to the workshop, since from the cab you can't see neither the car in the train, nor the entrance door. All you know is roughly how fast the train is going, and hear over radio how far away the car still is ("two car lengths, one car length, 1/2 car length"). No-one complained, so I guess I stopped reasonably well.
 Once the dining car was loaded, we pushed the train back to the platform, uncoupled and topped off water. Then it was back to the coaling platform for refueling and cleaning out the ash box, and my Dad took over to bring the locomotive to the head of the train for the first run of the day. Thomas took some excellent video footage of my switching maneuvers with my camera and I'll post that (and more video footage) once it's edited.
 Wolfram showed up shortly before 11am, and immediately started taking pictures. He looked so professional in attitude and attire that I had to clarify with the other seminar participants that, "yes, that's my brother, he lives nearby, and no he doesn't do this for a living". Quite a few passengers filled the platform, and at 11:15am we took off for the first run with Dad at the controls. He did a great job and carefully guided the train to Gillrath. It was very hard to take good photos or decent video footage even from the car behind the engine. The angles are not right and you often wish to be flying next to the train so you can film through the open cab windows.
 After the return trip we had a quick lunch since it was almost time for the second run. Bernd took the train down to Gillrath and I brought it back to Schierwaldenrath. I (again) had a little problem with braking when we got to Birgden and accidentally left the brake lever in a slightly open position so the stop in Birgden became ... errrm ... a bit abrupt towards the end. Did I mention that braking is hard? Especially when you try to be gentle to the equipment. Nevertheless, I thoroughly enjoyed the ride. Back in Schierwadenrath, I didn't want to leave the cab, I could have go on and on, but sadly my turn was over.
 Wolfram, Dad, and me skipped the 3rd run and had excellent ice cream at the station restaurant instead. While Dad relaxed in the shade, Wolfram and I climbed on the loading ramp and waited for the train to return. It was already time to say Goodbye to Wolfram since he wanted to get back on the road to drive home.
Thomas took the train to Gillrath, and I managed to get back in the cab for the return trip to Schierwaldenrath with Jan at the controls. It's very interesting and enlightening to watch a professional engineer who knows the line by heart, play with the controls, move the locomotive with centimeter accuracy, and just the right amount of steam or braking. It was also another demonstration of how a good team of stoker and engineer can work together in an almost artful dance to feed and care for the machine.
 Once we returned we received our certificates and now it was really time to say Goodbye. To the group, to the railroad, the people that cared for us all weekend long, and of course "our" locomotive 20.
 On the way home the sounds and sights of the weekend continued to play in my head. It was an awesome experience, and if I lived closer to Schierwaldenrath I would be there more often. Contrary to modern locomotives, steam engines feel a lot more alive, a feeling that is impossible to experience by looking at photos or watching them on TV. If you ever have a chance to see steam engines in operation, ride in a cab, or maybe even, take the controls yourselves, go and you won't regret it.
Friday - Saturday
However, today's the day!
Shortly before 9am we were back in Schierwaldenrath where Christoph and Jan had already prepared the locomotive for the day. There was not much left for us to do so we went inside the car hall for coffee and breakfast. Yup, the two of them did the job of oiling, lubing, and a light polish in less than a quarter of the time it took us yesterday...
 The morning was cool, with patchy fog and overcast skies, and by 10am I found myself in the warm cab of the locomotive switching an extra freight car to the tail end of the train. By now I was much more comfortable with the controls and had a blast. I must have been grinning over both ears most of the time. I picked up the freight car, spotted it to the end of the train, and then pulled the train forward into the service area so that the folks in the dining car could comfortably load food and drinks for the day.
It's not trivial to stop the train in a way so that the dining car ends up near the entrance door to the workshop, since from the cab you can't see neither the car in the train, nor the entrance door. All you know is roughly how fast the train is going, and hear over radio how far away the car still is ("two car lengths, one car length, 1/2 car length"). No-one complained, so I guess I stopped reasonably well.
 Once the dining car was loaded, we pushed the train back to the platform, uncoupled and topped off water. Then it was back to the coaling platform for refueling and cleaning out the ash box, and my Dad took over to bring the locomotive to the head of the train for the first run of the day. Thomas took some excellent video footage of my switching maneuvers with my camera and I'll post that (and more video footage) once it's edited.
 Wolfram showed up shortly before 11am, and immediately started taking pictures. He looked so professional in attitude and attire that I had to clarify with the other seminar participants that, "yes, that's my brother, he lives nearby, and no he doesn't do this for a living". Quite a few passengers filled the platform, and at 11:15am we took off for the first run with Dad at the controls. He did a great job and carefully guided the train to Gillrath. It was very hard to take good photos or decent video footage even from the car behind the engine. The angles are not right and you often wish to be flying next to the train so you can film through the open cab windows.
 After the return trip we had a quick lunch since it was almost time for the second run. Bernd took the train down to Gillrath and I brought it back to Schierwaldenrath. I (again) had a little problem with braking when we got to Birgden and accidentally left the brake lever in a slightly open position so the stop in Birgden became ... errrm ... a bit abrupt towards the end. Did I mention that braking is hard? Especially when you try to be gentle to the equipment. Nevertheless, I thoroughly enjoyed the ride. Back in Schierwadenrath, I didn't want to leave the cab, I could have go on and on, but sadly my turn was over.
 Wolfram, Dad, and me skipped the 3rd run and had excellent ice cream at the station restaurant instead. While Dad relaxed in the shade, Wolfram and I climbed on the loading ramp and waited for the train to return. It was already time to say Goodbye to Wolfram since he wanted to get back on the road to drive home.
Thomas took the train to Gillrath, and I managed to get back in the cab for the return trip to Schierwaldenrath with Jan at the controls. It's very interesting and enlightening to watch a professional engineer who knows the line by heart, play with the controls, move the locomotive with centimeter accuracy, and just the right amount of steam or braking. It was also another demonstration of how a good team of stoker and engineer can work together in an almost artful dance to feed and care for the machine.
 Once we returned we received our certificates and now it was really time to say Goodbye. To the group, to the railroad, the people that cared for us all weekend long, and of course "our" locomotive 20.
 On the way home the sounds and sights of the weekend continued to play in my head. It was an awesome experience, and if I lived closer to Schierwaldenrath I would be there more often. Contrary to modern locomotives, steam engines feel a lot more alive, a feeling that is impossible to experience by looking at photos or watching them on TV. If you ever have a chance to see steam engines in operation, ride in a cab, or maybe even, take the controls yourselves, go and you won't regret it.
Friday - Saturday
Saturday, August 15, 2009
Visiting the Selfkantbahn - Saturday
Today I drove a steam locomotive.
 The day started with firing up the locomotive. It took about 4 hours from lighting the first firewood in the firebox until steam pressure was within operating range. Meanwhile, stoker ("Heizer") Christoph and engineer ("Lokomotivfuehrer") Thomas explained the very basics how a steam locomotive works, and we had the pleasure of oiling, cleaning, and polishing the locomotive. Yes, cleaning and polishing, too.
After lunch everyone got to move the locomotive within station limits to practice accelerating and braking. There are two mechanisms to control acceleration: Amount of steam sent to the cylinders and amount of steam expansion within the cylinders. The general effect is similar to gears in a car. High gear at high speed uses less gas, but barely has enough torque to get the car moving in the first place. Some steam with little expansion in the cylinders gets the locomotive moving. Relying more on steam expansion in the cylinders once the train is moving saves steam pressure and therefore fuel.
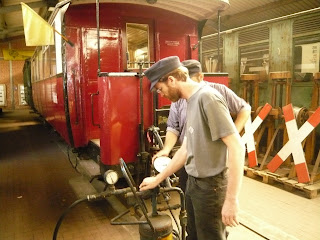 Braking is quite an art. The trains on the Selfkantbahn like most trains use an air brake system which uses air pressure to control brake cylinders in each car. The practical implication for a novice engineer is that contrary to a car,it will take a few seconds for braking to take effect, and the train will keep braking at the given pressure set in the main brake line. When the brake is released only slightly, it will fully release the brakes at each car, and on top of that it will take several seconds for the locomotive to re-pressurize the main brake line. We got to practice this on a demo system in the car hall.
There is also a direct brake system on the locomotive only, which is generally used when the locomotive is moving without a train, or, if we have a train, similarly to a hand brake in the car when going uphill from a full stop: Hold the train in place, while the brakes in the cars are already released.
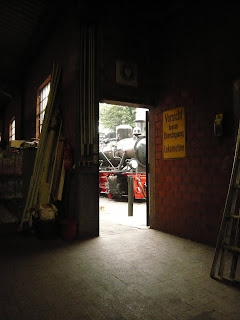 During my practice run in the afternoon the main brake line overloaded (too much pressure). This caused quite a commotion since it was unclear why this had happened in the first place. I was standing in the locomotive twisting thumbs and making a stupid face, while both Christoph and Thomas got to figure out what happened, and decide whether it's safe to continue the trip. In the end the net effect was that we got to de-pressurize and re-pressurize the brake system.
All in all, I think I did O.K. Under direction from Thomas I brought the train up to speed, slowed down and stopped before railroad crossings, rang the bell, and, to my utmost delight, blew the whistle. The interaction between steam pressure and steam expansion is not yet quite clear to me so Thomas had to guide me a bit, but I think I managed to do a decent job.
 It was a hot day, and being in the cab was even hotter with the fire burning like crazy 2 feet before you. The cab was very crowded with stoker, engineer, and two seminar participants, one driving, one trying not to be too much in the way, paying attention to instructions, shoveling coal, or refilling the boiler with water. We went through several liters of bottled water and "Apfelschorle" on each run. Replacing the empty bottles when we got back to Schierwaldenrath became an important chore.
 The practice runs happened to be two specials with paying customers from Schierwaldenrath to Gillrath. Yup, the whole, whopping 5.5km of track all the way from one end to the other end of the line.
The first run was booked by a Mazda fan club. Quite a sight when 40 Mazda sports cars along with their owners and respective girl friends enter a railroad museum in their shiny, little cars passing "our" shiny little steam engine.
The other run was for the youth group of a local fire department, as well as a birthday party in one of the cars.
After we returned with the second run to Schierwaldenrath, we had coffee and cake, watched/helped set the fire for the night and left the locomotive in the engine shed for the next day. Later in the evening the group had dinner together, and we had a fun time. The fact that I'm living in California was drawing quite some attention and many questions about life and work especially in comparison to Germany.
 Tomorrow I will drive the 13:45 train from Gillrath to Schierwaldenrath, which -- for extra fun -- runs with the locomotive backwards, and therefore the controls will be behind me when looking on the track ahead of the locomotive. I'm curious if Wolfram will be here in time for the 11:15 departure which will be driven by my dad.
Friday - Sunday
 The day started with firing up the locomotive. It took about 4 hours from lighting the first firewood in the firebox until steam pressure was within operating range. Meanwhile, stoker ("Heizer") Christoph and engineer ("Lokomotivfuehrer") Thomas explained the very basics how a steam locomotive works, and we had the pleasure of oiling, cleaning, and polishing the locomotive. Yes, cleaning and polishing, too.
After lunch everyone got to move the locomotive within station limits to practice accelerating and braking. There are two mechanisms to control acceleration: Amount of steam sent to the cylinders and amount of steam expansion within the cylinders. The general effect is similar to gears in a car. High gear at high speed uses less gas, but barely has enough torque to get the car moving in the first place. Some steam with little expansion in the cylinders gets the locomotive moving. Relying more on steam expansion in the cylinders once the train is moving saves steam pressure and therefore fuel.
 Braking is quite an art. The trains on the Selfkantbahn like most trains use an air brake system which uses air pressure to control brake cylinders in each car. The practical implication for a novice engineer is that contrary to a car,it will take a few seconds for braking to take effect, and the train will keep braking at the given pressure set in the main brake line. When the brake is released only slightly, it will fully release the brakes at each car, and on top of that it will take several seconds for the locomotive to re-pressurize the main brake line. We got to practice this on a demo system in the car hall.
There is also a direct brake system on the locomotive only, which is generally used when the locomotive is moving without a train, or, if we have a train, similarly to a hand brake in the car when going uphill from a full stop: Hold the train in place, while the brakes in the cars are already released.
 During my practice run in the afternoon the main brake line overloaded (too much pressure). This caused quite a commotion since it was unclear why this had happened in the first place. I was standing in the locomotive twisting thumbs and making a stupid face, while both Christoph and Thomas got to figure out what happened, and decide whether it's safe to continue the trip. In the end the net effect was that we got to de-pressurize and re-pressurize the brake system.
All in all, I think I did O.K. Under direction from Thomas I brought the train up to speed, slowed down and stopped before railroad crossings, rang the bell, and, to my utmost delight, blew the whistle. The interaction between steam pressure and steam expansion is not yet quite clear to me so Thomas had to guide me a bit, but I think I managed to do a decent job.
 It was a hot day, and being in the cab was even hotter with the fire burning like crazy 2 feet before you. The cab was very crowded with stoker, engineer, and two seminar participants, one driving, one trying not to be too much in the way, paying attention to instructions, shoveling coal, or refilling the boiler with water. We went through several liters of bottled water and "Apfelschorle" on each run. Replacing the empty bottles when we got back to Schierwaldenrath became an important chore.
 The practice runs happened to be two specials with paying customers from Schierwaldenrath to Gillrath. Yup, the whole, whopping 5.5km of track all the way from one end to the other end of the line.
The first run was booked by a Mazda fan club. Quite a sight when 40 Mazda sports cars along with their owners and respective girl friends enter a railroad museum in their shiny, little cars passing "our" shiny little steam engine.
The other run was for the youth group of a local fire department, as well as a birthday party in one of the cars.
After we returned with the second run to Schierwaldenrath, we had coffee and cake, watched/helped set the fire for the night and left the locomotive in the engine shed for the next day. Later in the evening the group had dinner together, and we had a fun time. The fact that I'm living in California was drawing quite some attention and many questions about life and work especially in comparison to Germany.
 Tomorrow I will drive the 13:45 train from Gillrath to Schierwaldenrath, which -- for extra fun -- runs with the locomotive backwards, and therefore the controls will be behind me when looking on the track ahead of the locomotive. I'm curious if Wolfram will be here in time for the 11:15 departure which will be driven by my dad.
Friday - Sunday
Friday, August 14, 2009
Visiting the Selfkantbahn - Friday
 We arrived at the main station of the Selfkantbahn in Schierwaldenrath just in time for the start of the seminar. After a brief introduction in the Buffetwagen, we did a tour of the museum, and visited the engine shed where we saw "our" steam engine No. 20 for the first time. She looked a bit dead standing there in the shed with a cold firebox and cold boiler. And I couldn't decide whether I should feel sad, curious, or excited about tomorrow. It didn't quite feel real that tomorrow we will fire up the locomotive and it will come to life.
 I'm nervous. After looking at the various levers and manometers in the cab, as well as a brief explanation from Christoph, our stoker for tomorrow, I re-read the explanations how a steam locomotive works. I hope I can get this thing to move once it's my turn, and especially get it to stop...
Later during dinner we received our engineer hats, and had a fun time discussing various railroady topics. The seminar group is quite interesting, and participants come from all over the country. I'm the youngest by far. Dad's the oldest by far. Most are in their fifties. Some came alone, others brought wives or family for moral support.
Saturday - Sunday
Subscribe to:
Posts (Atom)