Today was the last regular swim meet before Champs. Both Tatjana and Pascal are swimming great.
And I finally managed to convince kdenlive to not letterbox the funky SD mpeg2 wide-screen videos that my Panasonic SDR-H80 camera produces. I'm setting the project settings to edit in 720p, import the 480p SD material, force pixel-aspect ratio to 1.19 on the clips, edit the video, then finally render into HDV 720 30p 2-pass. This produces ginormous videos (sorry, storage and processing folks), but the final quality doesn't suffer nearly as much as when I edit and render in straight SD.

Saturday, July 09, 2011

Thursday, July 07, 2011
Tuesday, July 05, 2011
LocoNet issues with Uhlenbrock 63400
Wow. This is really confusing.
The Uhlenbrock 63400 is connected to its own 16V AC transformer. The Intellibox is on its own transformer as well. The 63400 is connected to the Intellibox via short LocoNet cable. The track connection from the Intellibox is directly connected to a portion of the layout that doesn't have trains on it (one of the three power districts on the layout). And LocoNet communication is still affected.
If I unplug the transformer connected to the 63400, LocoNet communication is still affected.
If I remove the 16V AC feeder to the 63400 (i.e. make it a passive device), no issues.
Similarly, there are no issues if I remove the tracks from the Intellibox track connection.
I.e. the mere fact that about 40ft of Maerklin track and the respective bus wiring is connected to the Intellibox moves the needle from "LocoNet works" to "LocoNet doesn't work". I double-checked the cabling to ensure no crossed wires. There is no connectivity between the power districts, either.
While Uhlenbrock Support responded to my first two emails within a couple days each, the last update apparently got lost in the ether.
So, at the moment I'm putting this issue to rest and may get back to it when I build the panel for staging. Meanwhile, a TeamDigital SRC16 in combination with jmri logix is pressed into service to drive the panel. Not exactly the most economic or simplistic option, but it should do the job nicely, plus allows for some bells and whistles that make the Talheim block a bit more fun, too.
Unfortunately, the 63400 is too light as a paper weight.
Update 07/08/2011:
Uhlenbrock got back to me and suggested another test regime only involving the Uhlenbrock components and a short piece of track with a loco to weed out any influence from other components or wiring. I'll do that over the weekend.
Update 07/10/2011:
And that test had all the components working correctly.
I removed (even) more components from power and busses. By now all twin-coil turnouts are disconnected, the somewhat messy Talheim panel is completely removed and cabling cleaned up. No DS64's have push-buttons connected any more, DS64 power is disconnected (not that it matters for the test).
There are no obvious ways any more I can think of that would inject non-DCC power into the system, yet LocoNet communication is still affected.
I don't get it. There must be something wrong with how the track is wired, but I have no idea what it could be. Need to find an oscilloscope, and re-read Wiring for DCC for any hints.
Update 07/08/2011:
Uhlenbrock got back to me and suggested another test regime only involving the Uhlenbrock components and a short piece of track with a loco to weed out any influence from other components or wiring. I'll do that over the weekend.
Update 07/10/2011:
And that test had all the components working correctly.
I removed (even) more components from power and busses. By now all twin-coil turnouts are disconnected, the somewhat messy Talheim panel is completely removed and cabling cleaned up. No DS64's have push-buttons connected any more, DS64 power is disconnected (not that it matters for the test).
There are no obvious ways any more I can think of that would inject non-DCC power into the system, yet LocoNet communication is still affected.
I don't get it. There must be something wrong with how the track is wired, but I have no idea what it could be. Need to find an oscilloscope, and re-read Wiring for DCC for any hints.
Thursday, June 30, 2011

Friday, June 24, 2011
Layout ground connected to LocoNet ... somewhere.
Hmmm, I heard back from Uhlenbrock's tech support. As suspected I must have a connection between layout ground and LocoNet somewhere, which causes communication issues on LocoNet. The problem is present when track is connected to the Intellibox. This won't be a fun exercise to find...
At least I have a quick and easy way to tell whether LocoNet is working or not: Connect the 63400 via LocoNet to the Intellibox by itself, then power up the Intellibox. If the keyboard mode takes less than a second to show in the display, all is good. If it takes longer than ~3 seconds, LocoNet communication is affected.
At least I have a quick and easy way to tell whether LocoNet is working or not: Connect the 63400 via LocoNet to the Intellibox by itself, then power up the Intellibox. If the keyboard mode takes less than a second to show in the display, all is good. If it takes longer than ~3 seconds, LocoNet communication is affected.
Friday, June 17, 2011
Some extra time...
Spending some time at home over the next few days should help me get through a few work items. More electronics. Freight car routing. Convert another locomotive to digital. Maybe I finish up more of the backdrop painting. That would be nice.
First bit of feedback on car card & waybill routing of freight cars: Contrary to when I used JMRIs operations module, I'm more inclined to keep cars and cards in sync. I often run only one or two trains in the evening for fun, not as a formal operating session. Having the car cards right there in my face makes it painfully obvious and quick to move them to the right slots and trains.
Yes, a stack of car cards is not nearly as neat as a printed train manifest, or switch list, but so far it seems they fit my needs better. Time will tell.
Update 06/18/2011:
Well, I did end up spending an hour or two in the garage throwing paint at the backdrop while chatting with my Dad. Quite enjoyable if not for the colors on the backdrop that didn't quite work out the way I wanted. On the second try it started to come out more the way I imagined. We'll see what it looks like when the paint had a chance to dry over night.
First bit of feedback on car card & waybill routing of freight cars: Contrary to when I used JMRIs operations module, I'm more inclined to keep cars and cards in sync. I often run only one or two trains in the evening for fun, not as a formal operating session. Having the car cards right there in my face makes it painfully obvious and quick to move them to the right slots and trains.
Yes, a stack of car cards is not nearly as neat as a printed train manifest, or switch list, but so far it seems they fit my needs better. Time will tell.
Update 06/18/2011:
Well, I did end up spending an hour or two in the garage throwing paint at the backdrop while chatting with my Dad. Quite enjoyable if not for the colors on the backdrop that didn't quite work out the way I wanted. On the second try it started to come out more the way I imagined. We'll see what it looks like when the paint had a chance to dry over night.
Thursday, June 09, 2011

Wednesday, June 08, 2011
DS64 "forgets" programming
When I mentioned a while ago that bad JMRI logic blew out a DS64 output, the actual problem was a lot more benign. The decoder simply "forgot" that output 3 is for turnout 11. I reprogrammed the 4 turnout IDs into that DS64, and afterwards everything worked just fine.
Various posts in the jmri-users and digitrax Yahoo groups report similar issues, and the same resolution. Problems with the track connection, or spikes on LocoNet frequently get mentioned as culprits for this. Hmmm...
Various posts in the jmri-users and digitrax Yahoo groups report similar issues, and the same resolution. Problems with the track connection, or spikes on LocoNet frequently get mentioned as culprits for this. Hmmm...
Monday, June 06, 2011
Talheim Local Panel
The buttons are in, plus some LEDs. I'll test-program the Uhlenbrock 63400 unit driving this tomorrow.
Contrary to the Emsingen panel this one will be mounted horizontally next to the Intellibox, so I'm putting a little box around the electronics and wiring.
Elapsed time so far: 3 hours.
The red buttons are for setting routes ("Fahrstrassen"). The routes don't lock, since I don't yet have a way to unlock them automatically as trains pass through, though that would be cool. (I will need similar functionality once I have signals, so that a green signal turns red as the train passes through).
A route is set by pressing the two red buttons at the ends of the route, and all turnouts inbetween will be lined properly. I'll program the LEDs to light up if the turnout is set to Thrown (i.e. the train will take the diverging route, instead of going straight). I'm counting a total of 12 different routes.
Just like in Emsingen, the black buttons are "locally operated" turnouts, and simply toggle between Closed and Thrown. The 2 cross-overs at the small run-around are connected. The button throws the turnout, and the respective LED lights up if it is set to lead into the industry tracks.
Update 06/07/2011:
Oh well, that didn't work. LocoNet becomes unstable (again) as soon as I plug in the 63400. There must be something special about my LocoNet setup, though I can't put my finger on it. I'll do some more testing tomorrow, and if I can't figure it out quickly, replace the 63400 with a SRC16, and do the routes in JMRI. At least temporarily.
Update 06/08/2011:
Hmmm, that 63400 might be a bit wonky. I made sure it has a dedicated power supply, but even with only the Intellibox, a single DS64, and the LocoBuffer connected, LocoNet is unstable as soon as the 63400 is connected. I put the new panel into a box for now while I mull this over and tend to other things.
 |
| The local panel for Talheim |
Elapsed time so far: 3 hours.
The red buttons are for setting routes ("Fahrstrassen"). The routes don't lock, since I don't yet have a way to unlock them automatically as trains pass through, though that would be cool. (I will need similar functionality once I have signals, so that a green signal turns red as the train passes through).
A route is set by pressing the two red buttons at the ends of the route, and all turnouts inbetween will be lined properly. I'll program the LEDs to light up if the turnout is set to Thrown (i.e. the train will take the diverging route, instead of going straight). I'm counting a total of 12 different routes.
Just like in Emsingen, the black buttons are "locally operated" turnouts, and simply toggle between Closed and Thrown. The 2 cross-overs at the small run-around are connected. The button throws the turnout, and the respective LED lights up if it is set to lead into the industry tracks.
Update 06/07/2011:
Oh well, that didn't work. LocoNet becomes unstable (again) as soon as I plug in the 63400. There must be something special about my LocoNet setup, though I can't put my finger on it. I'll do some more testing tomorrow, and if I can't figure it out quickly, replace the 63400 with a SRC16, and do the routes in JMRI. At least temporarily.
Update 06/08/2011:
Hmmm, that 63400 might be a bit wonky. I made sure it has a dedicated power supply, but even with only the Intellibox, a single DS64, and the LocoBuffer connected, LocoNet is unstable as soon as the 63400 is connected. I put the new panel into a box for now while I mull this over and tend to other things.
Sunday, June 05, 2011
Glass

 A few weeks ago I went to a glass blowing lesson at the Bay Area Glass Institute. This was very cool. While the participants didn't work directly with the melting oven, we got to do most of the forming, and cutting of the pieces. After some initial explanations the instructors pick the glass from the oven, and prep the hot blob of molten glass, and then you get to have it with scissors, pliers, and and funky round wooden tool, while the instructors help you along. One has to work fast as the glass quickly cools down and hardens. Once the piece is done it goes in a special cabinet to slowly cool down over night.
 Every participant made a flower and a letter weight.
I think, my creations came out surprisingly well.
Saturday, June 04, 2011
New Talheim panel in the works
Alright, I enjoy the panel in Emsingen so much that I'm building a similar one for Talheim (and will build yet another one for staging). Because the trackwork around Talheim is fairly complex (which should be an indicator that this will be an eternal bottleneck, but let's not go there...), Talheim routes are set by pressing two buttons on the panel at once, and the switches are lined appropriately. Well, at least they are supposed to.
The baseboard of the panel is done. Again I made this from hard-board. The buttons and LED holders are installed, and partially connected to the Uhlenbrock 63400 Switch-Control unit. I should be able to test-connect it to the layout tomorrow, and program the Switch-Control for the various routes.
This panel will replace the existing Talheim panel which was a lot of work to build, but turned out to be impractical to modify for the Kopper siding, as well as cumbersome to add LEDs or additional switches to it. I spent weeks building the old panel and the control board, mostly because of the many wires and solder connections needed to connect LEDs, buttons, and switch decoders to each other.
The new panel controls switches using LocoNet, so it doesn't matter which switch decoder controls the turnout, and they all work and behave the same.
The baseboard of the panel is done. Again I made this from hard-board. The buttons and LED holders are installed, and partially connected to the Uhlenbrock 63400 Switch-Control unit. I should be able to test-connect it to the layout tomorrow, and program the Switch-Control for the various routes.
This panel will replace the existing Talheim panel which was a lot of work to build, but turned out to be impractical to modify for the Kopper siding, as well as cumbersome to add LEDs or additional switches to it. I spent weeks building the old panel and the control board, mostly because of the many wires and solder connections needed to connect LEDs, buttons, and switch decoders to each other.
The new panel controls switches using LocoNet, so it doesn't matter which switch decoder controls the turnout, and they all work and behave the same.
Thursday, June 02, 2011
Another shot at operations
I mentioned before that I feel too boxed in with doing car routing with the computer. I don't have that many freight cars on the layout that need routing (~35), and the operating pattern is fairly simple. I also don't want to chase after cars that are not where the computer says they are, nor do I care that much about preparing printouts of switch lists for operating the railroad.
So, I decided to try the traditional route with car cards and waybills. There is tons and tons of information on the Internet about how other people have done this (Google for [car cards way bills]), and including primers about the principles and mathematics of operations.
Here's my version 1.0 of Operations on the Welztalbahn. I'm using Micromark's car card & way bill set for this.
Cards
Each car is assigned a car card. The car card lists type of car, reporting marks, and has a pocket for the way bill card.
The way bill defines where the car is supposed to be delivered to next. Additional information may include load, shipper/consignee, and special instructions.
There are also engine cards that have information about a locomotive (road, reporting marks, and DCC address)
Trains

A train is formed by forming a stack of car cards representing each car in the train, and putting the respective locomotive card on top. I use colored paper clips to hold together the card stack.
Train types in priority order:
So, I decided to try the traditional route with car cards and waybills. There is tons and tons of information on the Internet about how other people have done this (Google for [car cards way bills]), and including primers about the principles and mathematics of operations.
Here's my version 1.0 of Operations on the Welztalbahn. I'm using Micromark's car card & way bill set for this.
Cards
Each car is assigned a car card. The car card lists type of car, reporting marks, and has a pocket for the way bill card.
The way bill defines where the car is supposed to be delivered to next. Additional information may include load, shipper/consignee, and special instructions.
There are also engine cards that have information about a locomotive (road, reporting marks, and DCC address)
Trains

A train is formed by forming a stack of car cards representing each car in the train, and putting the respective locomotive card on top. I use colored paper clips to hold together the card stack.
Train types in priority order:
- White - switching and deliveries
- Green - Local Freight (typical stops in Emsingen and exchanges cars at the yard)
- Blue - Through Freight (typically unit trains, their main purpose is to keep traffic up and get in the way)
- Red - Local Passenger Train (typical on-layout stops are Emsingen and Talheim)
- Purple - Through Passenger Train (typcial on-layout stop is Emsingen)
The pocket on the locomotive card has a schedule that describes destination, stops, and for passenger trains, length of station stops.
Car Routing
Following the principles of car card and waybill operation, the destination for each freight car is provided by the way bill. To keep things simple, at the moment not every way bill is fully filled in. Instead, I simply color code for the major destinations:
- Blue - Deliver to the North
- Yellow - Deliver to the South
- Green - Deliver to Talheim
- Red - Deliver to Emsingen
Unless the way bill has specific instructions, the operator decides on an appropriate industry spot based on the type of car. Future iterations of the operating scheme will likely improve substantially on this aspect.
We'll see how this works...
Wednesday, June 01, 2011
Unexpected
 |
| Elvira having fun running a passenger local |
Alrighty then, ... let's try switching: "Here's a short freight train in Emsingen, run it down to Talheim, drop the cars at this, this, and that location, pick up the other cars and come back to Emsingen."
That was a nice little brainteaser puzzle, and she managed it perfectly.
Well done! :-)
Couple things I noticed while doing this:
- The new local panel in Emsingen works well. I need to build a similar panel for Talheim.
- The cheapo push buttons are not so great, though.
- The Talheim panel needs LEDs for reporting which way switches are set.
- There are a few dead spots in the less used industry leads due to dirty track.
- Talheim Track 2 is commonly used for temporary car storage while switching. I need more experience how badly this affects traffic flow through Talheim and whether that is acceptable. Otherwise, I need to consider adding another track for working the Talheim industries, though there really isn't any space.
Sunday, May 29, 2011
More progress
 |
| Panel installed in the fascia |
 |
| Platform detail. |
The platforms of Emsingen are taking shape. The platform edges are made from wood and will get a pattern of large stone blocks when I'm done with the sand cover. The area between the wood pieces are filled with very fine, soupy and colored plaster, and topped with very fine N scale ballast.
This method of building a platform has grown on me, and I'm likely going to use it again when it's time to build the platform in Talheim. The photo shows the almost finished state of the platform (of course for messy work like this, the track gets covered up with painters tape). Later I will add some vegetation, "platform furniture" (lights, benches, signs), as well as people to break up the monotony.
This method of building a platform has grown on me, and I'm likely going to use it again when it's time to build the platform in Talheim. The photo shows the almost finished state of the platform (of course for messy work like this, the track gets covered up with painters tape). Later I will add some vegetation, "platform furniture" (lights, benches, signs), as well as people to break up the monotony.
Summer Rain
 Summer ... Rain? Here? Seriously? That can't be right.
Yep.
We very much enjoyed the dripping of the rain while sitting outside. The smell of fresh rain on grass.
Thursday, May 26, 2011
Smooth
The BR211 from Roco is a very nice runner. It runs fairly quietly, with only a slight wirring sound. Nowhere as loud as the Maerklin BR86, but not as quiet as the Maerklin BR24, which is practically silent.
BR211 completed its run-in routine over the last two evenings. Now it's time for detailing and some minor reprogramming (I want to be able to turn off the red rear lights from the throttle, since they are only supposed to be on when the engine is running light). I'll use that opportunity to save the decoder values into JMRI, and adjust the locomotive address.
BR211 completed its run-in routine over the last two evenings. Now it's time for detailing and some minor reprogramming (I want to be able to turn off the red rear lights from the throttle, since they are only supposed to be on when the engine is running light). I'll use that opportunity to save the decoder values into JMRI, and adjust the locomotive address.
Staging 2 tracks affect current draw sensor
Last night I was running a few locomotives and notices that there's lots of LocoNet traffic. LocoNet monitor reveals that the sensor measuring current draw in the staging departure block was continously flipping on and off.
After installing Staging 2 all three tracks were part of that block. I didn't really worry about train detection when I temporarily installed Staging 2. Bad idea...
Either way, apparently there's some resistance between the rails in Staging 2. I'll have to check for that when I install the track there permanently. Meanwhile, I insulated Staging 2 from the departure block, and now the sensor is behaving properly again.
After installing Staging 2 all three tracks were part of that block. I didn't really worry about train detection when I temporarily installed Staging 2. Bad idea...
Either way, apparently there's some resistance between the rails in Staging 2. I'll have to check for that when I install the track there permanently. Meanwhile, I insulated Staging 2 from the departure block, and now the sensor is behaving properly again.
Sunday, May 22, 2011
Emsingen Panel close to working
The LocoNet problems I had with the SRC16 are now resolved (Thank you, thank you, Bill Robinson!) Adding a DS64 on the LocoNet bus apparently provided enough signal stability that the SRC16 can work properly with the Intellibox.
I moved on to programming the local panel and it's respective routes before putting the decoder back into the layout. So ... much ... fun!
I'll post some pictures once everything is installed.
Update 05/24/2011:
The Emsingen panel and SRC16 are working correctly in place now. Routes work as advertised. For some routes the SRC16 needs to throw switches that are connected only to the track bus. The Intellibox translates the Switch commands sent to LocoNet from the SRC16 into DCC commands sent via the DCC accessory bus and executed by a Tam Valley Depot servo decoder.
Next up:
Temporarily put Staging 2 in place, track cleaning, some loco maintenance, and a shake out Ops session to determine work items for the next 2-3 weeks.
I moved on to programming the local panel and it's respective routes before putting the decoder back into the layout. So ... much ... fun!
I'll post some pictures once everything is installed.
Update 05/24/2011:
The Emsingen panel and SRC16 are working correctly in place now. Routes work as advertised. For some routes the SRC16 needs to throw switches that are connected only to the track bus. The Intellibox translates the Switch commands sent to LocoNet from the SRC16 into DCC commands sent via the DCC accessory bus and executed by a Tam Valley Depot servo decoder.
Next up:
Temporarily put Staging 2 in place, track cleaning, some loco maintenance, and a shake out Ops session to determine work items for the next 2-3 weeks.
Monday, May 16, 2011
Reshuffling, part 1
I'm probably trying to do too much, but whatever...
Some of the supplies and tools cabinets are in the way of Staging 2. And I wanted to rearrange that area for a while now, make it more narrow to actually allow for a second chair, so the cabinets have to move. And the computer (oh, finding a new place for that is a lot harder than I thought).
And I wanted to finally hook up the blue "night light", and build a box into the wall so that freight cars can actually enter the factory hall at Werner & Soehne.
And I wanted to gain more storage for various kits and building material that's currently stored under the layout. So I started putting some of the computer supplies from the big garage cabinet into a box, only to realize that *that* cabinet is apparently too humid. Various USB connectors had rust on them, and spray cans where rusty at the bottom. Hmmmm. I should have grabbed that shelf/cabinet combo my neighbors gave away for free last weekend, and chop it down so that it fits along the train room...
I got the shelf for Staging 2 installed, since that defines how much space I have for the shelves and boxes. I opened up the wall, after moving all the wood and styrofoam out of the way that's stored on the other side, and ran wiring for the blue light, and built the box in the wall for Werner & Soehne.
Oh, and yesterday I finished painting the upstairs hallway, the stairs and a couple somewhat inaccessible walls above the entrance area. Took me only 3 1/2 years after our move-in date to get to that.
That reminds me... A little over 3 years ago, I started construction of what is now the train room. Progress has been slow, but steady, even though at times there's been very little happening for months at a time.
 |
| Too much stuff. |
And I wanted to finally hook up the blue "night light", and build a box into the wall so that freight cars can actually enter the factory hall at Werner & Soehne.
 |
| New switch to get into Staging 2 |
I got the shelf for Staging 2 installed, since that defines how much space I have for the shelves and boxes. I opened up the wall, after moving all the wood and styrofoam out of the way that's stored on the other side, and ran wiring for the blue light, and built the box in the wall for Werner & Soehne.
 |
| Shelving Rearranged |
That reminds me... A little over 3 years ago, I started construction of what is now the train room. Progress has been slow, but steady, even though at times there's been very little happening for months at a time.
Friday, May 13, 2011
In other news
Some long outstanding orders are finally starting to come in.
- A Roco BR211 diesel engine that will go very nicely with passenger trains for local service, along with the Maerklin BR24, and the (still to be digitized) Schienenbus.
- All remaining hardware to digitize the Schienenbus.
- Another DS64 and a couple more Tortoises.
- The engine shed for Emsingen will complete the set of buildings for the small servicing facility I'm planning, and allow me to proceed with the overall arrangement of tracks and buildings there.
- Bullfrog Snot liquid traction tires to get better traction for BR24. I haven't used this before, but I hope it will address the slipping issues experienced by this otherwise very nice model.
- The first city houses for the town of Emsingen. This will be a combination of existing kits from the old layout, a few new kits, some low-relief models, and potentially a partial photo background for more depth.
Uhlenbrock Intellibox + Team Digital SRC16 powered from track = Smoke
I love the SRC16. It's a very powerful and flexible stationary DCC decoder with 16 independent inputs and the ability to drive up to 16 slow motion switch machines like the Circuitron Tortoise (when using the MotoD board, otherwise it's 8 Tortoises). I use a single SRC16 for the control panel in Emsingen, and all slow-motion switch machines at that station.
I mentioned before that I had trouble getting my Team Digital SRC16 to say a peep on LocoNet. After quite a bit of back and forth with Team Digital's support, and breaking a second SRC16 at least now I know what the problem is.
LocoNet Ground of the Uhlenbrock Intellibox is not referenced to track ground (contrary to e.g. a Digitrax system). So when you power the SRC16 from track power, and plug in LocoNet, you most certainly fry a little resistor near the LocoNet plugs. Afterwards the SRC16 still works just fine, but lost it's ability to talk to LocoNet, no matter what CVs are set.
The suggested work-around is simple:
Don't use track power, use a 12V DC wallwart. I'll try to bench-test this soon. I'm looking forward to being able to continue with work in Emsingen.
Team Digital was nice enough to repair the two fried units.
Update 05/25/2011:
The bench-test worked out great .
I mentioned before that I had trouble getting my Team Digital SRC16 to say a peep on LocoNet. After quite a bit of back and forth with Team Digital's support, and breaking a second SRC16 at least now I know what the problem is.
LocoNet Ground of the Uhlenbrock Intellibox is not referenced to track ground (contrary to e.g. a Digitrax system). So when you power the SRC16 from track power, and plug in LocoNet, you most certainly fry a little resistor near the LocoNet plugs. Afterwards the SRC16 still works just fine, but lost it's ability to talk to LocoNet, no matter what CVs are set.
The suggested work-around is simple:
Don't use track power, use a 12V DC wallwart. I'll try to bench-test this soon. I'm looking forward to being able to continue with work in Emsingen.
Team Digital was nice enough to repair the two fried units.
Update 05/25/2011:
The bench-test worked out great .
Wednesday, May 11, 2011
Skype
Only days after announcing a security vulnerability in the Mac Client, Skype gets purchased by Microsoft for $8.5B. Apparently Windows is so secure now, that the Microsoft security folks needed a new challenge.
Monday, May 09, 2011
More staging
More staging? Don't I have enough staging tracks already? Well, yeah, kinda.
I have 4 staging tracks at the moment, 170-200cm in length. That is a lot longer than my longest passing tracks which is 120cm in Emsingen, so when I operate I often end up doubling up two of the shorter trains in the longer staging tracks. ... And then the schedule asks for the rear train to show up first. There are ways around that (e.g. shuffling trains to another staging track, or releasing the first train to the ramp, and then use the down ramp track to bring the second train up... yes, there are a lot of switches in staging...) but those operations are not fun to do, and the risk of derailments is high. I call the existing staging yard Staging 1.
Additionally, as I digitize more locomotives, I need more space for active trains.
To provide more storage capacity and expand staging capacity, I decided to stick a few more staging tracks below Moebelfabrik Kopper along one wall of the room. The shelf for Staging 2 is not yet built, so I tested the track arrangement by simply laying out the tracks on top of the future of home of Moebelfabrik Kopper.

Here are the constraints for Staging 2:
I have 4 staging tracks at the moment, 170-200cm in length. That is a lot longer than my longest passing tracks which is 120cm in Emsingen, so when I operate I often end up doubling up two of the shorter trains in the longer staging tracks. ... And then the schedule asks for the rear train to show up first. There are ways around that (e.g. shuffling trains to another staging track, or releasing the first train to the ramp, and then use the down ramp track to bring the second train up... yes, there are a lot of switches in staging...) but those operations are not fun to do, and the risk of derailments is high. I call the existing staging yard Staging 1.
Additionally, as I digitize more locomotives, I need more space for active trains.
To provide more storage capacity and expand staging capacity, I decided to stick a few more staging tracks below Moebelfabrik Kopper along one wall of the room. The shelf for Staging 2 is not yet built, so I tested the track arrangement by simply laying out the tracks on top of the future of home of Moebelfabrik Kopper.

Here are the constraints for Staging 2:
- stub-ended staging (due to space and location)
- 3-4 tracks (I'm not going to buy any additional M-Track for Staging 2)
- accessible
- enter/exit Staging 2 from the departure track of Staging 1 (use the cross-over on the ramp to get from the down ramp track to the departure track and the switch to Staging 2
- no manual handling of locomotives between arrival and departure at Staging 2
I was able to cut an additional switch for accessing Staging 2 in the existing trackage behind the last switch of Staging 1 without modifying the existing geometry of the departure track. Originally I planned a trapezoid switch arrangement for Staging 2 giving me 120 cm usable length for each staging track. Due to how the departure track curves and underground supports, I gave up on that approach and ended up with above arrangement. I'm mostly using M-track switches from my Dad's layout. Each staging track will have a usable length of 130cm. The switch ladder made from double-slip switches allows locomotives to move around the train.
The rear track is 77cm between switches, the middle track 90cm, and the front track 117cm. This is sufficient for most passenger locals I'm plannung to run. The full 130cm are available for longer trains, but those need more involved maneuvers to swap the locomotive to the other end of the train. A stub track can be attached to the last switch in the lower right of the picture. That track will stick through the door and will need to be removable. It might be possible to build a removable return loop from that last switch out into the garage and conecting to the middle track through a hole in the wall.
There is a short stub track off the switches on the layout side to arrange for locomotive changes without running around the cars of an arrived train.
Sunday, May 08, 2011
Ridiculous
A recent article in the California HSR Blog talks about the security implications of potential terrorist attacks on high-speed rail infrastructure.
Of course, as one response TSA-style passenger screenings (also known as "security theater") are being floated by the folks that own that hammer.
Robert Cruickshank's discussion of the topic in the blog entry is worth reading, as he presents a very level-headed and fact-based response to such suggestions.
My take on this is, that rail systems by their nature are very large, and the tracks are easily accessible. For the determined, it's trivial and quite a bit more effective to attack trains without being inside, so to me the idea to increase train security by screening the passengers is simply ridiculous.
Maybe that's because, like Robert suggests, because I'm used to european trains as an effective, well integrated transportation mode. Contrary to Robert I don't think Europeans are "taking their chances" using public transit. Instead the mode of transportation is a choice that everyone makes when they leave the relative safety of their house. Every year a lot more people die from car accidents than terrorist attacks...
Of course, as one response TSA-style passenger screenings (also known as "security theater") are being floated by the folks that own that hammer.
Robert Cruickshank's discussion of the topic in the blog entry is worth reading, as he presents a very level-headed and fact-based response to such suggestions.
My take on this is, that rail systems by their nature are very large, and the tracks are easily accessible. For the determined, it's trivial and quite a bit more effective to attack trains without being inside, so to me the idea to increase train security by screening the passengers is simply ridiculous.
Maybe that's because, like Robert suggests, because I'm used to european trains as an effective, well integrated transportation mode. Contrary to Robert I don't think Europeans are "taking their chances" using public transit. Instead the mode of transportation is a choice that everyone makes when they leave the relative safety of their house. Every year a lot more people die from car accidents than terrorist attacks...
Friday, April 29, 2011
San Diego Model Railroad Museum - a mixed experience
We went to visit the San Diego Model Railroad Museum today. It was a very mixed experience. Beforehand I took a look at their Web site, and learned that they have over 2700 sqm of floor space making it one of the biggest model railroad museums in the world. Now that's cool.
Once we got there two things irritated me right away:
The O-Scale "Cabrillo Southwestern" didn't really excite me that much. The layout lighting was terrible, and it was hard to see details in the back of the rectangular layout room, since the visitor aisle runs only along one of the long edges of the rectangle. Looking at construction methods and track layout it appears this layout has been around for quite a while (though the Website claims it was designed in 1986 ... Well that's still 25 years :-) The layout did remind me about how big O-Scale really is. Thus, the hefty rolling stock had some serious "oompf" to it.
 A large part of the HO-Scale "San Diego & Arizona Eastern", especially near the museum entrance, is still visibly under construction. This layout attempts a quite correct depiction of actual rail lines around San Diego to the East and South into Mexico. This is one of the biggest layouts in the museum space-wise, and was quite interesting to view. The area depicting San Diego looks very interesting to operate on. The "desert side" with El Cajon has some impressive deep canyons and trestles , though the scenery is very sparse. This layout "burns" a lot of space on the mountains, canyons, and the descent into El Cajon. It does look more or less accurate and true to the prototype. Unfortunately for the museum visitor, the prototype is a lot of single-track main line. The layout is manually controlled, and doesn't appear to have any automation, so while we were visiting two friendly guys were running trains over the mountains. ... For some reason pretty much all major trains on the layout were at or en-route to El Cajon. So there was a major traffic jam getting trains out from El Cajon and back on the San Diego side of the layout. Somewhat interesting for the operators. Terrible for the visitor. This layout has a lot of potential, though...
 The N-Scale "Pacific Desert Lines" was cute to look at. The visitor aisle side of the layout is painted like a passenger railcar and the viewing windows are the windows of the car. Neat. The layout is large and very deep (6+ meters). Given it's N-scale, it's hard to see anything interesting that's more than 2-3 meters away from the visitor aisle. I saw a single train moving on this layout. Disappointing.
The kids had a blast in the "Toy Train gallery" which is a relatively small room with 3 gentlemen running Lionel trains on 3-rail track. The layout is stuffed with tracks all over and there's a lot going on, so a very welcome diversion from the mostly static displays we saw with the other layouts.
 Hands-down the most impressive layout at the museum is the "Tehachapi Pass" HO layout. The scenery in combination with the painted backdrop is superb, and the layout is actually arranged to be viewer friendly. There are no windows to peek through, no back at the wall features like on most of the other layouts. Just the SP/BNSF Tehachapi mainline climbing through the mountains up to the pass. Operationally, again this is not particularly interesting to watch, and not many trains where running, but the presentation and level of detail make up for it. I particularly liked the scene at Bealville, which has a very nice, old-timey atmosphere. Even though this layout is controlled digitally, trains are run over the line by an operator, one at a time, so there wasn't a lot going on here either.
Was it worth going? I don't know. Definitely more interesting than some other attractions at Balboa park, but my expectations were certainly higher than the delivery. I came for the layouts, so I didn't pay much attention to the wall display cases, with exception of the one that had items from John Allen's Gorre & Daphetid layout, including paper machee models of the layout.
Due to the impossible photography conditions, I didn't take many pictures. However, I got some video footage and will upload to Youtube if it's usable.
Once we got there two things irritated me right away:
- Most of the layouts are behind glass, which makes photography incredibly difficult, if not impossible.
- There's a lot of layout space still under construction.
- Very few trains were moving.
- Most of the layouts are not really set up to be viewed from the visitor aisle.
- Getting to see (some of) the layouts without having to peek through glass
- Have a chat with the people actually building this thing
The O-Scale "Cabrillo Southwestern" didn't really excite me that much. The layout lighting was terrible, and it was hard to see details in the back of the rectangular layout room, since the visitor aisle runs only along one of the long edges of the rectangle. Looking at construction methods and track layout it appears this layout has been around for quite a while (though the Website claims it was designed in 1986 ... Well that's still 25 years :-) The layout did remind me about how big O-Scale really is. Thus, the hefty rolling stock had some serious "oompf" to it.
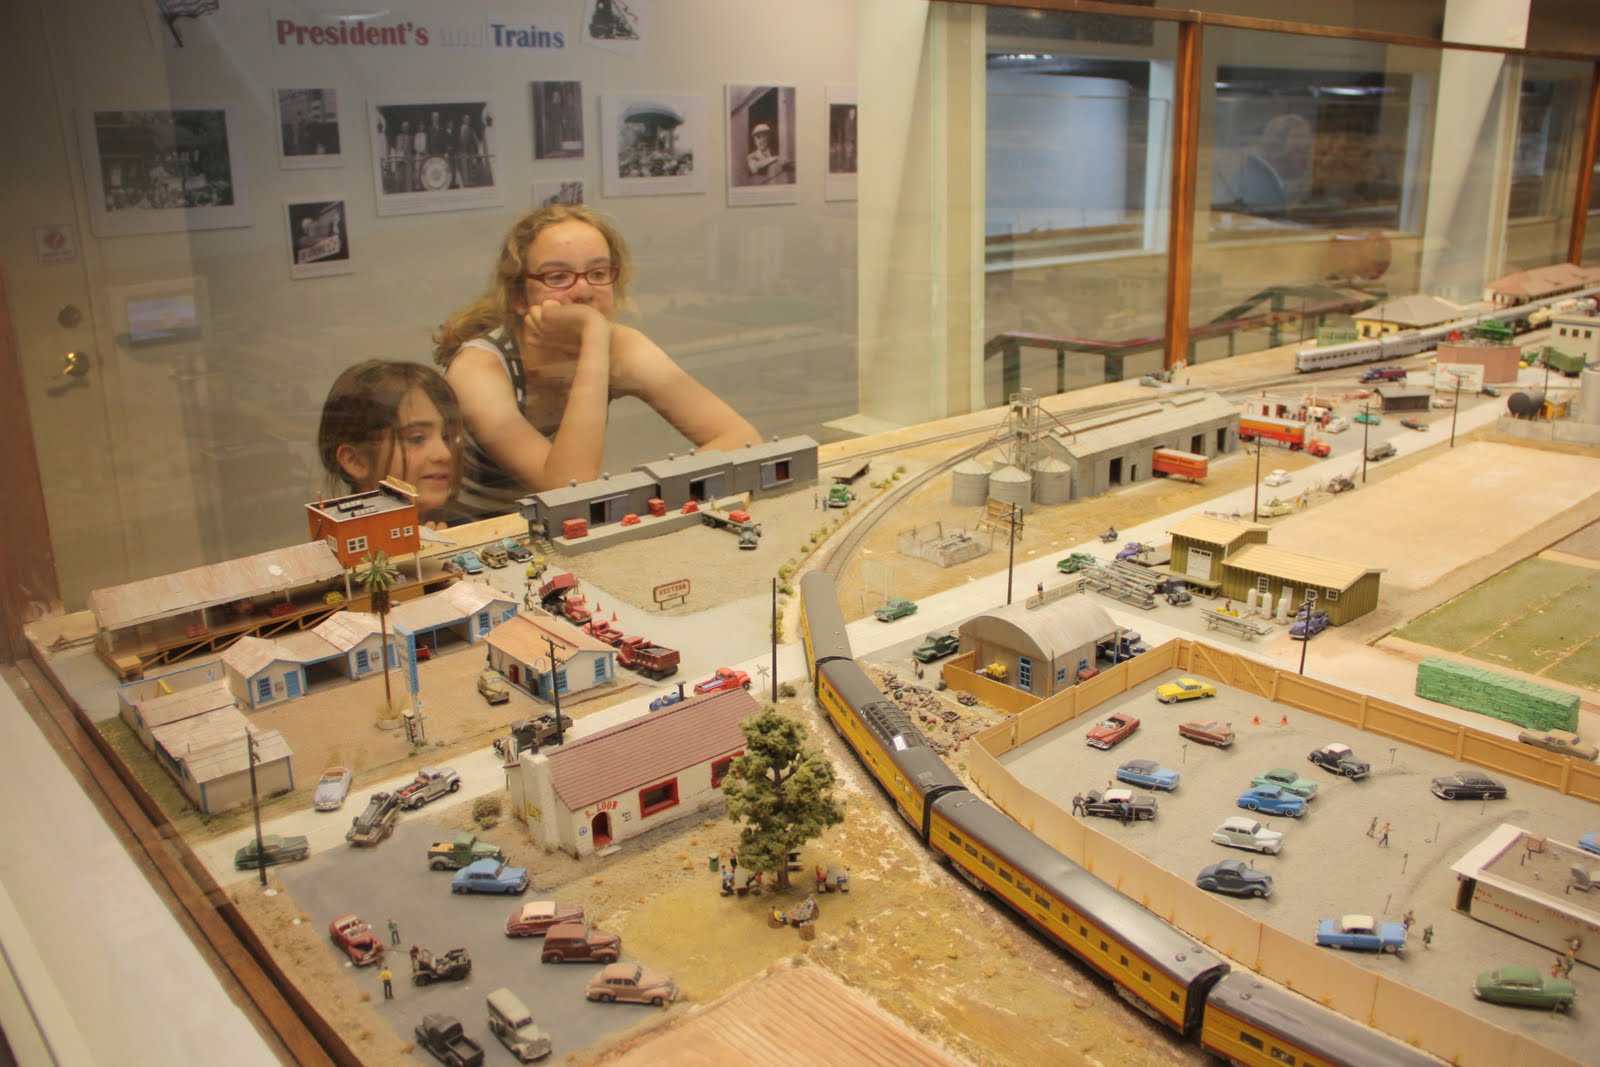
 The N-Scale "Pacific Desert Lines" was cute to look at. The visitor aisle side of the layout is painted like a passenger railcar and the viewing windows are the windows of the car. Neat. The layout is large and very deep (6+ meters). Given it's N-scale, it's hard to see anything interesting that's more than 2-3 meters away from the visitor aisle. I saw a single train moving on this layout. Disappointing.
The kids had a blast in the "Toy Train gallery" which is a relatively small room with 3 gentlemen running Lionel trains on 3-rail track. The layout is stuffed with tracks all over and there's a lot going on, so a very welcome diversion from the mostly static displays we saw with the other layouts.

Was it worth going? I don't know. Definitely more interesting than some other attractions at Balboa park, but my expectations were certainly higher than the delivery. I came for the layouts, so I didn't pay much attention to the wall display cases, with exception of the one that had items from John Allen's Gorre & Daphetid layout, including paper machee models of the layout.
Due to the impossible photography conditions, I didn't take many pictures. However, I got some video footage and will upload to Youtube if it's usable.
Sunday, April 10, 2011
Progress?
Yep, there's been very little progress on the layout lately. Work kept me busy, and the weekends are chock-full with non-modelling activities.
I did manage to build a new panel for Emsingen that should be more straight-forward to use than the old one. Now, if only I could convince the SRC16 decoder to actually talk to LocoNet, so that the push-button actions actually show up as switch commands to the command station... Team Digital's support is very responsive, but we haven't gotten to the bottom of this yet.
Out of frustration dealing with electronics the last few evenings I worked on the layout, tonight I added a platform edge to Emsingen's track 2, as well as built the styrofoam core for tracks 1, and 1a. Styrofoam is a messy material to use for this, but it's what I had on hand for track 2, so I used it for track 1 as well.
The access hatch under the Emsingen station building is starting to become tight. This was always meant for emergencies only, but turned out to be convenient when I have visitors so I can get out of the way, as well as for working on the engine servicing facility.
I'm pretty sure I'll build the town of Emsingen off-layout, once I have a basic support frame in place, since that corner is harder to reach than I expected.
I did manage to build a new panel for Emsingen that should be more straight-forward to use than the old one. Now, if only I could convince the SRC16 decoder to actually talk to LocoNet, so that the push-button actions actually show up as switch commands to the command station... Team Digital's support is very responsive, but we haven't gotten to the bottom of this yet.
Out of frustration dealing with electronics the last few evenings I worked on the layout, tonight I added a platform edge to Emsingen's track 2, as well as built the styrofoam core for tracks 1, and 1a. Styrofoam is a messy material to use for this, but it's what I had on hand for track 2, so I used it for track 1 as well.
The access hatch under the Emsingen station building is starting to become tight. This was always meant for emergencies only, but turned out to be convenient when I have visitors so I can get out of the way, as well as for working on the engine servicing facility.
I'm pretty sure I'll build the town of Emsingen off-layout, once I have a basic support frame in place, since that corner is harder to reach than I expected.
Saturday, April 02, 2011
This is tiresome and makes me annoying
Taxes for 2010 are done, and e-filed. Just like last year the return keeps getting more complicated. One stumbling block took me a while a figure out, but in the end was really easy ...
Once you make your way through the various broker statements and 1099 forms, and reconcile what they talk about with what TurboTax offers.
Overall, I was quite a bit more annoyed about filing taxes this year than last year.
Once you make your way through the various broker statements and 1099 forms, and reconcile what they talk about with what TurboTax offers.
Overall, I was quite a bit more annoyed about filing taxes this year than last year.
Thursday, March 24, 2011
Thirty Inches of Snow
The buzz in the Boston office for the last couple days was that there will be snow. It's certainly cold enough, but every morning I woke up, there was no snow.
Until today:

A whopping thirty linear inches of snow, right next to the side walk.
Update (03/24/2011):
Tonight there was a very light snow shower. It was nice walking back to the hotel with some white fluffy stuff twirling around, though it was over after a few minutes, and no snow on the ground. Everyone here is longing for spring and was amused by my excitement about a few flakes of snow.
Until today:

A whopping thirty linear inches of snow, right next to the side walk.
Update (03/24/2011):
Tonight there was a very light snow shower. It was nice walking back to the hotel with some white fluffy stuff twirling around, though it was over after a few minutes, and no snow on the ground. Everyone here is longing for spring and was amused by my excitement about a few flakes of snow.
Monday, March 21, 2011
Rain and sun at the airport
My flight is delayed. There's some heavy rain around SFO. Though, it looks nice through the airport windows.

Boston will be a lot colder than San Francisco...
Update:
Boston _is_ colder.
Update:
Za Restaurant has an execellent Mac'N'Cheese pizza, that I improved further with bacon per recommendation from the waitress. Very good. Very rich. Nice crust.
Sunday, March 20, 2011
Second Operating Session on the Welztalbahn
Well, this was a disaster.
I wasn't prepared. Emsingen wasn't ready. JMRI Logix played tricks on me. And there were power problems.
When I installed the yard in Emsingen, I apparently forgot to connect one of the tracks to power. That was easily fixed, once noticed (thanks, Balasz), but it was a bit annoying nethertheless. What was worse, though, was that my spiffy new JMRI panel for Emsingen is over-engineered, has bugs in the routing logix, and only works on the control computer. The over-engineering makes the panel harder to use than necessary. The logix bug causes an endless series of switch commands to be sent to one switch, renders JMRI unresponsive, and apparently managed to burn out the affected output on one of my DS64 stationary decoders.
Finally, the whole reason I created that panel was so that I can drive it via the Web interface from an Android G1 smart phone. The catch? Sensor button pushes, which were meant as the primary means to drive the panel are not recognized via the Web interface.
We spent quite a bit of time debugging car routing in the Operations part of JMRI. Waaaay too much time for routing 30 cars around. "How did that car get here, and why is it not moving?", was a fairly common sigh.
There were also issues with power pickup in some underground sections, especially in the curves leading to and from the ramp. Staging needs some thorough clean-up and track polishing. At least once the PSX circuit breakers were too sensitive and cut power for what should have been a momentary blip.
I have a lot of work to do...
I wasn't prepared. Emsingen wasn't ready. JMRI Logix played tricks on me. And there were power problems.
When I installed the yard in Emsingen, I apparently forgot to connect one of the tracks to power. That was easily fixed, once noticed (thanks, Balasz), but it was a bit annoying nethertheless. What was worse, though, was that my spiffy new JMRI panel for Emsingen is over-engineered, has bugs in the routing logix, and only works on the control computer. The over-engineering makes the panel harder to use than necessary. The logix bug causes an endless series of switch commands to be sent to one switch, renders JMRI unresponsive, and apparently managed to burn out the affected output on one of my DS64 stationary decoders.
Finally, the whole reason I created that panel was so that I can drive it via the Web interface from an Android G1 smart phone. The catch? Sensor button pushes, which were meant as the primary means to drive the panel are not recognized via the Web interface.
We spent quite a bit of time debugging car routing in the Operations part of JMRI. Waaaay too much time for routing 30 cars around. "How did that car get here, and why is it not moving?", was a fairly common sigh.
There were also issues with power pickup in some underground sections, especially in the curves leading to and from the ramp. Staging needs some thorough clean-up and track polishing. At least once the PSX circuit breakers were too sensitive and cut power for what should have been a momentary blip.
I have a lot of work to do...
Thursday, March 17, 2011
Success!
It took me only 3 evenings in elapsed time, but the dryer belt is replaced thanks to Appliance Parts on Blossom Hill, judicious study of Internet how-to articles (which appear to be more or less just copies of each other), and good old observation.
Our dryer flat out stopped spinning the drum. After a few Google searches it was likely that the dryer belt was bad, and that was confirmed when I found the old belt under the dryer. I didn't realize at first, but dryers are really just boxes of sheet metal held together with little plastic clips and a few screws. When you know where to pull a dryer quickly comes apart. The mechanics are super simple, too: A motor, a pulley, a belt around the drum. Once you figure out in what sequence to install the parts, and where to thread the belt (belt around drum, put pulley in place, loop belt through pulley, then around motor axle), with help holding the drum in place, this was really just a 15 minute job start to finish.
I guess most of the $100 I saved by doing this myself pay for the knowledge of doing this efficiently.
Our dryer flat out stopped spinning the drum. After a few Google searches it was likely that the dryer belt was bad, and that was confirmed when I found the old belt under the dryer. I didn't realize at first, but dryers are really just boxes of sheet metal held together with little plastic clips and a few screws. When you know where to pull a dryer quickly comes apart. The mechanics are super simple, too: A motor, a pulley, a belt around the drum. Once you figure out in what sequence to install the parts, and where to thread the belt (belt around drum, put pulley in place, loop belt through pulley, then around motor axle), with help holding the drum in place, this was really just a 15 minute job start to finish.
I guess most of the $100 I saved by doing this myself pay for the knowledge of doing this efficiently.
Laughing Baby
What the hell is so funny about this video? I don't really know. I don't know the poster, nor the baby.
At the surface it's like any of the other million laughing baby videos on Youtube.
Yet, I still can't stop laughing any time I watch this video. The faces this baby makes, ... His reaction to the blowing-nose noises, ... It just cracks me up.
Sunday, March 13, 2011
That didn't work
I had this idea to use a spare Android G1 as a portable panel for Emsingen (at least until I'd built a physical panel near the station). I made a panel for Emsingen in JMRI and decked it all out with logix and routes. On the screen I could emulate the prototype practice of pressing a source and a target button and switches would be lined for the route between the two buttons.
Well, it didn't work out that way, mainly because the panel as presented by JMRI's mini-Webserver doesn't harmonize with Android's Web browser, so any clicks on Android result in a refresh of the panel image, but no actual button press being recorded on my JMRI IS buttons.
Next I experimented with the sand cover of the platform in Emsingen. Neither deco-sand, nor regular sand I had available worked out. The deco sand is way too shiny, and glittery. The platform looked like a Danish butter cookie. Regular sand is not sufficiently homogeneous and fine. I think I need some very fine powdery sand for this to come out right. Maybe Arizona Rock and Minerals Co. has a color and grain size that works in their product catalog ...
Well, it didn't work out that way, mainly because the panel as presented by JMRI's mini-Webserver doesn't harmonize with Android's Web browser, so any clicks on Android result in a refresh of the panel image, but no actual button press being recorded on my JMRI IS buttons.
Next I experimented with the sand cover of the platform in Emsingen. Neither deco-sand, nor regular sand I had available worked out. The deco sand is way too shiny, and glittery. The platform looked like a Danish butter cookie. Regular sand is not sufficiently homogeneous and fine. I think I need some very fine powdery sand for this to come out right. Maybe Arizona Rock and Minerals Co. has a color and grain size that works in their product catalog ...
Finally a useful explanation of what's happening at Fukushima
This blog entry explains very clearly and precisely how reactors like Fukushima-1 function and what can and can not happen during events that lead to possible meltdowns. I very much like the comparison in the comments of nuclear meltdowns to heart-attacks. They are all bad, but not every heart attack will kill you.
Friday, March 04, 2011
"Gar kein Problem"
My flight back to the US is this coming Monday. I have a Lufthansa ticket, and will arrive by train at Frankfurt airport at 12:38 (Lufthansa 353). My connecting flight is Lufthansa 9052 (i.e. United 901), leaving at 14:00. The departure time is really convenient since I don't need to hurry Monday morning, or get up at some awful early-morning hour.
I just called Lufthansa reservations to confirm whether 72 minutes is enough time to get off the train, check luggage, pass through security, and get to the departure gate. "Ja das geht, ist gar kein Problem", said the nice lady at the other end.
ok, then, if this is no problem, I won't worry about it.
I just called Lufthansa reservations to confirm whether 72 minutes is enough time to get off the train, check luggage, pass through security, and get to the departure gate. "Ja das geht, ist gar kein Problem", said the nice lady at the other end.
ok, then, if this is no problem, I won't worry about it.
Thursday, February 24, 2011
No tape, no ground cover
The platform for track 2 is in and debris cleaned up. It looks pretty bad right now, but I hope it will be much better once I add the platform edge (made from a Heki cut stone sheet), and build up the sanded top of the platform. I still need to build the platform for the house track. That platform will run roughly from the end of the switch on the left to where the cardboard sign for Emsingen is located. Due to that switch, obviously long passenger trains need to stop at track 2.

Adding ballast to the track as well as ground cover (dirt, sand, and gras) on the areas between tracks will substantially help with how this area will look.
However, my first experiments with ballasting and ground cover in Talheim were actually not that satisfying, both in color, texture and general appearance. The photo below gives an idea of the look I'm after for the tracks.

I think the best way forward will be to build a small diorama with a short section of track, maybe two track lengths long (i.e. 36cm), and scenic that from beginning to end. One half of the diorama will be station track (ballasted with an assumed drainage pipe, like in the photo above), the other half will be the regular high ballast with water draining to the sides of the track.
Gorre & Daphetid in Z Scale
Just in case you have not seen this yet...
David K. Smith is chronicling his endeavor to build John Allen's Gorre & Daphetid in Z Scale for a couple months now. Following this blog's almost daily updates is truly fascinating reading on the wonders and pains of model railroad modeling.
Update 9/28/2014:
David has removed all his personal blogs due to trolls and other idiots that can't appreciate people showing off their work. What a pity.
The G&D in Z scale went into the trash some time last year after all turnouts stopped working, and the layout was damaged. I removed the link to the G&D blog.
David K. Smith is chronicling his endeavor to build John Allen's Gorre & Daphetid in Z Scale for a couple months now. Following this blog's almost daily updates is truly fascinating reading on the wonders and pains of model railroad modeling.
Update 9/28/2014:
David has removed all his personal blogs due to trolls and other idiots that can't appreciate people showing off their work. What a pity.
The G&D in Z scale went into the trash some time last year after all turnouts stopped working, and the layout was damaged. I removed the link to the G&D blog.
American Politics is just frustrating
The California High Speed Rail blog has an interesting article commenting on a Michael Byrne article basically arguing that major infrastructure improvements -- actually any major public works project -- that can't be completed while one federal administration is in power, is doomed to failure. That is due to partisan politicking and fundamentally different opinions on how tax payer money should be spent, as policies and priorities can change substantially from one administration to the next.
Both articles look at this through the eyes of infrastructure advocates. However, the same pattern is pervasive throughout all levels of government, federal, state, and even local.
In the end I strongly feel that the existing two-party and winner-take-all system is to blame for this, because it leads to a mentality of not wanting, nor needing to compromise. Even the media (TV, newspapers, Web sites) can be fairly easily classified into "right-wing" and "left-wing", catering to their respective constituencies for entertainment, and ad-dollars.
Balanced opinions and thoughtful commentary are hard to find in this climate of pervasive hyperbole. This just makes me sad.
On the positive side I do like the no-nonsense approach Governor Jerry Brown is taking in California. Granted, he has nothing to prove on the political front anymore, which is why he can comfortably play this role, and even propose raising taxes without committing political suicide. I'm very curious how this will play out over the next few months.
Both articles look at this through the eyes of infrastructure advocates. However, the same pattern is pervasive throughout all levels of government, federal, state, and even local.
In the end I strongly feel that the existing two-party and winner-take-all system is to blame for this, because it leads to a mentality of not wanting, nor needing to compromise. Even the media (TV, newspapers, Web sites) can be fairly easily classified into "right-wing" and "left-wing", catering to their respective constituencies for entertainment, and ad-dollars.
Balanced opinions and thoughtful commentary are hard to find in this climate of pervasive hyperbole. This just makes me sad.
On the positive side I do like the no-nonsense approach Governor Jerry Brown is taking in California. Granted, he has nothing to prove on the political front anymore, which is why he can comfortably play this role, and even propose raising taxes without committing political suicide. I'm very curious how this will play out over the next few months.
Sunday, February 20, 2011
Read the instructions!
A couple weeks ago I complained that I can't get the Uhlenbrock 63350 to send sensor messages to LocoNet. After reviewing the drawings in the instructions yet another time, I noticed that I was just missing a Ground connection between the Ground pin of the 63350, and DCC Ground. I expected that the 63350 would use LocoNet Ground (or RailSync), but apparently it doesn't. I also misread part of the instruction text talking about Ground between boosters in the instructions.
Now I'm somewhat baffled that at power-up the unit would actualy report anything given the setup I had.
Now I'm somewhat baffled that at power-up the unit would actualy report anything given the setup I had.
A platform in Emsingen
I didn't feel like running trains tonight. Nor was I in the mood to build the control panel for Emsingen (the electronics don't like me this week. Why the heck can I not get the sensors of the Uhlenbrock 63350 to report that there is something to report when I connect Ground to an input? gah! But I disgress...)
So I started mucking around with a piece of styrofoam to build the platform for Emsingen's track 2. Working with styrofoam is messy. A very sharp knife is helpful. That turned out better than I expected, and after a few more experiments I glued down the styrofoam. The idea was to build the platform core from styrofoam and then cover it with the usual plaster-vermiculite mix.

I imagine the platform is built from gravel and dirt with a sanded top. The side towards track 2 is raised slightly above the the rails, while the side facing track 1 is sloping down. There will be two crossings over track 1 for passengers to get to the platform for track 2. One can see the styrofoam core on the photo below.

Since I had the tracks masked off already, I also filled in the area between track 2 and track 3, as well as a small section between track 3 and track 4. While I tried to make the surface of the platform really smooth, the fills are a bit more rough. Of course, the debris will be cleaned up once the plaster is dry. I should have just used a cork sheet when building the station area, instead of individual cork strips for the tracks. Oh well ...
So I started mucking around with a piece of styrofoam to build the platform for Emsingen's track 2. Working with styrofoam is messy. A very sharp knife is helpful. That turned out better than I expected, and after a few more experiments I glued down the styrofoam. The idea was to build the platform core from styrofoam and then cover it with the usual plaster-vermiculite mix.

I imagine the platform is built from gravel and dirt with a sanded top. The side towards track 2 is raised slightly above the the rails, while the side facing track 1 is sloping down. There will be two crossings over track 1 for passengers to get to the platform for track 2. One can see the styrofoam core on the photo below.

Since I had the tracks masked off already, I also filled in the area between track 2 and track 3, as well as a small section between track 3 and track 4. While I tried to make the surface of the platform really smooth, the fills are a bit more rough. Of course, the debris will be cleaned up once the plaster is dry. I should have just used a cork sheet when building the station area, instead of individual cork strips for the tracks. Oh well ...
Monday, February 14, 2011
Emsingen Underground
True, I didn't put up photos with my last two trains posts. I figured nobody is reading this stuff anyways. I was wrong. So, by popular demand this post goes into a few more details, and has photos of the ugly underbelly.
For orientation around Emsingen, take a look at the photos in this post from last year. The small yard in the upper photo is at the south end of Emsingen, while the north side sports a loading ramp, and a tail track.
Most people don't show the underside of their layouts because unless you have a large layout, or are really anal about cabling, it's usually a mess. Exceptions confirm the norm. Modular, or portable layouts tend to have cleaner cabling than stationary layouts. Anyways, the photo on the right gives a pretty good idea what my cabling looks like... Hey, at least I color code everything. Black/red is the main DCC bus (usually AWG14 cable). I have three independent power districts, this is in the "blue" district as signified by the blue tape wrapped around the bus cable.
Those red plastic thingies are 3M insulation displacement connectors (IDCs) to connect rail feeders to the main bus. The round grey cables are various local cable runs (e.g. the one at the top is connected to train detection sections, the one at the bottom runs to a servo in a somewhat remote corner of the layout). Blue/yellow is the 16V AC bus, and blue/red is the DCC accessory bus.
The printed circuit board in the back is a Tam Valley Depot QuadP servo controller.
The photo below shows my technique for installing and connecting Tortoise switch machines. First off, at the workbench, I solder a short cable to the contacts and run it to a terminal block. The Tortoise has two built-in contacts for powering frogs or switch feedback. I don't really have a need for either of them, but since I have a 5 wire cable, I connected one of them.
The Tortoise is screwed to a block of 3/4" plywood. After I prepared the hole for the throw bar at the switch, I add some wood glue to the top of the block, thread the actuator throw the hole in the switch throwbar, position the Tortoise, and test the throw, repositioning the motor until I found a position that evenly throws the switch without going too far in either direction. Then I hold the motor in that position until the glue starts to set and becomes tacky.
Depending on the amount of glue I added, this takes anywhere from 5-10 minutes, which is usually enough working time to find a good working position for the motor, and not so long that my arm falls off before the glue has become tacky enough to hold the motor in place.
Using terminal blocks between the track and the main bus, or between switches and decoders, makes it easy to disconnect wires for debugging.
Sometimes things don't quite work out, because you don't think about what happens behind the scenes. A few weeks ago I installed a Digitrax UP5 panel in the fascia at Emsingen. This is used to plug in Loconet throttles. The panel is connected to a printed circuit board that extends a couple inches behind the fascia. No problem. ... Until I tried to install the Tortoise for one of the yard switches, which happens to collide with one of the Loconet plugs at the back of the UP5. Had I installed the UP5 half an inch to the left, or a couple inches to the right, this would not have been a problem at all. Now it just barely fits when I let the UP5 stick out from the fascia a fraction of an inch.
The photo on the left gives an idea about how cramped the area underneath Emsingen is (and how big those Tortoise motors are...) Not only is there plenty of cabling in the way, but also a track running through the middle of it. Those white "guard rails" are extra slats from window blinds.
To wrap up, here are the south switches in Emsingen from the top. The big rectangular holes will hold the twin-coil semaphor machines ... Unless I'm crazy enough to either buy new semaphors with servo drives, or outfit the semaphores I have with servos...
 |
| Emsingen Underground South Switches from below |
Most people don't show the underside of their layouts because unless you have a large layout, or are really anal about cabling, it's usually a mess. Exceptions confirm the norm. Modular, or portable layouts tend to have cleaner cabling than stationary layouts. Anyways, the photo on the right gives a pretty good idea what my cabling looks like... Hey, at least I color code everything. Black/red is the main DCC bus (usually AWG14 cable). I have three independent power districts, this is in the "blue" district as signified by the blue tape wrapped around the bus cable.
Those red plastic thingies are 3M insulation displacement connectors (IDCs) to connect rail feeders to the main bus. The round grey cables are various local cable runs (e.g. the one at the top is connected to train detection sections, the one at the bottom runs to a servo in a somewhat remote corner of the layout). Blue/yellow is the 16V AC bus, and blue/red is the DCC accessory bus.
The printed circuit board in the back is a Tam Valley Depot QuadP servo controller.
The photo below shows my technique for installing and connecting Tortoise switch machines. First off, at the workbench, I solder a short cable to the contacts and run it to a terminal block. The Tortoise has two built-in contacts for powering frogs or switch feedback. I don't really have a need for either of them, but since I have a 5 wire cable, I connected one of them.
 |
| Emsingen Underground Yard Switches |
Depending on the amount of glue I added, this takes anywhere from 5-10 minutes, which is usually enough working time to find a good working position for the motor, and not so long that my arm falls off before the glue has become tacky enough to hold the motor in place.
Using terminal blocks between the track and the main bus, or between switches and decoders, makes it easy to disconnect wires for debugging.
 |
| Tortoise vs. UP5 |
 |
| Emsingen North Switches from below |
 |
| Emsingen South Switches |
To wrap up, here are the south switches in Emsingen from the top. The big rectangular holes will hold the twin-coil semaphor machines ... Unless I'm crazy enough to either buy new semaphors with servo drives, or outfit the semaphores I have with servos...
Sunday, February 13, 2011
All switches installed and motorized in Emsingen
Over the last couple days I installed switch machines and programmed decoders for all switches in Emsingen. I used mostly Tortoise motors I bought quite a while ago, as well as a servo in one somewhat tight spot. The switch leading to the Lokstation is not yet motorized, but it also doesn't actually go anywhere.
The next project is completing the JMRI panel and routes for Emsingen, so that I can actually use all those switches without having to remember individual switch addresses.
While messing with cables I shorted out part of one of my Tam Valley Depot Servo Decoders. Very, very annoying, since I now can no longer fine tune the individual servo positions. I also managed to make a Team Digital SRC16 decoder completely non-responsive to switch commands. Only a hard-reset (hold the Smart button for ~30 seconds) brought it back to life. I love the very slow switch throw of this unit in combination with the Tortoise switch machines.
The next project is completing the JMRI panel and routes for Emsingen, so that I can actually use all those switches without having to remember individual switch addresses.
While messing with cables I shorted out part of one of my Tam Valley Depot Servo Decoders. Very, very annoying, since I now can no longer fine tune the individual servo positions. I also managed to make a Team Digital SRC16 decoder completely non-responsive to switch commands. Only a hard-reset (hold the Smart button for ~30 seconds) brought it back to life. I love the very slow switch throw of this unit in combination with the Tortoise switch machines.
Wednesday, February 09, 2011

Tuesday, February 08, 2011

Sunday, February 06, 2011
Here we go again
I'm at the airport again.
A trip to Miami for a bunch of meetings. I didn't feel like driving all the way to SFO for a non-stop flight, so today I fly from SJC via LAX, not exactly one of my most favorite airports. In fact most of the larger airports suck for their hustle and bustle, the unfriendly TSA folks, congestion, and delays. The small airports (like SJC) don't get you anywhere interesting non-stop. Though I like the usually relaxed atmosphere at the SJC security check points. The TSA folks were even joking today. Granted, it's a Sunday morning, and there were no lines...
A trip to Miami for a bunch of meetings. I didn't feel like driving all the way to SFO for a non-stop flight, so today I fly from SJC via LAX, not exactly one of my most favorite airports. In fact most of the larger airports suck for their hustle and bustle, the unfriendly TSA folks, congestion, and delays. The small airports (like SJC) don't get you anywhere interesting non-stop. Though I like the usually relaxed atmosphere at the SJC security check points. The TSA folks were even joking today. Granted, it's a Sunday morning, and there were no lines...
Train detection woes
I spent Friday evening hooking up power feeders in Emsingen, as well as connecting the drops from the train detection sections to a Uhlenbrock 63350 detector. The 63350 sounds great: Loconet, 16 inputs, flexible programming. But, ... it just won't send a sensor signal to Loconet when cars or a locomotive enter the monitored section. However, when I send a Loconet interrogate command, the unit happily reports all occupied sections correctly. So it seems I have everything connected correctly on the electrical side. Since Maerklin is a 3-rail system, I can just insulate one rail, and whenever the axles of a car bridge the two rails track voltage can be detected against ground on the sensor input. Ground gets to the unit via Loconet, so this should work. Looks like it's time asking on the appropriate mailing lists, and contacting Uhlenbrock Support.
Programming Loconet Configuration Variables (LNCVs) via the Intellibox menu is a tad cumbersome. I need to figure out how to do this for a unit that is not directly supported by JMRI.
What's more annoying though, is that I found out while researching the detection problem, that the 63350 doesn't have opto-insulated inputs, so shorts can show up on LocoNet and possible cause havoc (in fact, I had one nearby switch, which is controlled by a LocoNet connected decoder, throw itself when I created a short voltage spike while fiddling with cables. Not good). Not being opto-insulated can cause issues with Digitrax equipment later on, too.
For now the plan of attack is to remove the 63350 from track detection, finish up wiring in Talheim which is using a Viessmann 5217 (S88 straight into the Intellibox), to verify the general approach, and use the 63350 for the control panel in Emsingen complementing a 63400 unit. That way the control panel will have only one power plug for the 16V accessory bus, as well as the Loconet plug(s).
Programming Loconet Configuration Variables (LNCVs) via the Intellibox menu is a tad cumbersome. I need to figure out how to do this for a unit that is not directly supported by JMRI.
What's more annoying though, is that I found out while researching the detection problem, that the 63350 doesn't have opto-insulated inputs, so shorts can show up on LocoNet and possible cause havoc (in fact, I had one nearby switch, which is controlled by a LocoNet connected decoder, throw itself when I created a short voltage spike while fiddling with cables. Not good). Not being opto-insulated can cause issues with Digitrax equipment later on, too.
For now the plan of attack is to remove the 63350 from track detection, finish up wiring in Talheim which is using a Viessmann 5217 (S88 straight into the Intellibox), to verify the general approach, and use the 63350 for the control panel in Emsingen complementing a 63400 unit. That way the control panel will have only one power plug for the 16V accessory bus, as well as the Loconet plug(s).
Friday, February 04, 2011

Thursday, February 03, 2011
Emsingen mainline operational
The main tracks through Emsingen are glued down and operational again. I added all the rail isolations and cuts I need for detection as well. The north-half of the station has all switch machines installed.
As a little side-project I tried to fix the issues I had with BR86, and it ran great with the shell off. I couldn't get it to get stuck in various configurations over 30 minutes, when it stopped within a minute before I took the shell off. In the end I think it was a screw that was just a tad too tight and pressed the locomotive shell on a cog wheel off the motor.
Next up: wire and connect the remaining switch machines in Emsingen, both the freight area, and the south switches. Then build a quick-and-dirty control panel for the switches, since I don't really want to do this from the computer, and I don't want to spend weeks on building a proper panel (like in Talheim) before I can operate trains again. Then I'll move on to connect the detection sections, and after that probably do signals.
The locomotive service area is blocked pending proper seating of the turntable, and arrival of parts and the engine shed. It's not like I'm running out of work...
As a little side-project I tried to fix the issues I had with BR86, and it ran great with the shell off. I couldn't get it to get stuck in various configurations over 30 minutes, when it stopped within a minute before I took the shell off. In the end I think it was a screw that was just a tad too tight and pressed the locomotive shell on a cog wheel off the motor.
Next up: wire and connect the remaining switch machines in Emsingen, both the freight area, and the south switches. Then build a quick-and-dirty control panel for the switches, since I don't really want to do this from the computer, and I don't want to spend weeks on building a proper panel (like in Talheim) before I can operate trains again. Then I'll move on to connect the detection sections, and after that probably do signals.
The locomotive service area is blocked pending proper seating of the turntable, and arrival of parts and the engine shed. It's not like I'm running out of work...
Wednesday, February 02, 2011
There's a prototype for everything

I have a bunch of steam and diesel passenger equipment. I also have several electric locomotives, and my working theory is that the Welztalbahn is electrified. My explanation for running Diesel equipment was that there's an unmodeled, non-electrified branch line to Prechtal north of Emsingen. Local commuter service to Prechtal is done with a Schienenbus, just like the one in the photo above. Also, since I'm modeling the early-mid 1970's the Welztalbahn has been electrified only recently, so not all scheduled runs have switched to electric locomotives, providing the excuse for running heavy freight steamers like my BR50.
Reading the description on the calendar entry this morning, it says this is taken on the Schwarzwaldbahn in 1989 showing E3642, and Schienenbus VT798 units were used well into to the 1990's on the Schwarzwaldbahn.
If DB can run Diesel passenger units for regional service between Gutach and Offenburg on the electrified Schwarzwaldbahn, I can do the same just fine between Freiburg and Prechtal on my Welztalbahn.
There's a prototype for everything.
Sunday, January 30, 2011
Good weekend.

The water tower is only 1/3 full, but my enthusiasm is at 100%. The weekend started off with Friday evening at SVL. I originally planned to only take some photos and video footage, but when I was asked whether I wanted to run a train, of course I couldn't say No. I left SVL shortly after midnight ...
The meet on Saturday had some very interesting talks, and a few not so interesting ones. I particularly liked the talks about how others developed operations schemes for their layouts, especially when the layout wasn't really designed for operations from the beginning. The talk about about Operations at Train Mountain was also great. On balance it was a very good day, chatting with people in the breaks, over lunch, and well worth the time spent.
The layout tours in the evening were fascinating, inspiring, and sometimes intimidating all at the same time. We went to several private layouts in the Newark area, as well as the California Central Model Railroad in a former SP depot in Santa Clara. Four different layouts in just over 3 hours. By the end of the day my head was full, and I was tired and exhausted.
Sunday was the absolute highlight of the weekend when I got to operate on a private layout in South San Jose (not that far from where I live). It's hard to believe that I had this much fun switching cars on a local freight turn. This was a two person job, and took a whopping 2.5 hours in elapsed real time. Afterwards I did get to run a way freight by myself, and railfan the entire length of the layout. They say going slowly on a model railroad increases the fun, ... and it's true.
This layout feels extremely realistic, working with the dispatcher, communications between the road crews, the jobs of spotting and picking up cars, ... It was a pleasure to spend the day.
Friday, January 28, 2011
Boeing 737s on a train
Steve Eshom has some nice articles recently about Boeing 737s fuselages built in Kansas being transported by rail to final assembly at Boeing's plant in Renton, WA.
I very much enjoyed reading Al Krug's account of dealing with those extra high, extra wide loads from a railroader's perspective: Boeing bridge at Big Hook and More Boeings. Other articles on his site are also quite fun to read...
I very much enjoyed reading Al Krug's account of dealing with those extra high, extra wide loads from a railroader's perspective: Boeing bridge at Big Hook and More Boeings. Other articles on his site are also quite fun to read...
Looking forward to a weekend of fun ...
Last fall I signed up for the LD/Ops SIG weekend ("Layout Design / Operations Special Interest Group) that's coming up this weekend. Tonight is a dinner and the option to stop by at Silicon Valley Lines again.
The day tomorrow is packed with talks and sessions about various layout design and operations topics, followed by layout visits in the evening.
Sunday I'm signed up for an eight hour operations session on a private layout in San Jose.
I've never been to a model railroad convention before. I'm very curious about how this all will work out, the people, the talks and sessions, and of course the layout tours.
The day tomorrow is packed with talks and sessions about various layout design and operations topics, followed by layout visits in the evening.
Sunday I'm signed up for an eight hour operations session on a private layout in San Jose.
I've never been to a model railroad convention before. I'm very curious about how this all will work out, the people, the talks and sessions, and of course the layout tours.
Wednesday, January 19, 2011
Emsingen track layout finalized
After operating for a while with the rearranged trackplan in Emsingen I have decided that, while not perfect, it is as workable as it's going to get in the space I have available, and I want to move on. So after soldering feeders on Monday, tonight I started glueing down the station tracks.

The stub roadbed in the rear will be serving the Emsingen freight house.
Once the major track work is in, I can start installing switch motors, and finally use some components I bought almost two years ago, as well as turn up block detection in the upper levels of the layout.
Block detection is already up and running in staging and properly reporting block occupancy in JMRI. One use case for this is to track a train over the layout and have the computer take over as it enters staging and drop it to an open staging yard, prepare the next train to appear, so I don't have to wait for the train to make it up the ramp, etc. We'll see how that works out ...

The stub roadbed in the rear will be serving the Emsingen freight house.
Once the major track work is in, I can start installing switch motors, and finally use some components I bought almost two years ago, as well as turn up block detection in the upper levels of the layout.
Block detection is already up and running in staging and properly reporting block occupancy in JMRI. One use case for this is to track a train over the layout and have the computer take over as it enters staging and drop it to an open staging yard, prepare the next train to appear, so I don't have to wait for the train to make it up the ramp, etc. We'll see how that works out ...
Tuesday, January 18, 2011
Note to self

The cat tree in the living room needs 300ft of 1/4" sisal rope. When replacing more than half of the rope, don't assume a 100' roll is enough.
Saturday, January 15, 2011
Stresstest
Today I ran my usual routine operating on the Welztalbahn: One Nahgueterzug each from the North and the South dropping off and picking up cars in Emsingen, as well as the transfer run to Talheim. However, this time I wanted continuous traffic on the main line (instead of just pretending), so I kept two freight trains running, roughly with the same speed spaced out on the main loop. As those trains ran continously around the layout, I ran the Ng's between them, and made the necessary switching moves. Digital train control is flat out fantastic for this.
When I needed to run an opposing train to either of the two trains I only had to slow one of them down or stop at a (still imaginary) signal, when one of the other trains needed to run from North to South. This also works well with a passenger train looping in the opposite direction between Prechtal Staging, Emsingen, and Talheim.
I did similar things on my father's analog layout many years ago. One loco got it's current from the rails, while the other used catenary. If I wanted to run a train "in-between" it was sharing power, and therefore control, with one of the other trains. It's possible, and one had to time it right cutting in and out of the loop, but that is no match to digital control where each locomotive is controlled individually.
A nice side-effect of this was that my BR50 and BR194 got a good work-out ... a stress test if you will. The tender of BR50 managed to derail several times at a somewhat finicky location with curved turnouts at the exit of staging. Adding some weight to the tender and balance it out evenly helped, replacing the pickup shoe seemed to really make a difference. After I converted this locomotive to digital, the tender was a bit lighter since the I removed the mechanical direction relay, and a decoder is not that heavy.
BR194 needs some tuning, its motor is quite temperamental. I think I'll take it completely apart again and make sure it's mechanically sound.
Finally, my switcher BR86 needs a thorough cleaning. It has a problem were sometimes the gears bind, and the locomotive doesn't move after coasting to a stop. Let's see if I can figure out what's wrong with it.
When I needed to run an opposing train to either of the two trains I only had to slow one of them down or stop at a (still imaginary) signal, when one of the other trains needed to run from North to South. This also works well with a passenger train looping in the opposite direction between Prechtal Staging, Emsingen, and Talheim.
I did similar things on my father's analog layout many years ago. One loco got it's current from the rails, while the other used catenary. If I wanted to run a train "in-between" it was sharing power, and therefore control, with one of the other trains. It's possible, and one had to time it right cutting in and out of the loop, but that is no match to digital control where each locomotive is controlled individually.
A nice side-effect of this was that my BR50 and BR194 got a good work-out ... a stress test if you will. The tender of BR50 managed to derail several times at a somewhat finicky location with curved turnouts at the exit of staging. Adding some weight to the tender and balance it out evenly helped, replacing the pickup shoe seemed to really make a difference. After I converted this locomotive to digital, the tender was a bit lighter since the I removed the mechanical direction relay, and a decoder is not that heavy.
BR194 needs some tuning, its motor is quite temperamental. I think I'll take it completely apart again and make sure it's mechanically sound.
Finally, my switcher BR86 needs a thorough cleaning. It has a problem were sometimes the gears bind, and the locomotive doesn't move after coasting to a stop. Let's see if I can figure out what's wrong with it.
Time lapse of SVL September Operations Night
Back in September I was at Silicon Valley Lines and I did notice the camera for the time lapse recording. Turns out there is a video of this evening, and I'm in it, clearly visible in the first few seconds while I got my introduction to the layout, and then later running a really long freight train.
The time lapse gives a good idea about the size of the layout. Definitely worth a visit. Check them out at www.siliconvalleylines.com.
The time lapse gives a good idea about the size of the layout. Definitely worth a visit. Check them out at www.siliconvalleylines.com.
Saturday, January 08, 2011
Dell Latitude C810, ESS Maestro 3s, and Debian Lenny = no sound
I installed Debian Lenny on my old Dell Latitude C810 in the train room. With Debian Sarge, sound worked just fine, but Lenny just doesn't do it. Kernel modules are all loaded, and look right. Logs have
Jan 8 17:02:53 doc kernel: [ 2579.448816] firmware: requesting ess/maestro3_assp_kernel.fw
and nothing else interesting.
After some googling I learned that I'm missing the firmware, but it no longer comes with the Debian ALSA packages due to license violations of the binary-only firmware.
http://wiki.debian.org/snd-maestro3 has instructions on what to do to get sound anyways. Basically one needs to download the firmware tar.gz from the ALSA project's FTP server, and build it manually, then copy to e.g. /usr/local/lib/firmware/ess, reload the maestro3 kernel module, and voila, we have sound.
Jan 8 17:02:53 doc kernel: [ 2579.448816] firmware: requesting ess/maestro3_assp_kernel.fw
and nothing else interesting.
After some googling I learned that I'm missing the firmware, but it no longer comes with the Debian ALSA packages due to license violations of the binary-only firmware.
http://wiki.debian.org/snd-maestro3 has instructions on what to do to get sound anyways. Basically one needs to download the firmware tar.gz from the ALSA project's FTP server, and build it manually, then copy to e.g. /usr/local/lib/firmware/ess, reload the maestro3 kernel module, and voila, we have sound.
Thursday, January 06, 2011
Like ice in the sunshine
It's been cold lately and I had to scrape ice off my windshield this week. Today the whole car was covered in a thin layer of ice.

Unfortunately, the photo doesn't do the ice crystals sparkling in the morning sun justice.

Unfortunately, the photo doesn't do the ice crystals sparkling in the morning sun justice.
Wednesday, January 05, 2011
Two and a half years do make a difference

In August 2008 I attempted my first conversion of a Maerklin locomotive to digitial. I read some stuff online, but I wasn't really quite sure what I was doing, so I opted to using an Uhlenbrock 75200 decoder that doesn't require disassemby of the motor. I tried to do the minimum amount of modifications to that locomotive to make it work with Maerklin's digitial system. The image on the right shows the inside of this Maerklin 3075 locomotive, a BR216 of the German Bundesbahn, after the conversion. This locomotive has a large flat collector AC motor typical for older Maerklin locomotives.

I was never really happy with that conversion. The motor ran very rough and loud. So after having done a few more conversions and increasingly getting more adventurous, last week I decided to re-do BR216. This time I used an ESU Lokpilot 3.0 decoder. Since that decoder only supports DC motors I needed to install a permanent magnet and disassemble the motor, which was a good opportunity to give it a thorough cleaning, too. As is standard in my recent conversions, I installed a NEM 562 plug for the decoder, so that I can easily replace the decoder if I feel the need at some time in the future. The 16V bulbs got replaced with yellow LEDs that were painted black all around except the front to prevent light leakage into the cab. This was the first time I tried using LEDs in a conversion, and it worked reasonably well, though next time I'll try extra-bright warm-white LEDs instead of standard issue yellow, if I can find them. I'm also tempted to use SMD LEDs and glue them in place.

When I did the first conversion, I didn't have that many supplies, but now it's hard to see the tablet under all the stuff.

Subscribe to:
Posts (Atom)